WAIT! Let Us Guide You!!
Don't waste hours searching online.
Answer these simple questions and will direct you to the best resources.
Other Related Posts
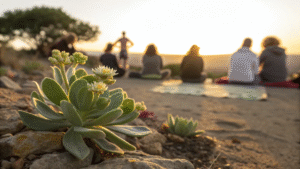
Unwinding is of utmost importance in the present hectic world. The 'Yoga For Stress' practice is available in a 30-minute prerecorded guidance to the relaxing sequence of movements to relieve stress, which is all you need to follow your breath and let go of your worries. It does not matter whether you are a beginner or an experienced yogi; the practice is suitable for everyone.
Table of Contents
- Introduction to Your Practice
- Incorporating Twists in Child's Pose
- Reclining Twist for Deep Release
- Finding Stillness and Savasana
- Concluding Your Practice
- FAQ: Common Questions About Yoga For Stress
Introduction to Your Practice
Starting a yoga practice can really be a life-changing experience, particularly when it is aimed at stress relief. This 'Yoga For Stress' program is actually a training that is going to help you to form a careful environment throughout your body and mind. It also shows you that you can be still and through this, you will find your true self.
The Purpose of the Sequence
Relaxing and letting go of the tension that builds up during the day is the main objective of this sequence. Every pose is chosen to help you do some gentle stretching and practice your mindful breathing, thereby promoting your calmness. At the conclusion of this routine, you will feel more centered and relaxed.

GET INSTANT ACCESS!!
Download Our Yoga Power Poses Cheat Sheet Guide
Lose Weight, Reduce Stress, Increase Flexibility and Improve Your Life These Top and Liberating Yoga Poses!
Preparing Your Space
To practice successfully, It is important to create a peaceful environment. Look for a quiet place where you can move easily without being interrupted by anything. If you can, turn off the lights and consider using soft music or nature sounds to make your experience more enjoyable.
Collect any props you might require, for instance, a yoga block or a pillow. These items will help you to feel more comfortable and to get more support while practicing. Even if you don't have these, don't be concerned; you can still take advantage of this sequence.
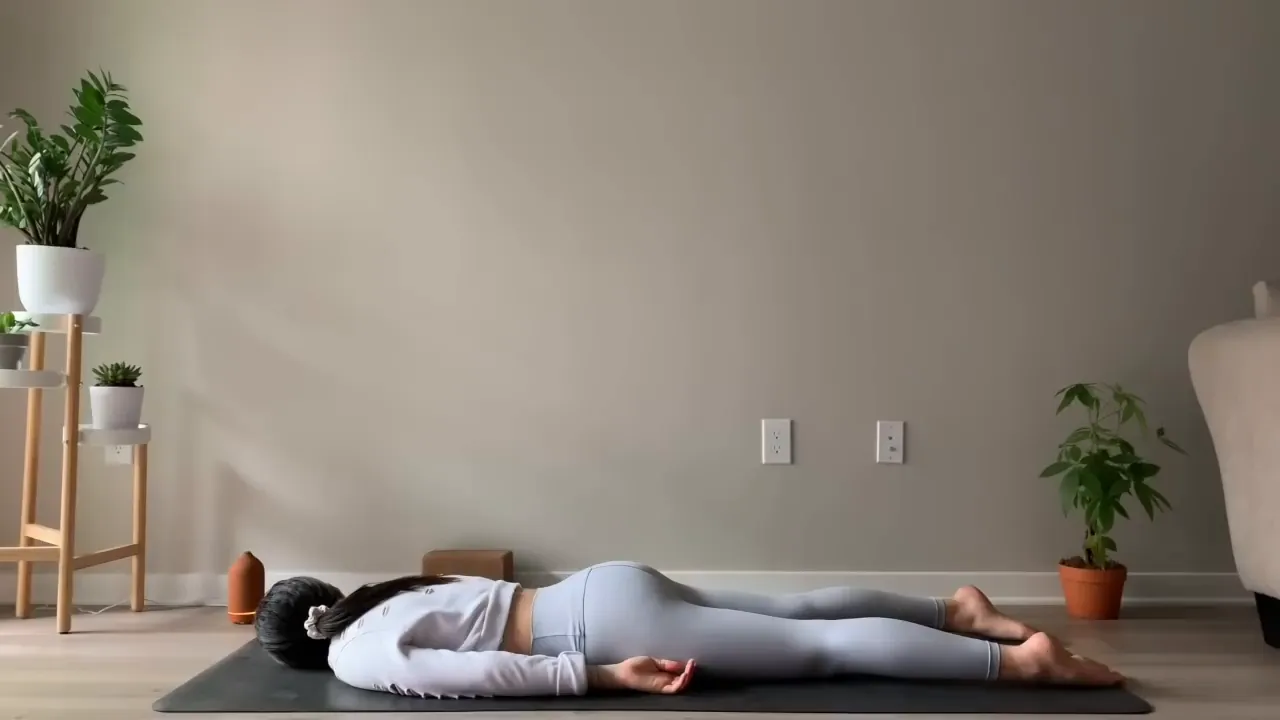
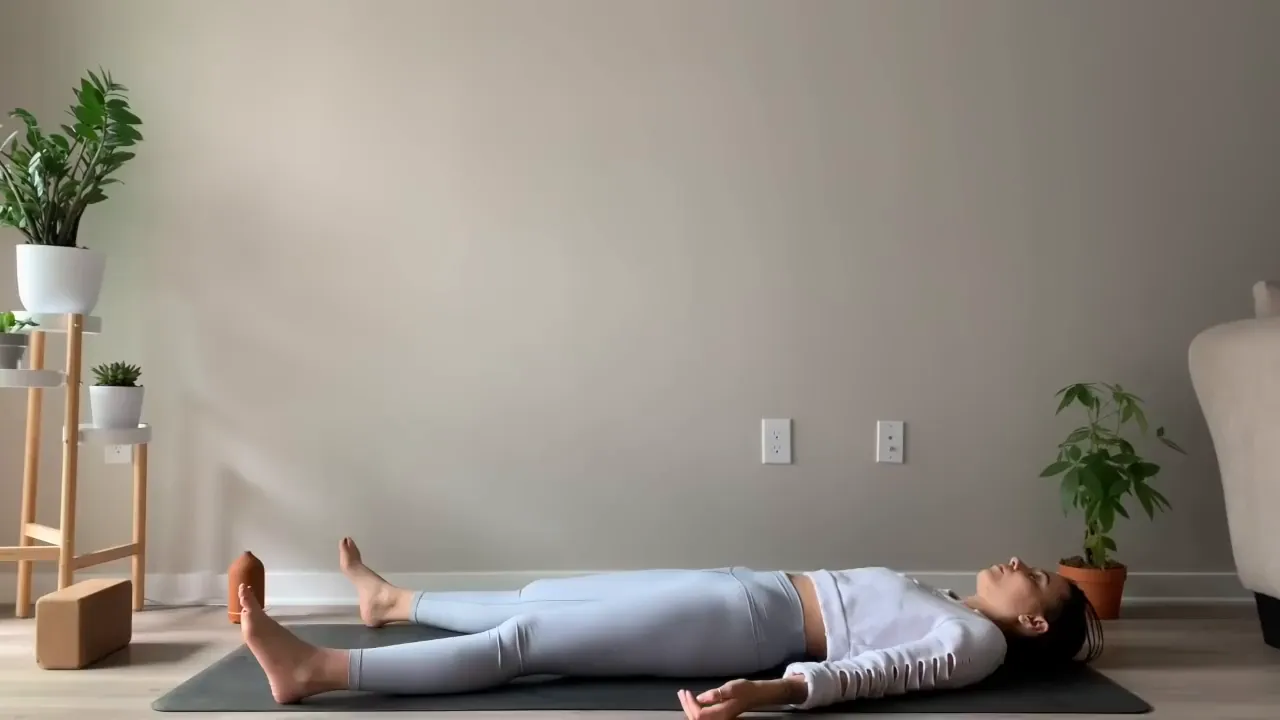
Starting with Belly Down Savasana
Initiate your practice with the Belly Down Savasana pose where you lie on your stomach. It is a basic position that helps you to ground and connect yourself with the earth. Stretch your arms and legs back behind you, occupying space, and take a seat on the mat.
#1

I’m a huge fan of Zoe Cotton’s Yoga Burn! I recently added the Trim Core program and the monthly workouts to my routine, and I’m loving them. The workouts really get me sweating, making me feel like I’m making the most of my time while burning plenty of calories.
What makes this program stand out is how each movement builds on the last, constantly adapting and increasing the challenge just as your body starts to get comfortable.
This keeps your body progressing and transforming, helping you achieve a strong, feminine physique that not only looks amazing but also feels fantastic!
Unlike many other fitness programs, Yoga Burn takes a "strategic, progressive approach" that’s designed to deliver real results. Each session is personalized to suit you, ensuring it’s both effective and enjoyable!
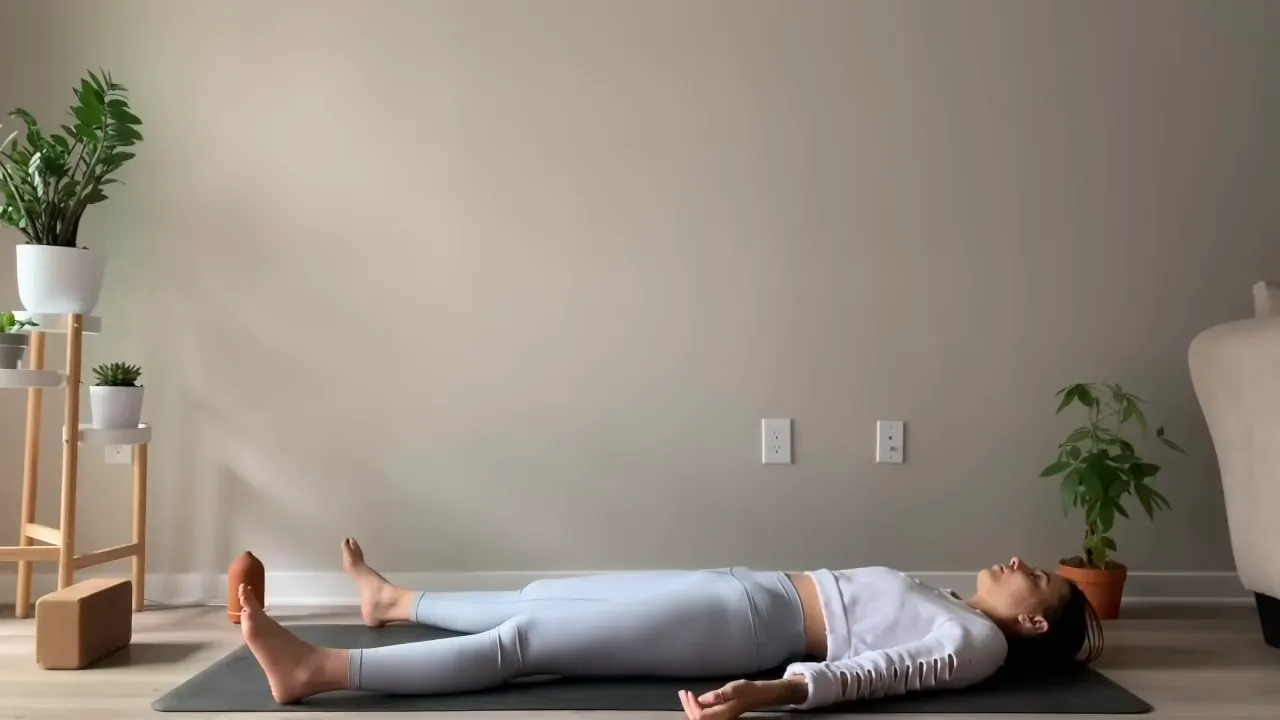
While lying down be sure to let your feet fall outwards and your hands face upwards. This position of openness is a stimulus for relaxation. Move your hips softly from side to side till you have found a relaxed position, and afterward, close your eyes and direct your attention on your inhales and exhales.
Connecting with Your Breath
Once you have found your position, you can start your breathing practice. Each breathing cycle becomes more relaxed and full with your inhale, more relaxed and empty with your exhale. Each breath brings you closer to the earth and away from the worries.
Be aware of the physical sensations that you experience in your body, especially at the points where it touches the floor. Deepening your relaxation is made possible by this awareness. In case you detect any tight spots, just with the exhale let them go.
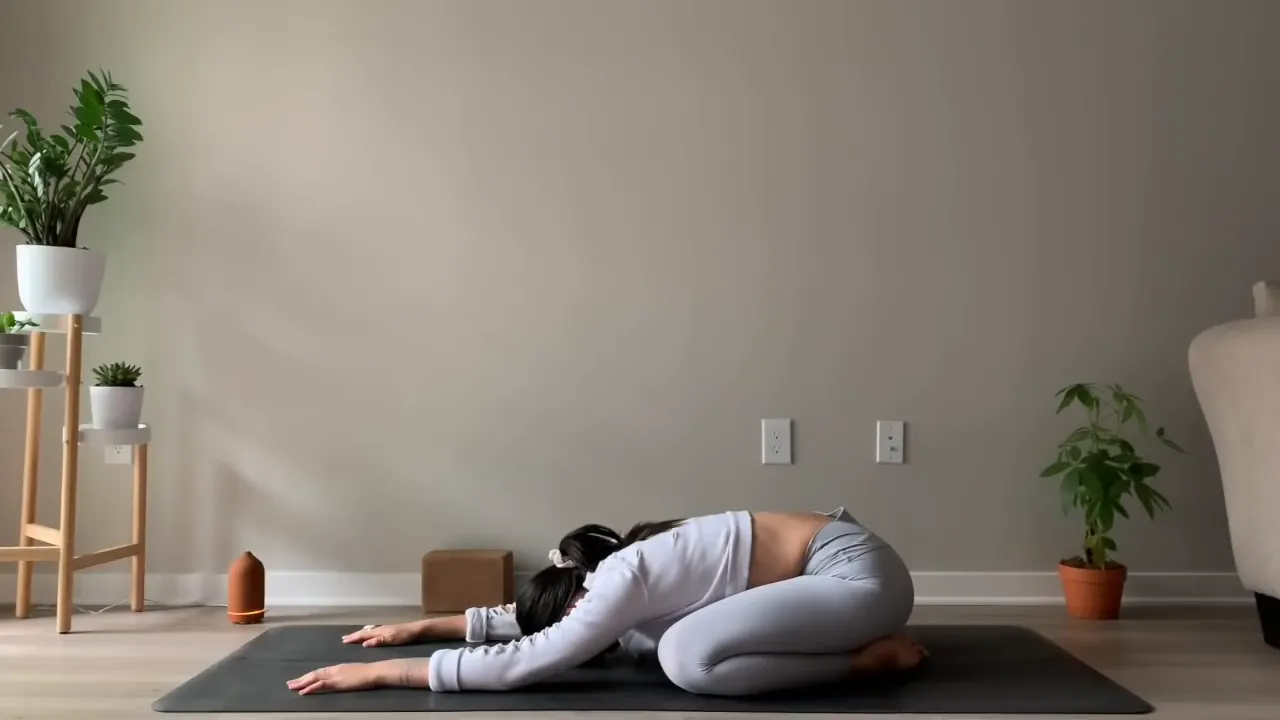
Transitioning to Child's Pose
Having stayed for a few moments in Savasana, you can slowly move to Child's Pose. The asana is just right for you to help deepen your relaxation and stretch your back. Start by lifting the head and putting the hands under the shoulders.
In a tabletop pose, lift your body, then place your big toes together and open your knees wide. Stretch your arms forward and bring your forehead to the mat as you relax. What a gentle stretch it is as your back pushes the calming feeling into your hips, which pull back like your heels.
While in Child's Pose, give your attention to releasing the neck muscles at the back. Your breath should be your only guide for going deeper into the pose. With each inhale, visualize your body with tranquility, then with every exhale, eject any remaining tension. This change helps you to be in a state of flow, which you can maintain throughout the whole time for your practice.
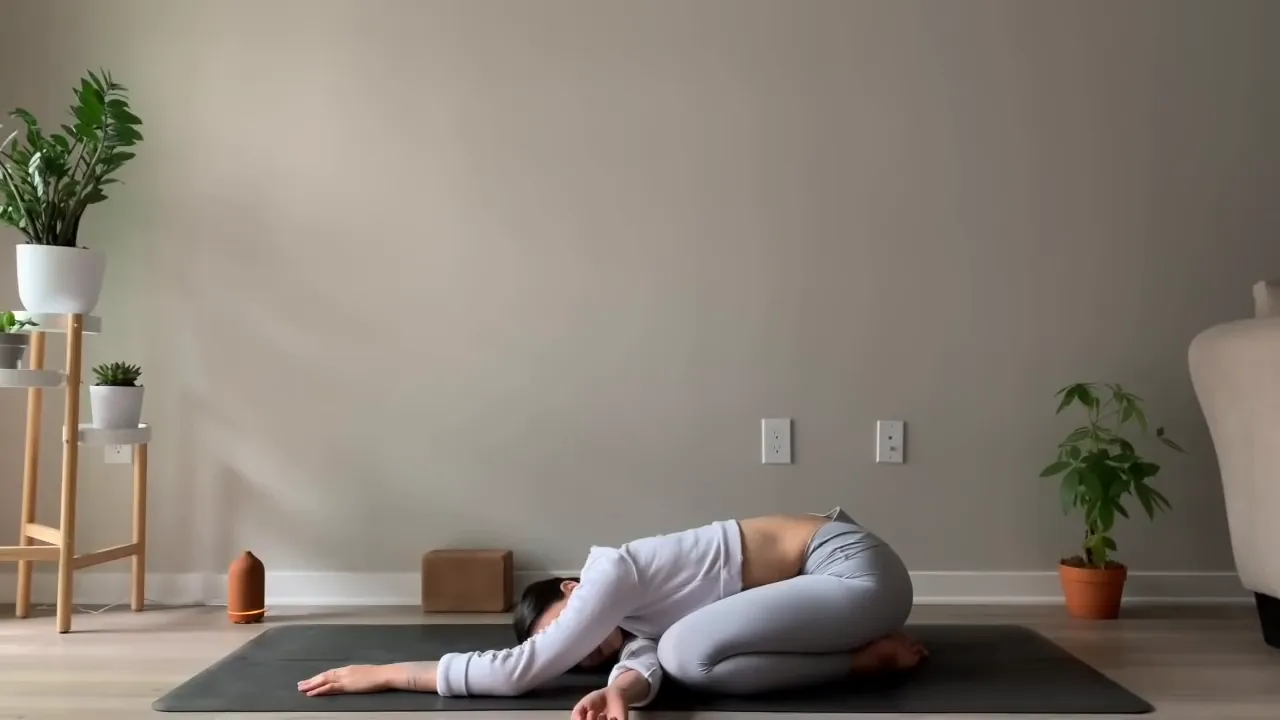
Incorporating Twists in Child's Pose
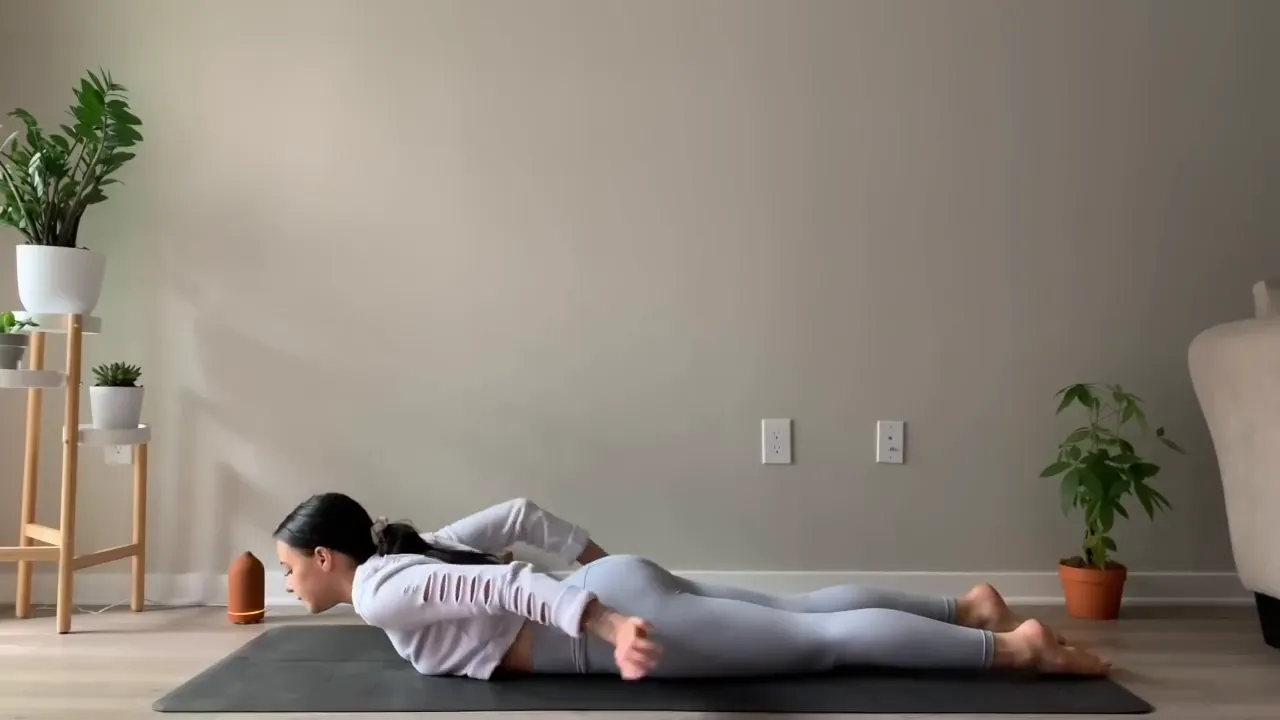
Incorporating twists with the Child's Pose can not only strengthen spinal flexibility but also relieve shoulder tension. Start this move by slowly raising your head and passing your right arm beneath your left. Put your right cheek and shoulder on the mat and let your right palm face up.
Adjusting to this position, you can notice an arm weight. By moving your hips backward towards your heels, you elongate the spine further creating a deeper stretch. Inhale deeply and release your body tension through each exhale.
Inhale and exhale for a couple of times and then slowly unthread your right arm from the rest and stretch it in front of you. In this position, you have to pass your left arm booling underneath your right arm and let your left cheek and your shoulder rest on the mat. The variation is a shoulder flexor stretch and also is about relaxation. Play with the idea of this post and focus on your left shoulder flexor.
Downward Facing Dog: A Key Position
To recover your body, the transitioning the Downward Facing Dog is very important. At first, move your hands a few inches forward and bend your toes under. Lifting hips, stay sure your feet are apart hip width and your hands are shoulder width.
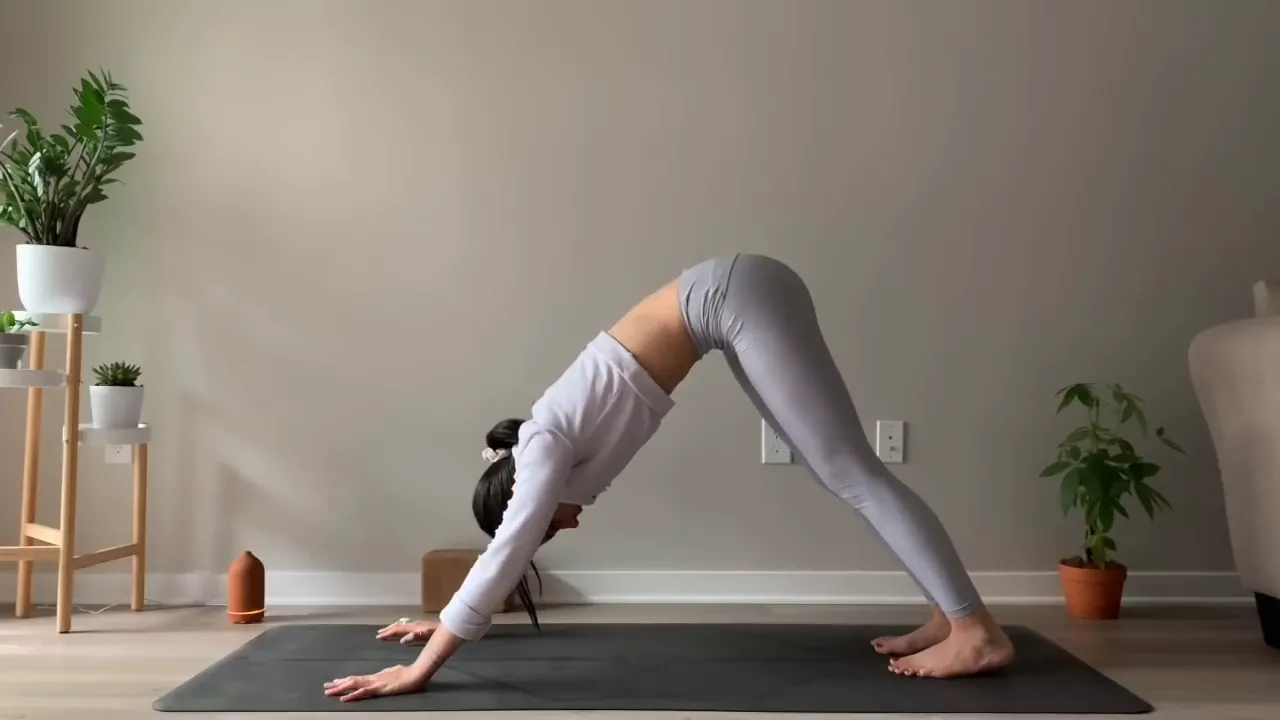
Conceal in your knees a slight bend, and by this, your head and neck will be able to hang heavy between your arms. Your task is to focus on the act of energetically driving your heels down towards the ground while keeping an easy and relaxed upper body. This posture is excellent for the spine to lengthen and the legs to stretch.
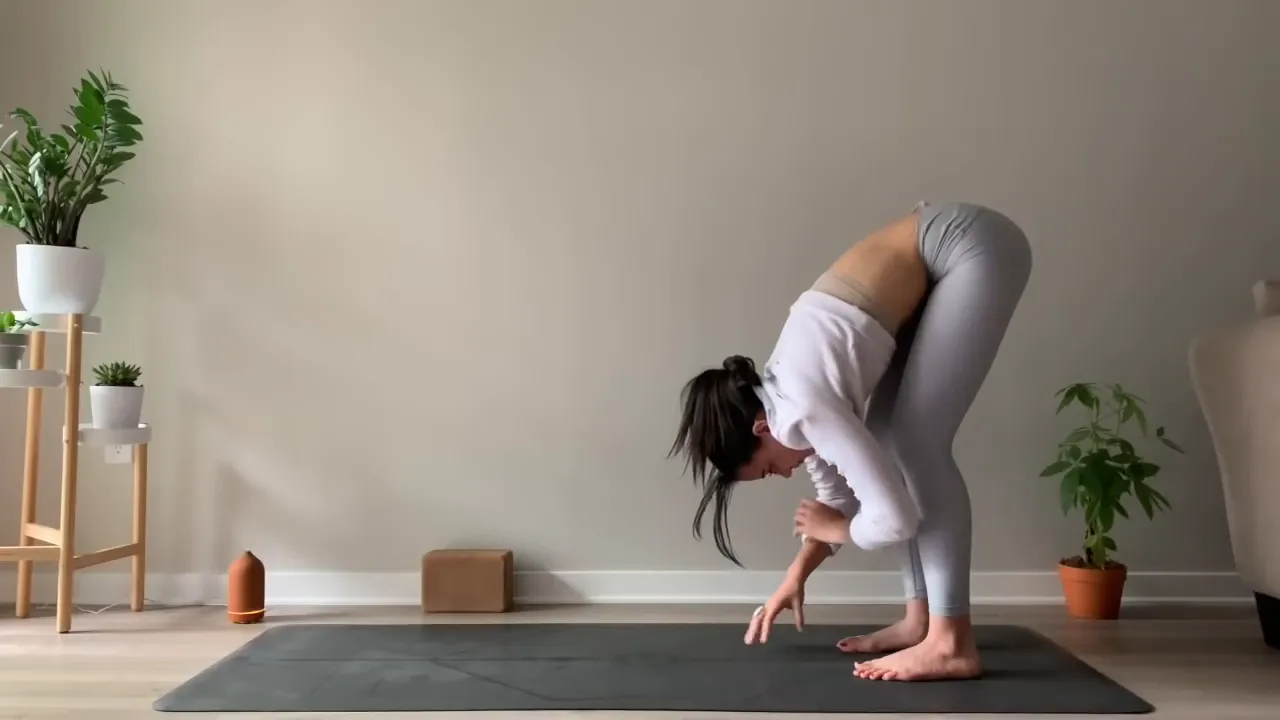
In this position, you can easily shift your hands toward your feet and turn into a Ragdoll Pose. While you allow your tummy to hang on your thighs, feel free to bend your knees as much as necessary. This mild forwards bend helps to relax the tension in the neck and lower back.
Exploring Pigeon Pose
Dove Pose is a strong hip and glute stretch. To do this pose, look straight ahead, and move your right knee towards the right elbow, pressing your right shin down while you stretch your left leg backward. The alignment of your right shin will not be very much of an issue; rather, keep in view the maintenance of your hips as square as possible to the front.
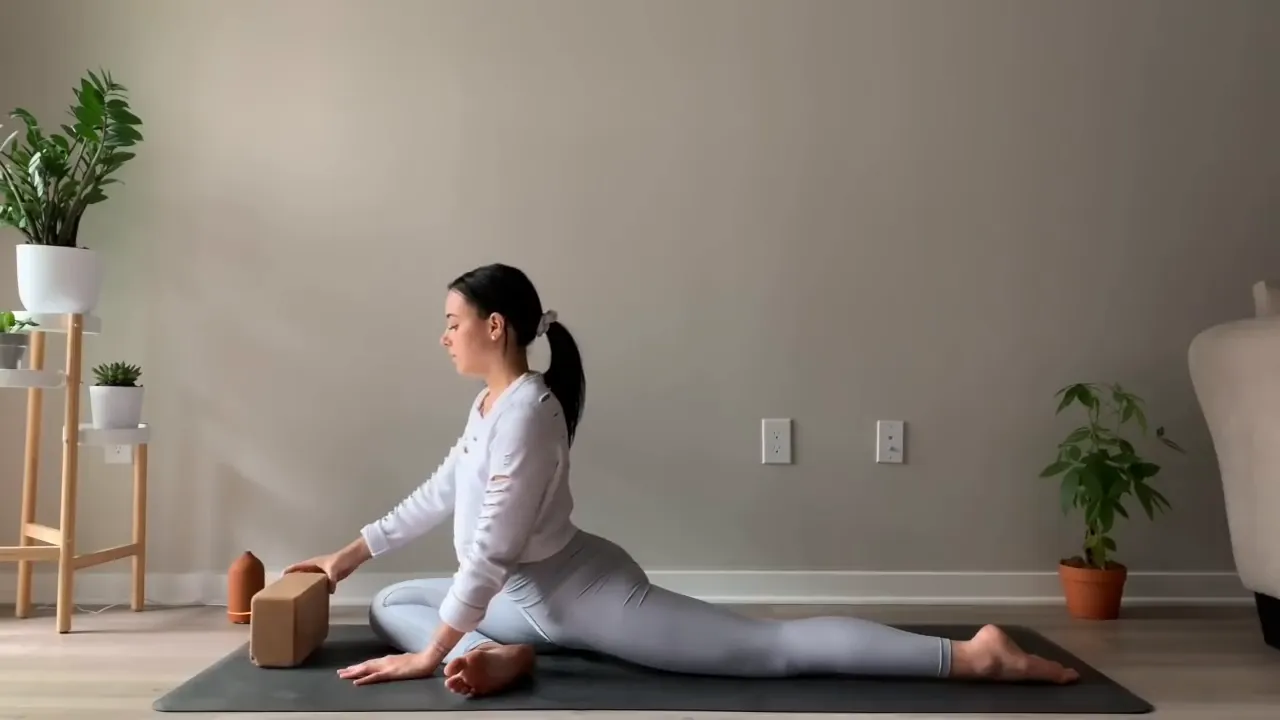
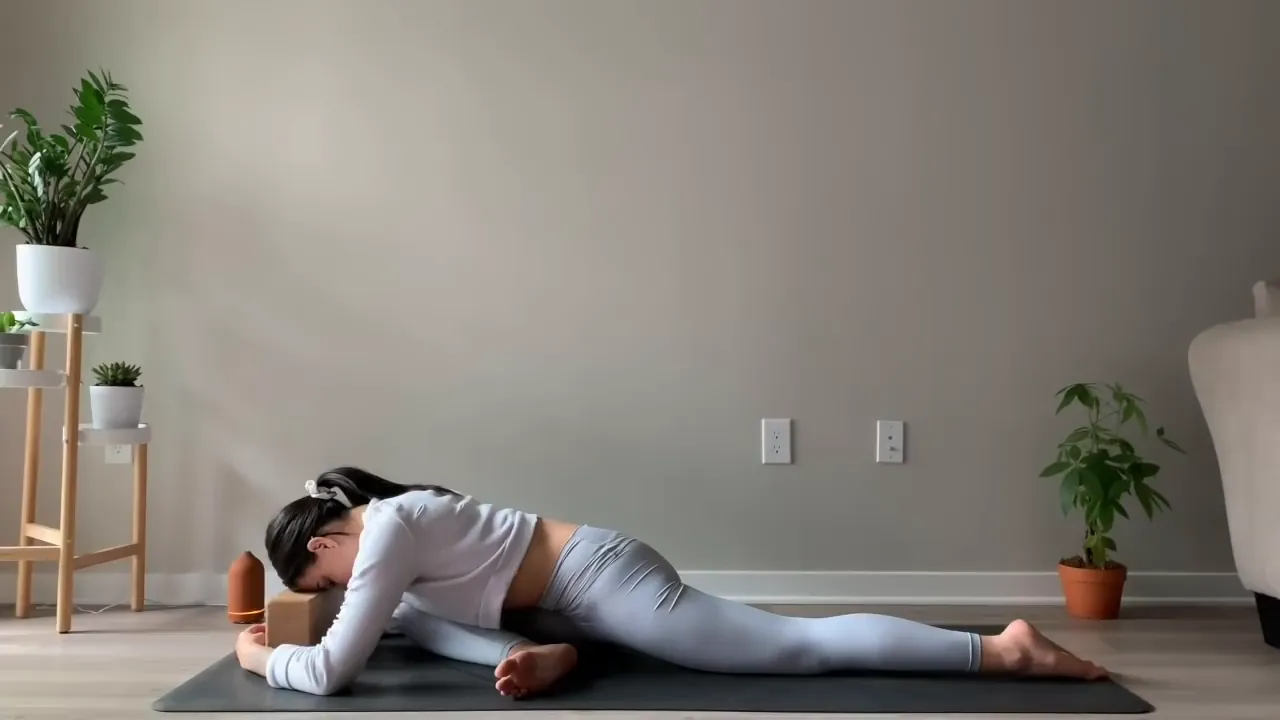
The left hip flexor stretches deeply in this posture. In case you require it, put a blanket or block under the right hip. Move your hands towards the front and lower the upper body to the floor in such a way that the forehead can be placed on a prop or the mat. This is done to help with the signaling of your nervous system to be relaxed.
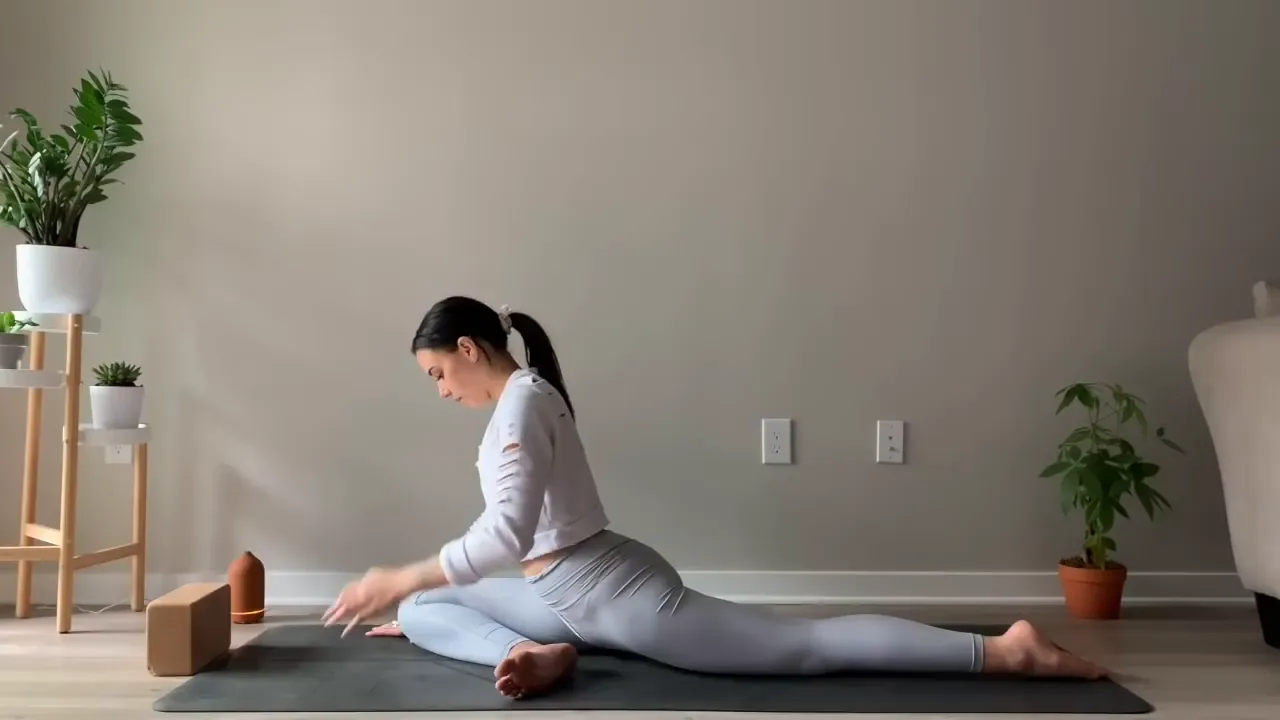
Switching Sides in Pigeon Pose
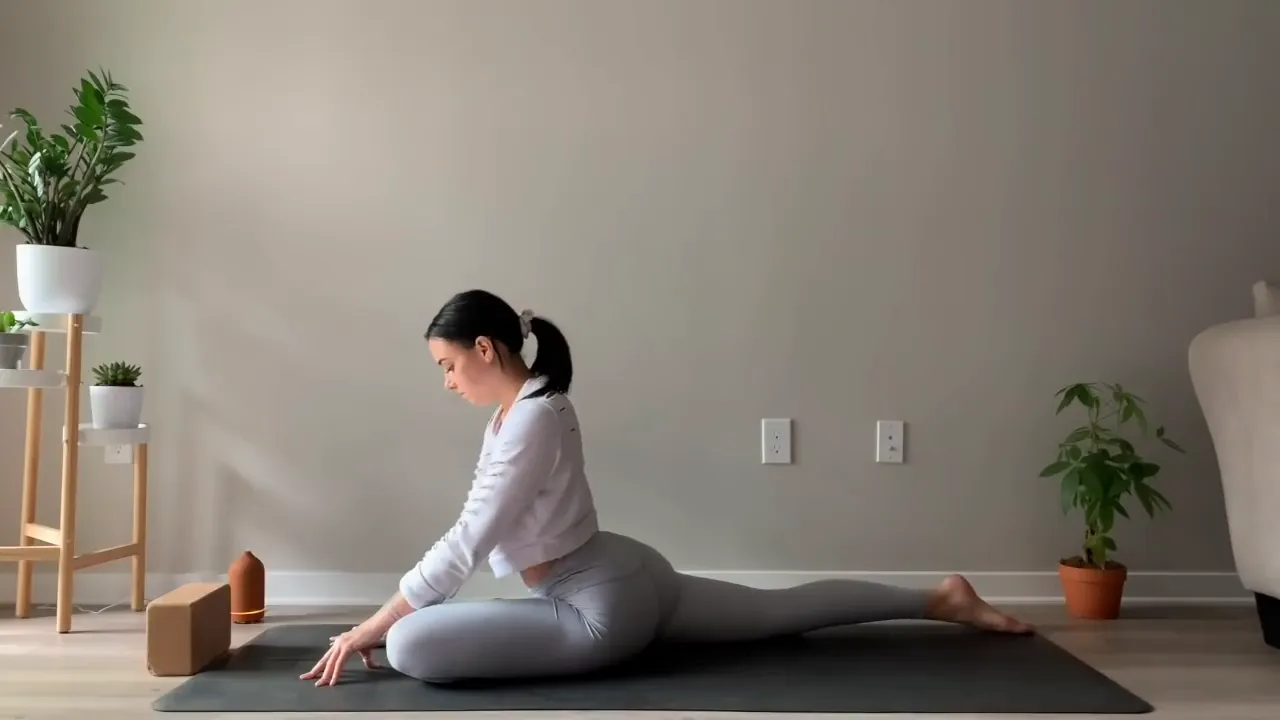
Now that you have spent some time in Pigeon Pose, it is time for the switch. First of all, come to an upright position by lifting your head and moving onto your palms while removing any props. Subsequently, tuck your back toes and raise your back knee then take a step with your right foot to meet your left foot in Downward Facing Dog.
Dog facing down is your starting position, where you need to look ahead and pull your left knee to the left elbow. Keep your left shin parallel to the mat and extend your right leg back. Concentration on the squaring of the hips again is important for you. Walk your hands ahead, drop the torso down, and feel the stretch.
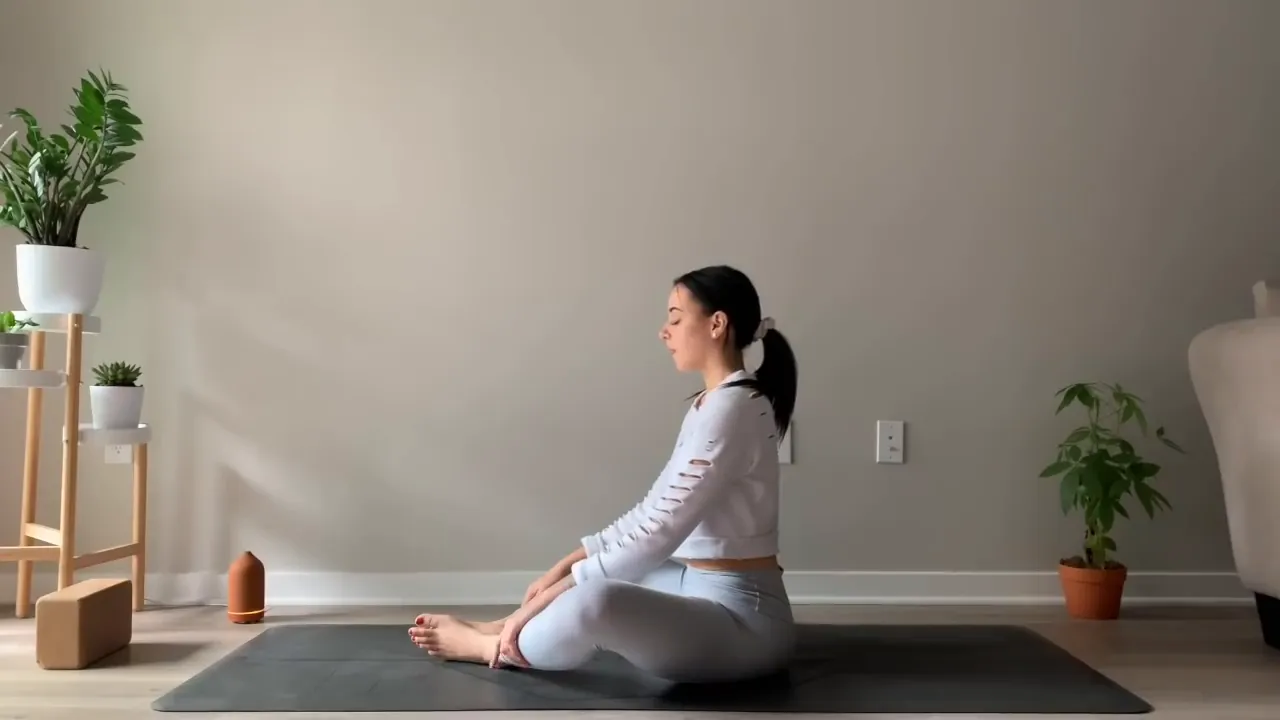
Butterfly Pose for Hip Opening
Sit on your knees and cross your ankles on the carpet to perform the Butterfly position. By bringing the inner side of your feet, your knees, and your elbows close together, you allow your knees to lie on the side. This position stretches the hips and helps calm you.
Placing your hands on the ankles or shins, and making your spine longer, is the position you have to take. Drop deeply through your sit bones since you are about to do some gentle neck stretches. Close your eyes and pull down your chin to your chest, which makes your neck's back stretch.
Neck Stretches for Tension Relief
As you breathe in, move your right ear closer to your right shoulder. You can sense the stretch on the left side of your neck as you let your left shoulder go. Let the air out and return your chin to your chest.
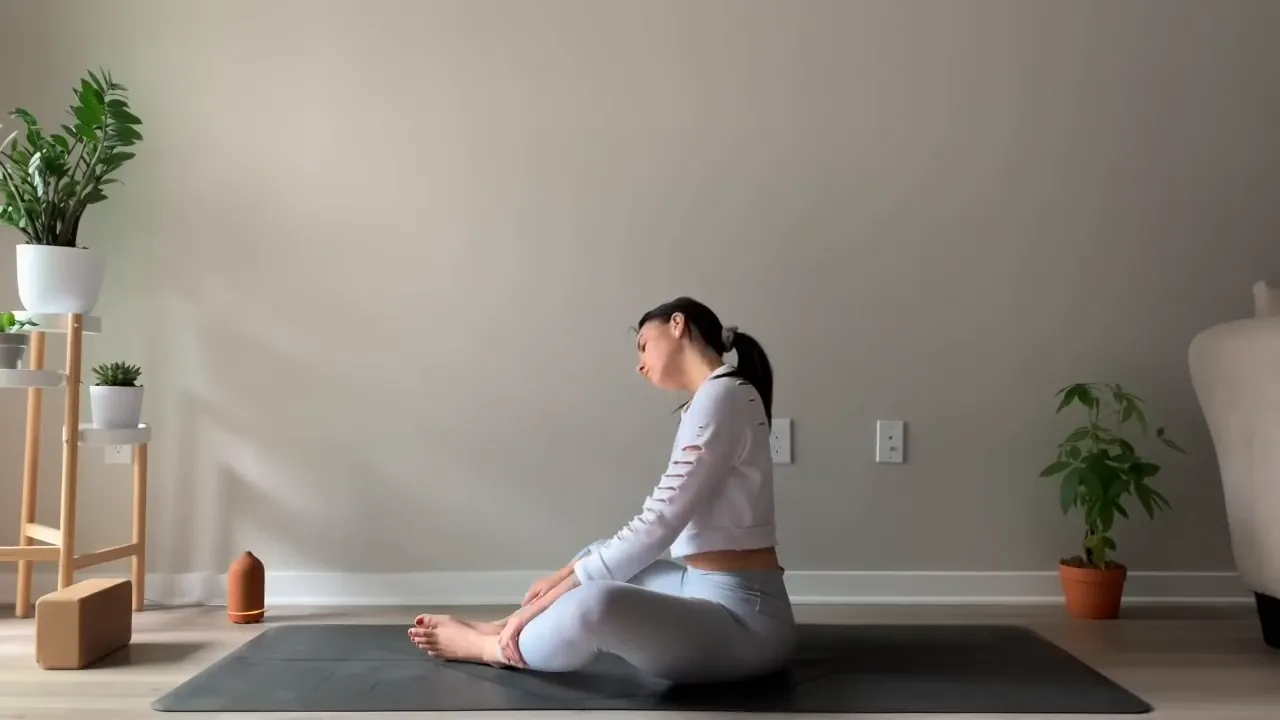
Once more, inhale while pulling your left ear to your left shoulder, which will make the right side of your neck stretch. Once again, flow back to these stretches, concentrating specifically on letting go of the tension%26nbsp;with each breathe you take.
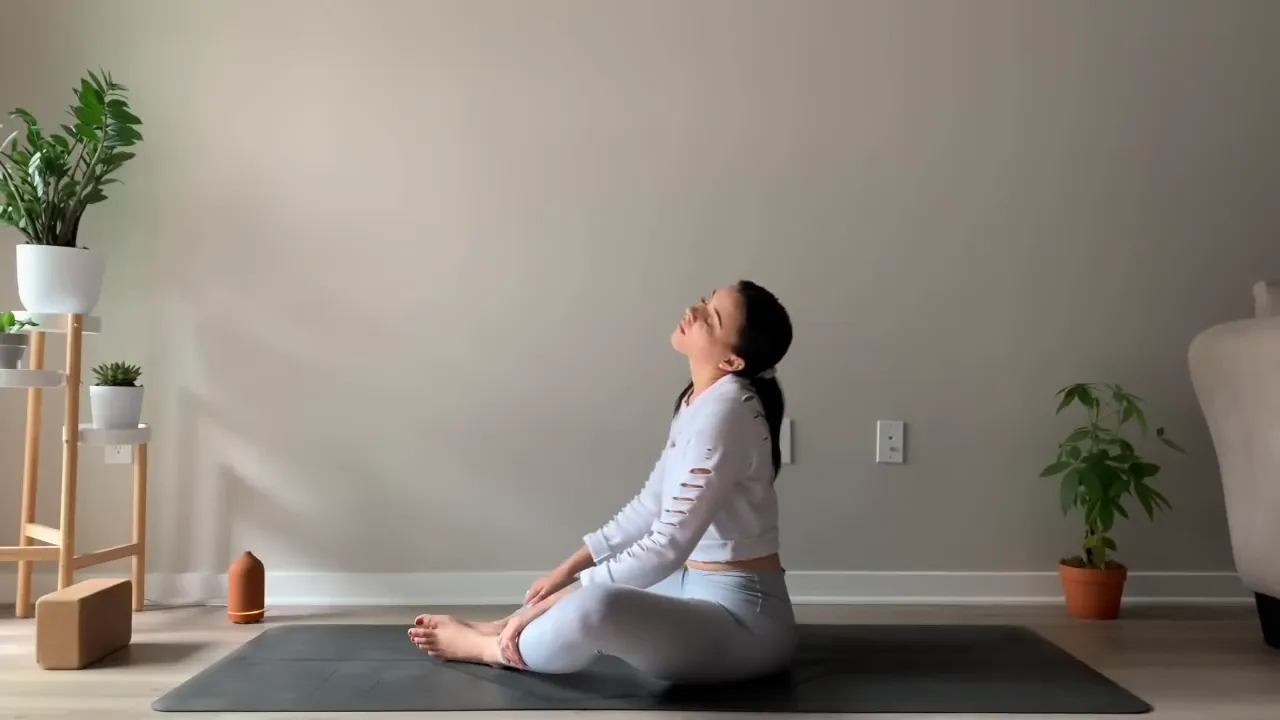
Lift your head back again, finally, and stretch the front of your neck. If you feel comfortable, lean your head back slowly, raising your chin and at the same time keeping your spine straight. The last stretch here is to relieve the tension held in the throat.
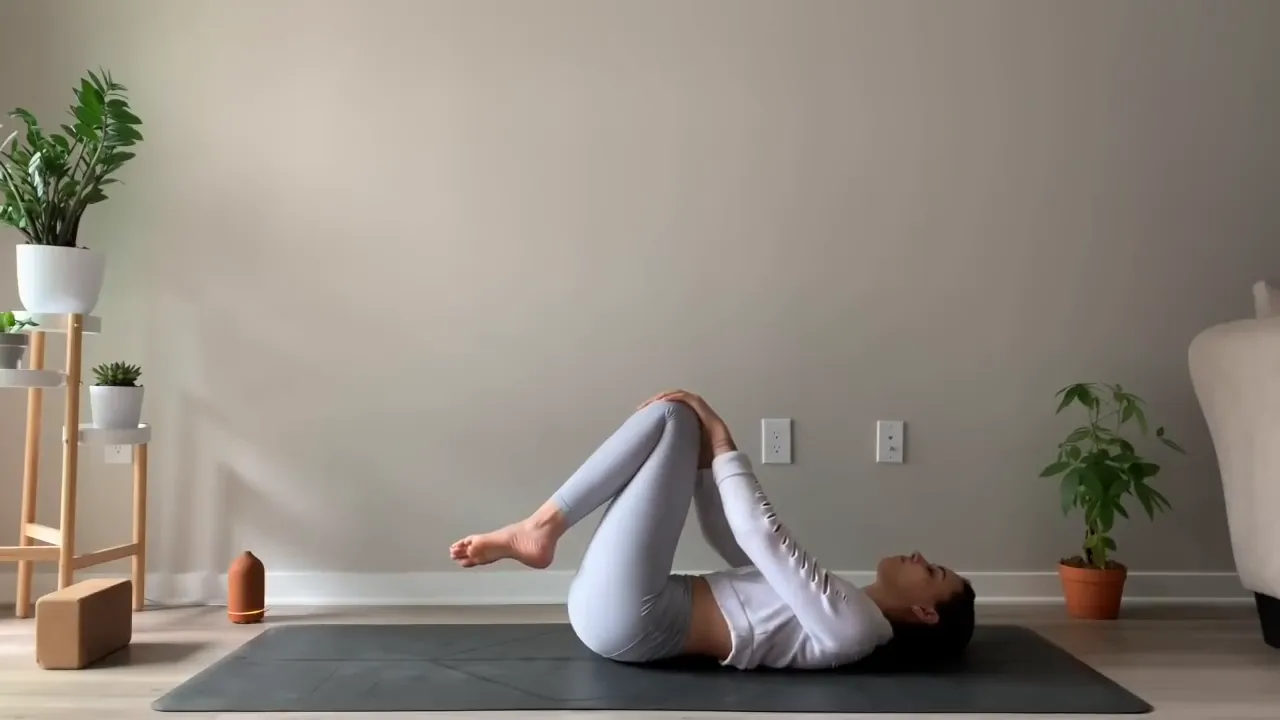
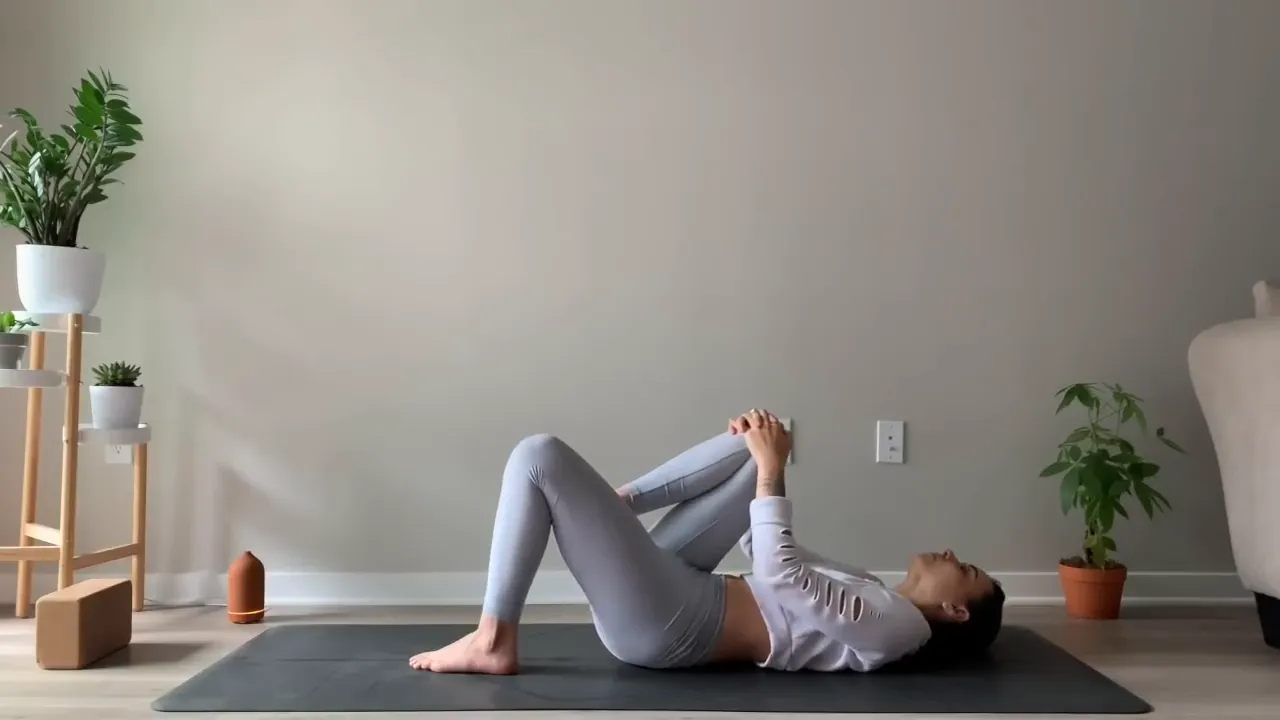
Reclining Twist for Deep Release
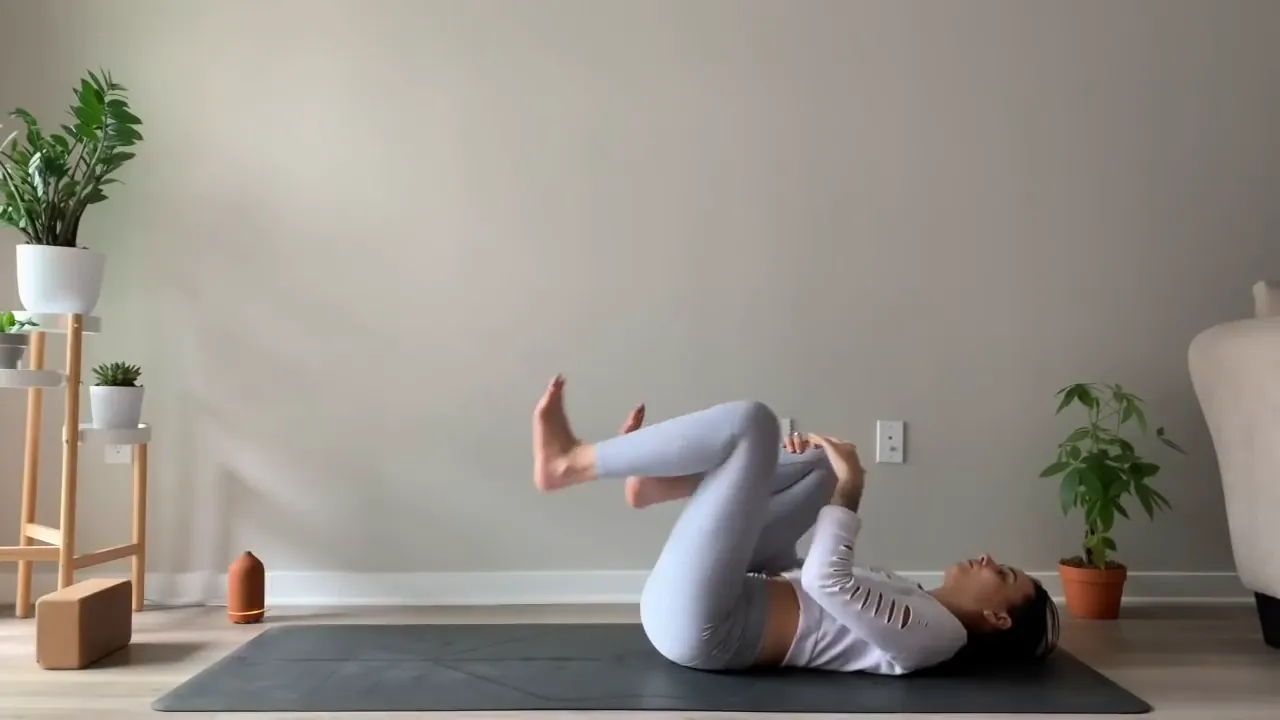
Reclining twists are a good practice for back and hip tension release. Initially, you start with lying flat on your back and then hugging your knees into your chest. The first pose is a spinal warm-up and a preparatory pose for the twist.
Knees in, put your palms on top of your knees and make small circles with your hips. This smooth movement massages your lower back helping to eliminate any tightness.
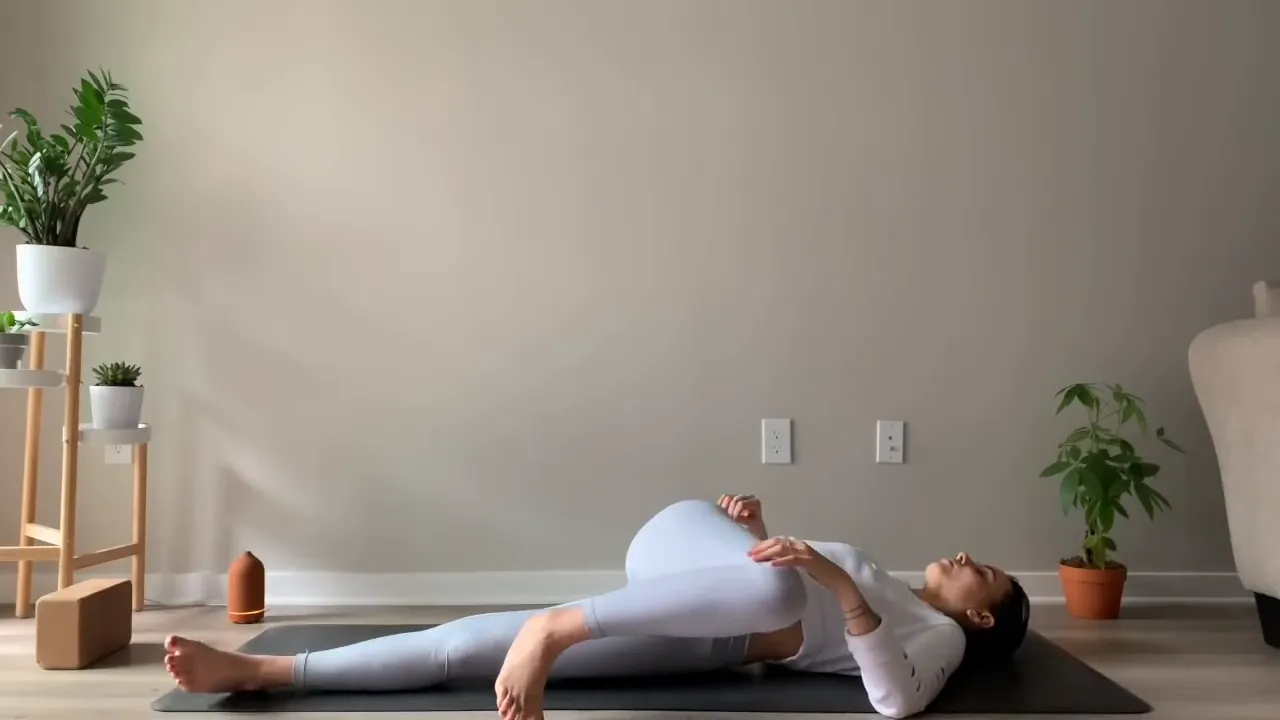
For a moment, feel serenity within you. Extend your left leg long on the mat while bending your right knee to your chest. Lying on your back, place your left heel on the floor and roll out your right ankle to get rid of any stress by pressing down your left heel.
Then, place your left hand on the outer side of the right knee. Take a long breath in, and when you breathe out, move your right leg to the left side of your body, creating a reclined twist. Your left hand can relax on your right knee, and your right arm can be stretched out to the side.
Turn your face towards the right by moving your shoulder blades into the relaxed position on the mat. Inhale deeply through your lungs, noticing the mild stretch of your spine. The twist helps not only to relax but also to improve the mobility of the spine.
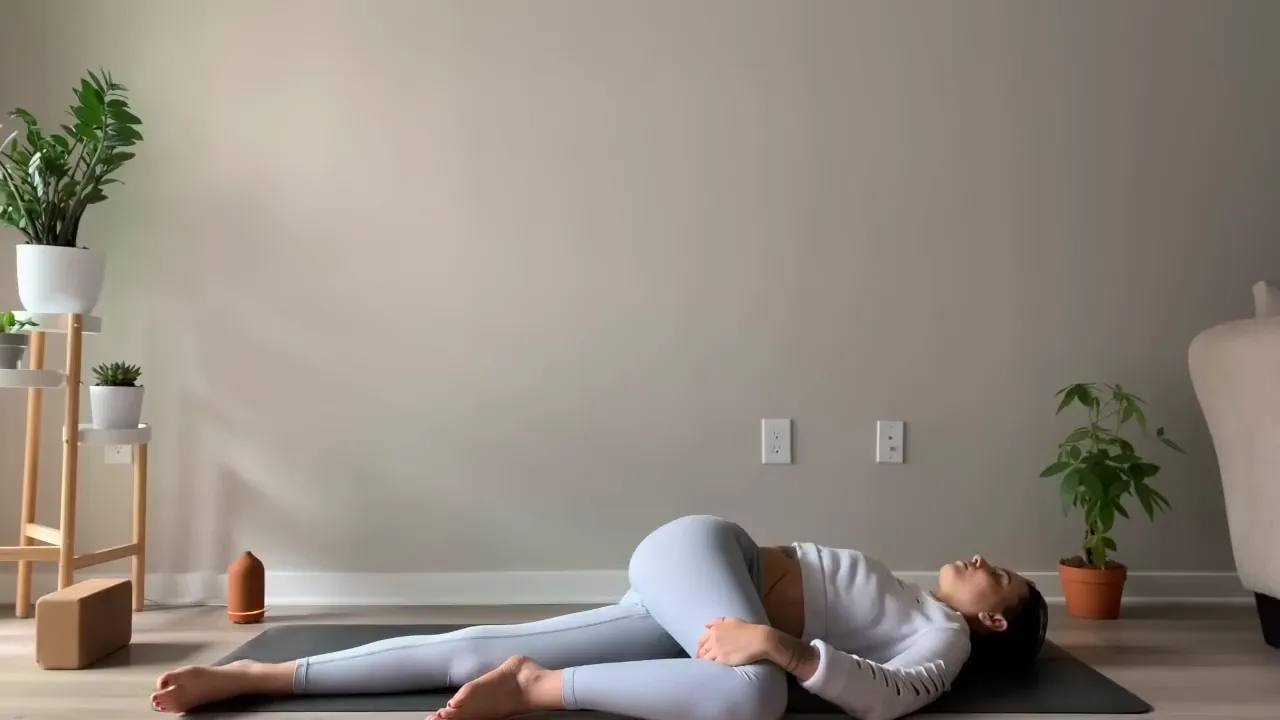
After taking a few breaths, you can gently come back to the center. Pull both knees to your chest and then switch sides, repeating the procedure with your left leg. This even practice makes sure that both sides of your body get the same amount of care and release.
Finding Stillness and Savasana
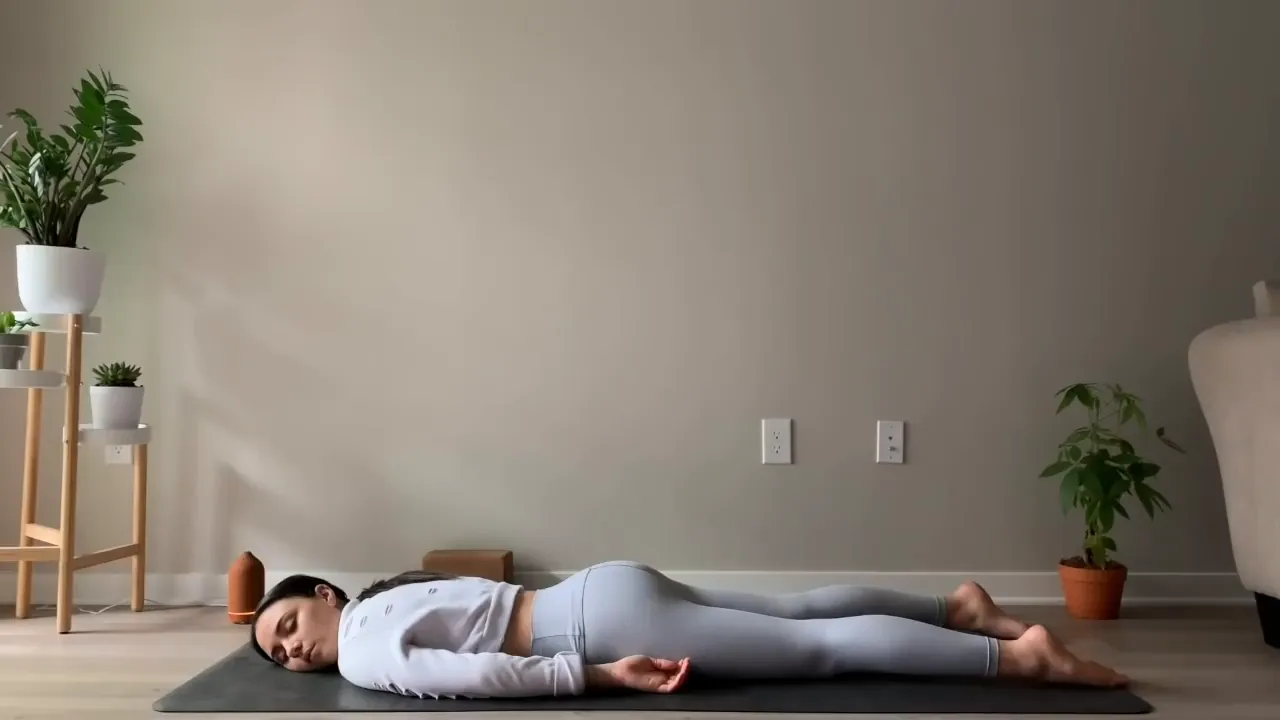
Once you are done with your twists, get into the last and resting''Savasana' pose. Flex the legs softly in front of you, making your heels go out toward the edge of the mat. Let your arms relax alongside your body, with the palms facing the ceiling.

Let the lids of your eyes be heavy as you close them and concentrate on your breathing. You are now starting to feel the weight of your entire body disappear as you begin to relax. This is your moment to release all the stress that might still be left.
Remain in this healing position for several minutes. With every breath, accept serenity into your body; and with every breath out, let go of any remaining stress. This skill increases your feeling of calm and balance.
Concluding Your Practice
As you get ready to finish your rehearsal, softly begin to return your attention to the immediate moment. Start by wriggling your fingers and toes, and taking a longer breath. Sensing the energy in you slowly coming to life.
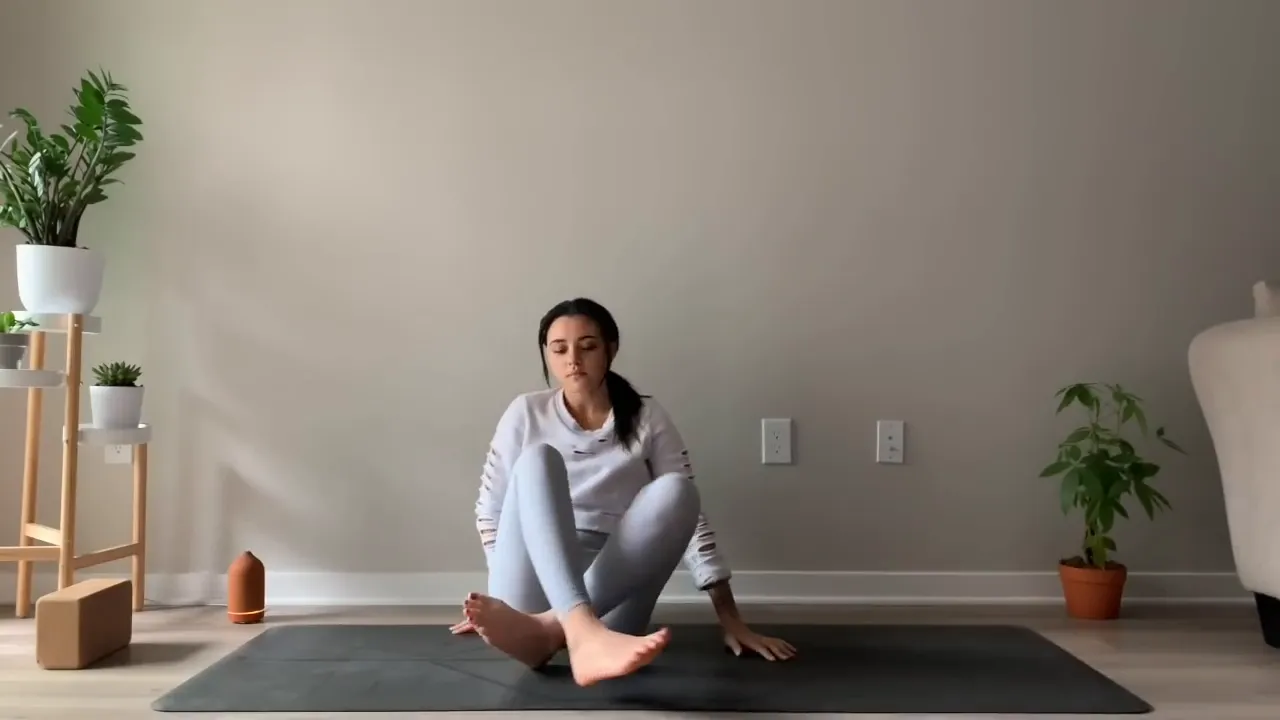
How about if you directly implement the statement? So, as you feel prepared, stretch your arms gracefully to overhead and feel your whole body relaxed. After that, with soft movements, go to one side and roll up to a fetal position for a moment. This is a gentle way of expressing the transition back to a seated position.
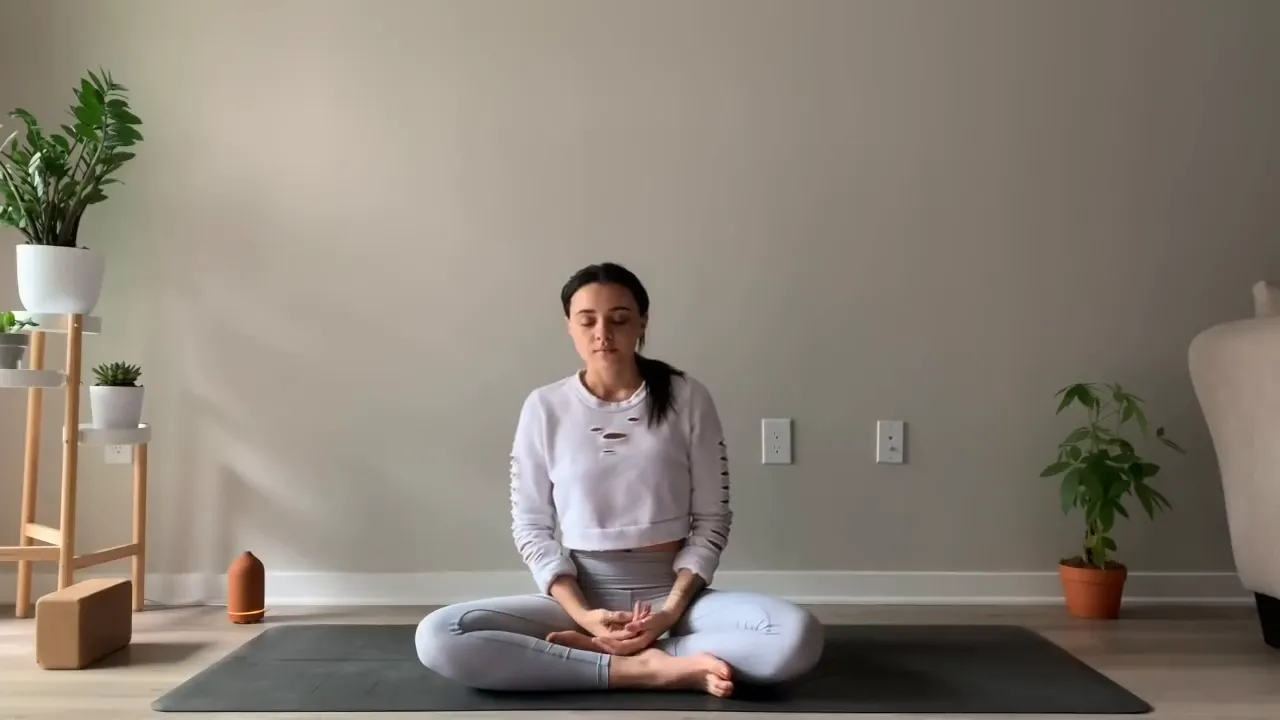
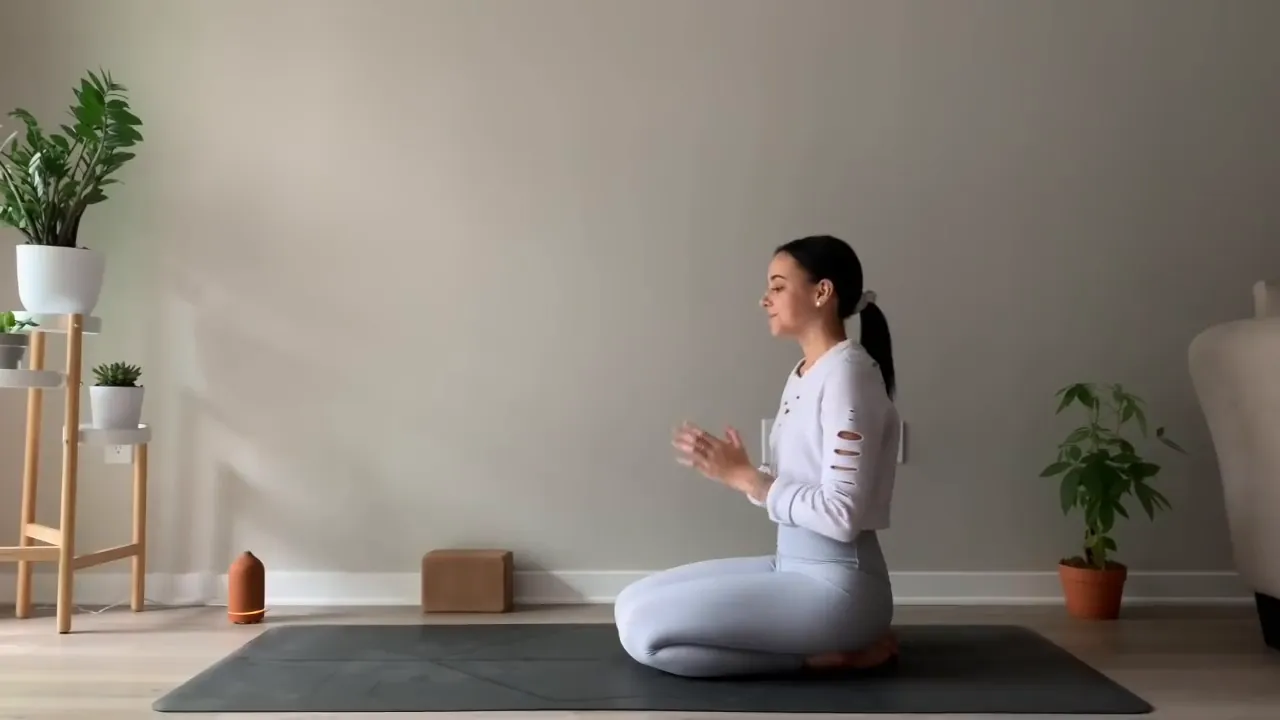
Gradually, with a sense of ease, you adjust your position to a seated one, with your hands placed in your lap. The eyes remain shut as you elevate the palms together right at the middle of your chest. You can take a break to feel thankful for your yoga class today.

FAQ: Common Questions About Yoga For Stress
What is Yoga For Stress?
Stress Yoga is primarily concerned with slow-paced body movement and deliberate breathing for the purpose of releasing tightness and tension in the body and mind. This practice aims to facilitate relaxation and improve your overall wellness.
How often should I practice Yoga For Stress?
Doing yoga regularly, at least a few times a week, can actually help you to have more calmness and balance in your life. A brief session of it is also helpful.
Do I need to be flexible to practice Yoga For Stress?
Certainly, flexibility is not a requirement. This class is intended for people of all levels, and you can use your own range of motion.
Can Yoga For Stress help with anxiety?
Of course, a lot of people experience the beneficial effects of Yoga For Stress in reducing anxiety levels. The integration of the three elements of movement, breath, and relaxation contributes to the development of a peaceful state of mind.
What should I do if I feel discomfort during a pose?
Discomfort should be addressed by backing off the position and probably making it as per your need. It is extremely important to listen to your body in any yoga practice.
Can I practice Yoga For Stress at home?
Definitely! Yoga can be practiced at home easily for stress. Establish a peaceful atmosphere and follow along with the guided sessions or perform your own routine.This article was curated from the help of this video Restorative Yoga For Stress Relief | 30 Minute Practice from YouTube. If you want to know more about this Yoga YouTube click the link to visit their channel.
Why Was This 1,000-Year-Old Ancient Plant Kept Secret for So Long?
This article draws inspiration from a thoughtful presentation by PsycheTruth that introduced
Yoga for Stress Management: A 10-Minute Deep Stretch Yoga Practice to Relieve Anxiety
In today’s fast-paced world, finding moments of calm and relaxation can feel
Our Top Picks - Courses & Resources
#1

Losing weight is hard. It's one of the hardest things to do, and it often feels like you're fighting a losing battle. Most people who try to lose weight will yo-yo diet for the rest of their lives.
This unique formula with Java Burn helps you burn fat faster than ever before, without all the fuss and bother of traditional diets and fitness programs.
#2

Custom meal plan service was designed to help men and women all over the world turn their lives around and take charge of their health and figure.
Tom Hunter’s program based on recent scientific studies on how gut health impacts weight loss.
They use scientific research and proven studies to create personalised Ketogenic diet plans that maximise fat burning via the correct calories and macronutrients for each individual.

Facebook Comments