
Other related posts
In case you are a beginner looking for yoga practices to ease into yoga, this session of just 10 mins is perfect for you. Exclusively created for starters, this soft flow guides you through primal postures that are designed to build your strength, flexibility, and balance. Come with us as we dissect some easy yet adequate movements in this Yoga for Beginners class.This article was curated from the video 10 min Yoga for Beginners - Gentle & Simple Yoga Stretch Click this link to visit this YouTube channel for more content like this.
Table of Contents
- Introduction to the Class
- Getting Started: Tabletop Position
- Cat and Cow Poses for Spine Health
- Engaging the Core: Hovering Leg Lift
- Low Lunge (Anjaneyasana)
- Spinal Twist with Anjali Mudra
- Hamstring Stretch: Straightening the Leg
- Downward Facing Dog Introduction
- Plank Pose: Strengthening the Upper Body
- Cobra Pose (Bhujangasana)
- Building Strength with Tabletop Pose
- Low Lunge on the Other Side
- Half Splits Pose for Flexibility
- Return to Downward Facing Dog
- Child's Pose (Balasana) for Relaxation
- Lying Down: Knee Pulls and Stretching
- Bridge Pose (Setu Bandha Sarvangasana)
- Final Stretch and Release
- Closing the Class with Gratitude
- FAQ
Introduction to the Class
You are about to begin a Yoga for Newcomers class that will cover some basic poses. You are going to go through these postures rigorously but gently- basic poses that you need to practice and learn the correct posture. Particularly it has been designed for the beginners that the transitions flow slowly and each of the yoga poses is very doable as well as they can gain a lot from it. At this class, whether you are an absolute beginner or you have a yoga break and begin again; you can build up your body with strength, flexibility, and balance.
Breathe deeply and align correctly during this session, which will help you connect to your body and mind at a much deeper level. Get ready to try out various positions that are specifically designed to help you unwind and feel recharged, while being in a comfortable nurturing environment. Let's begin!
Getting Started: Tabletop Position
At the outset, we will get into the tabletop position. This primary stance is essential for creating stability and alignment. First, position your palms straight across from your shoulders and place your knees beneath your hips. Your fingers should be fully spread, pushing very hard down into the mat.
Slowly breathe in the air as well as deep as it gets, your abdomen to be down like a mat as you raise your glance. This is the initial stage of correlating your breathing with motion. When you exhale, curve your back, hiding your chin under your chest. This soft and easy movement will be the first step to your spine's readiness for the upcoming exercise.
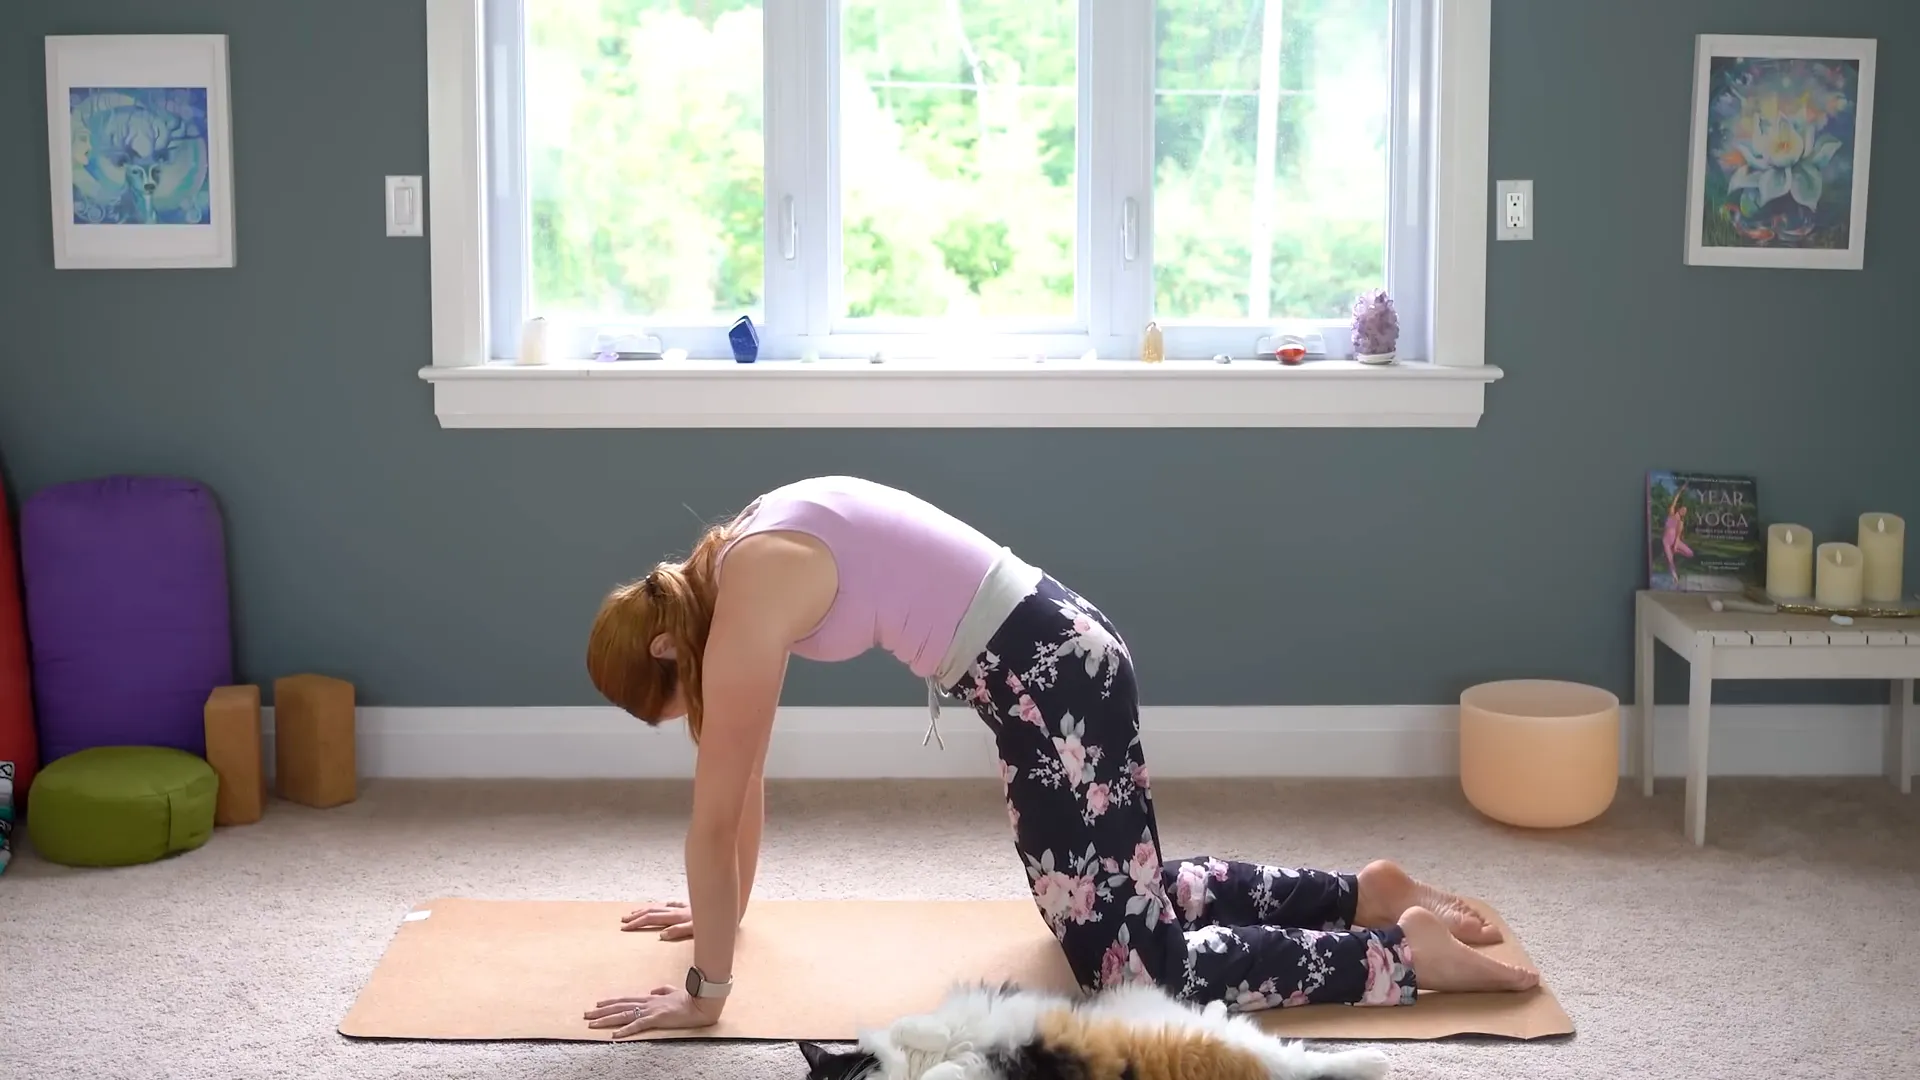
Cat and Cow Poses for Spine Health
Next, we will switch to the Cat and Cow postures, which are necessary for the proper maintenance of the spine. Inhale while you curve your back, allowing your belly to drop and your heart to open up. This is the Cow posture.
Breath out, and shift to Cat pose by curving your spine, pulling your belly button towards your back. Repeat this pattern a few times, setting your movement with your breath. This practice facilitates enhancement of flexibility and strength in the back, thus getting you ready for the other poses.
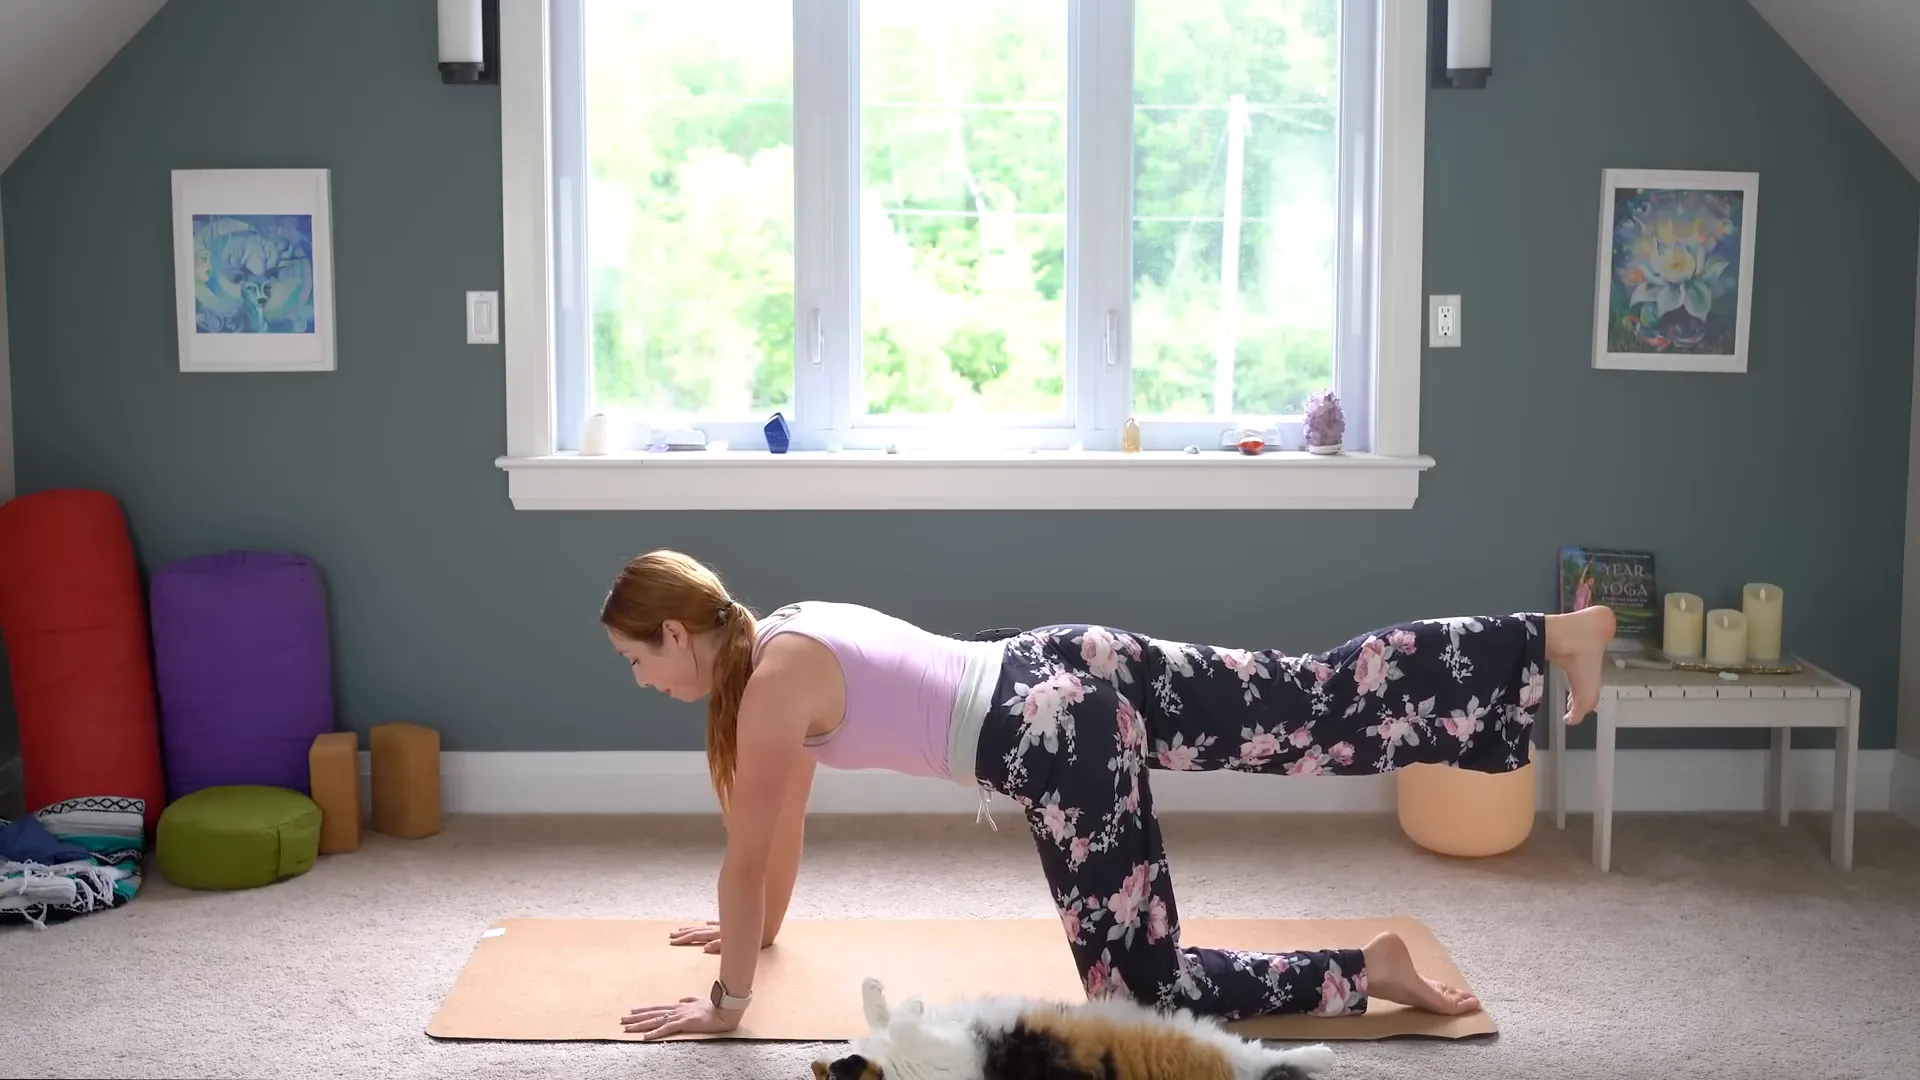
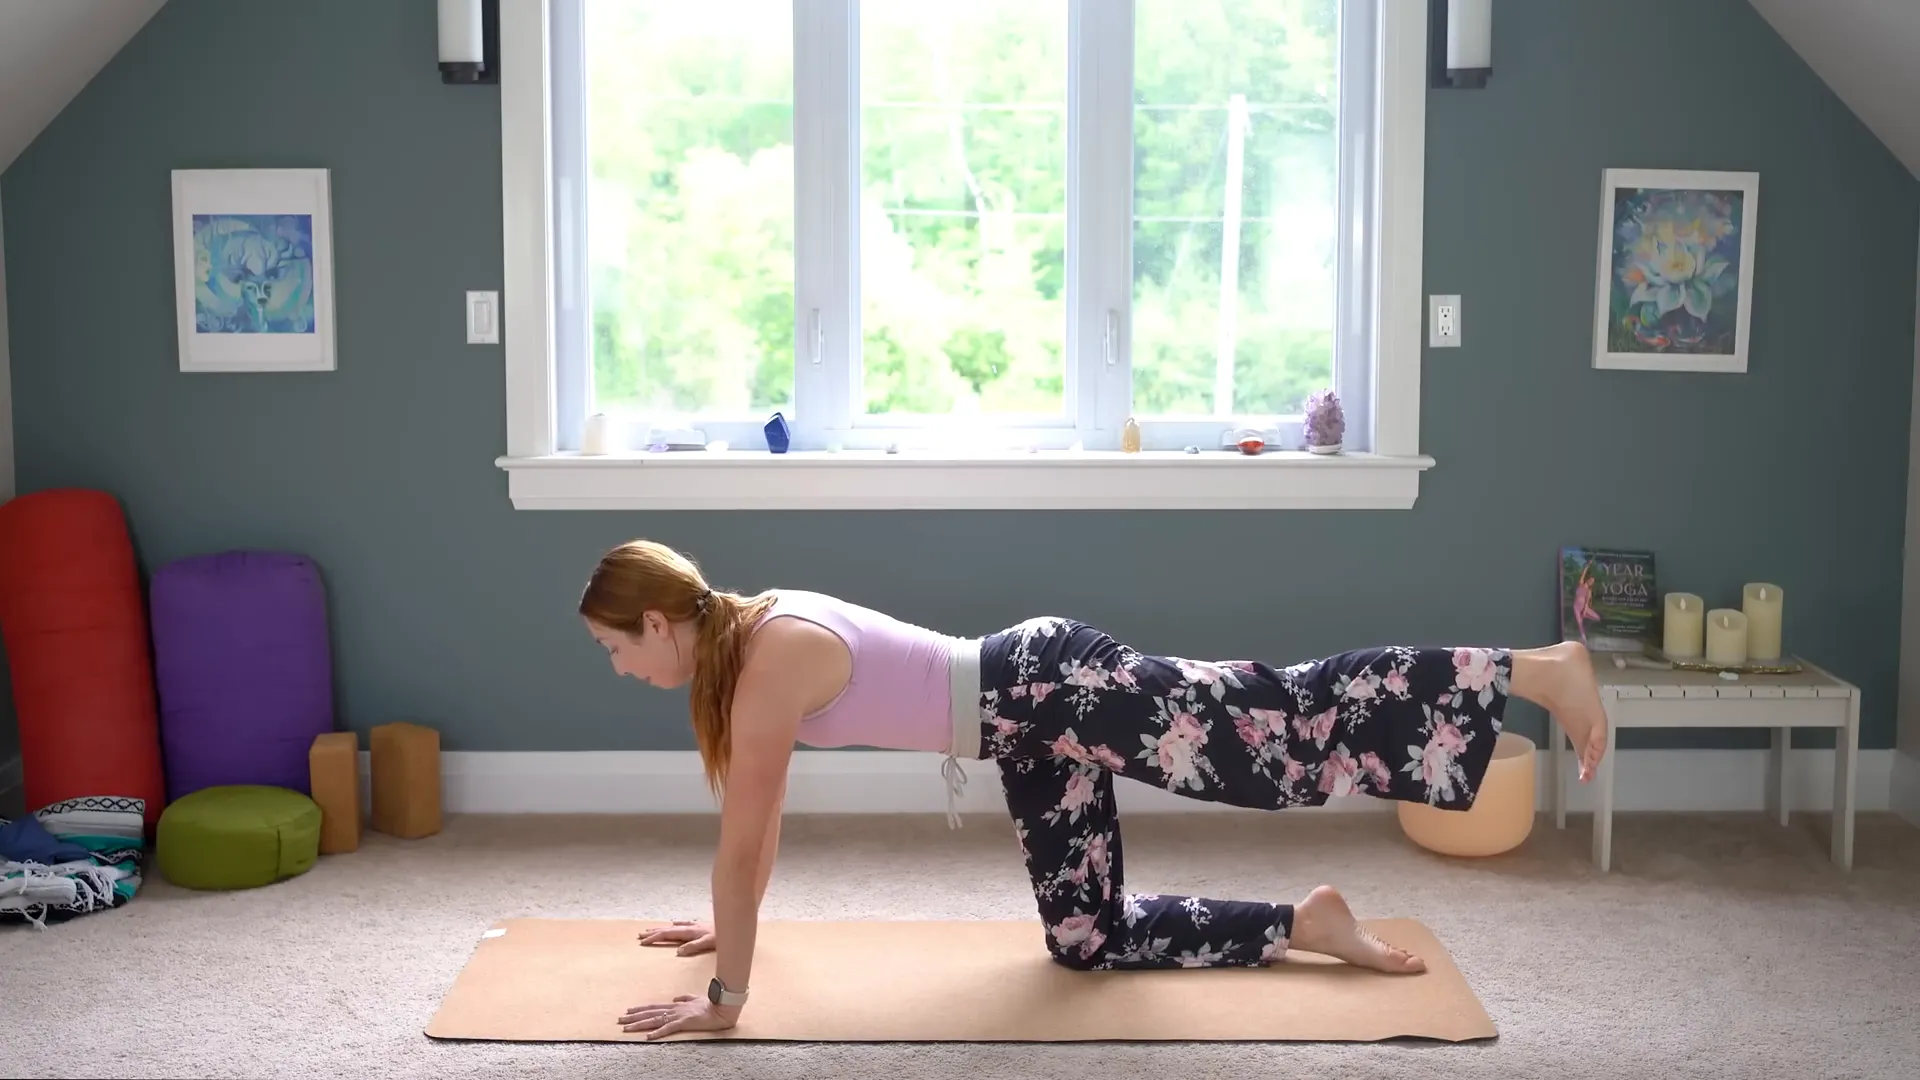
Engaging the Core: Hovering Leg Lift
At this point, we will do a Hovering Leg Lift to target the core muscles. Starting from your tabletop position, pull your right knee towards the chest, keeping your elbows straight. Inhale as you extend your right leg back, maintaining a strong core by engaging your lower belly. The exercise not only makes tough abdominal muscles but also helps you to better balance.
Keep your hips in level position and your back straight while repeating this motion. Yoga, of course, core engagement is the necessary part of yoga as it is the source of stability and it helps to do many yoga postures.
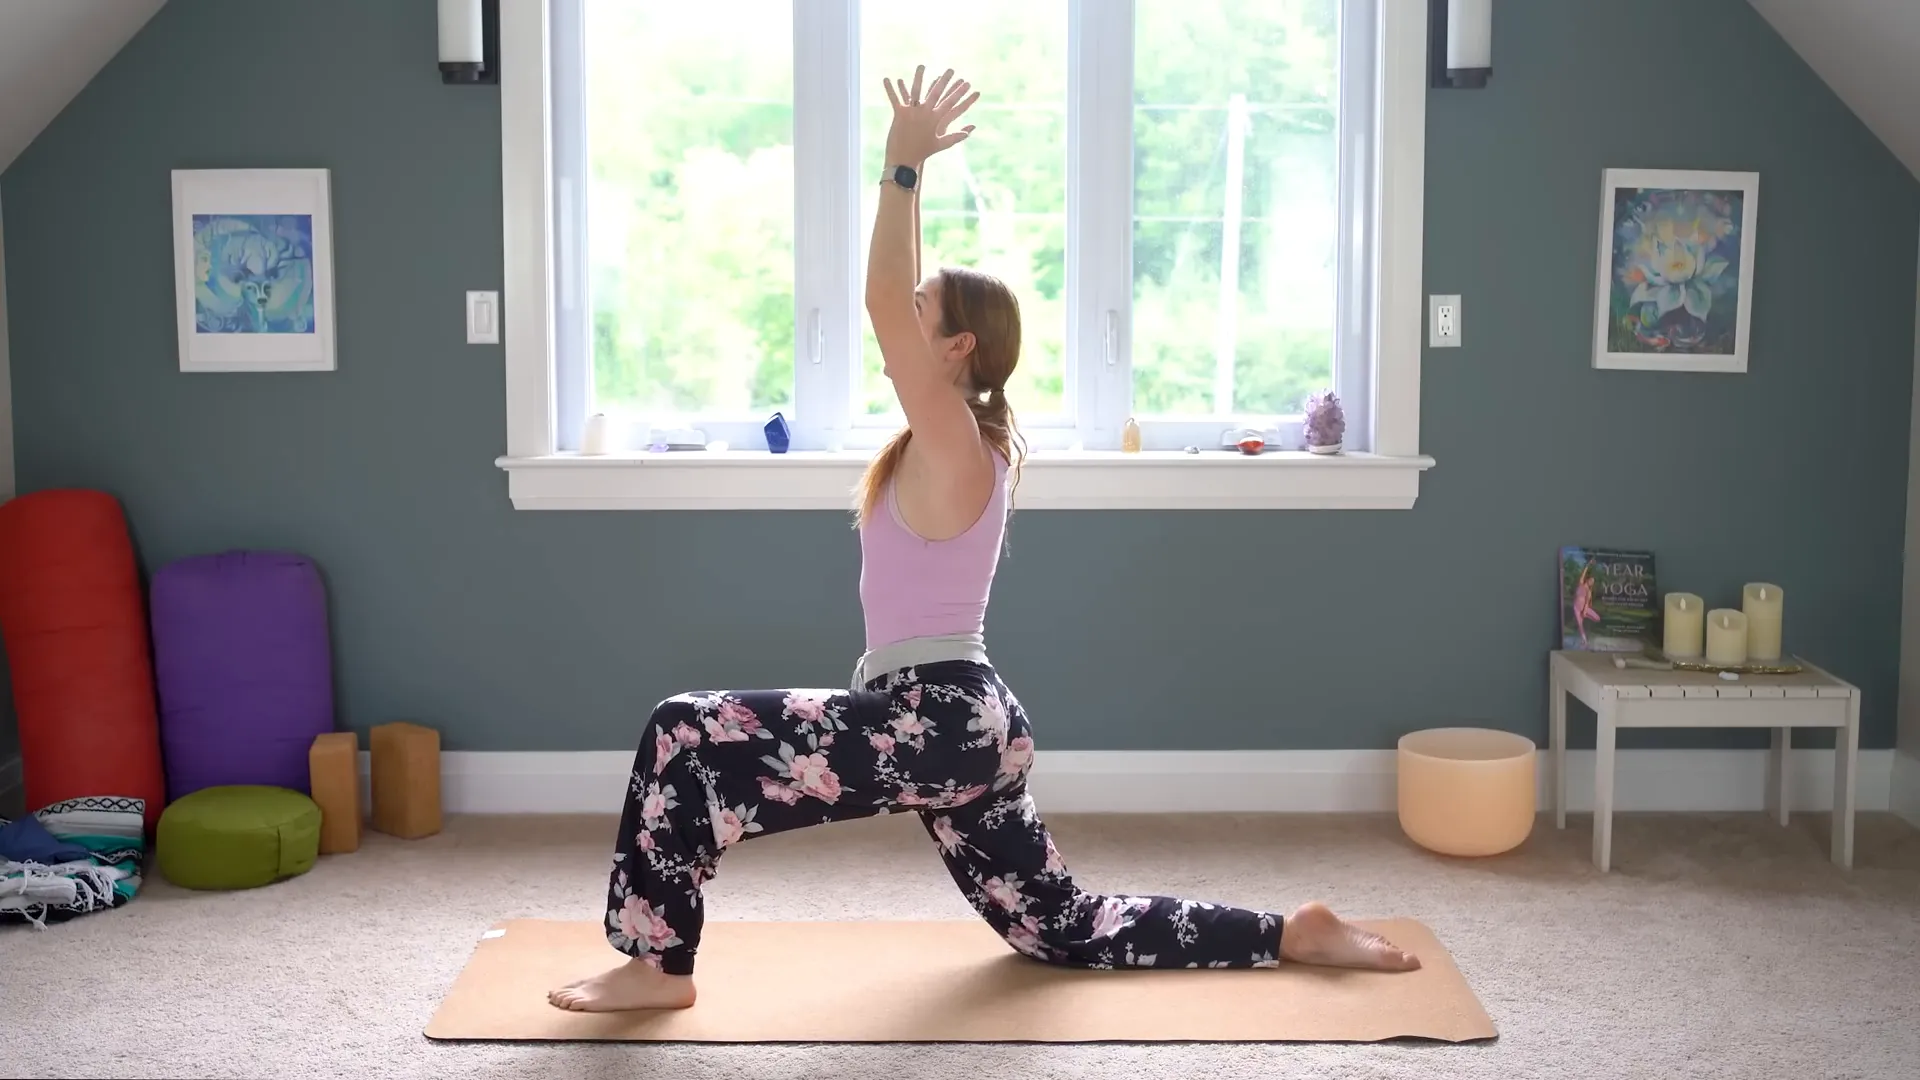
Low Lunge (Anjaneyasana)
Transition smoothly to Low Lunge, which is famously referred to as Anjaneyasana. Place your right foot in front of your hands, making sure that the knee is right above the ankle. While the upper part of the body is being raised, the core should be running and the tailbone should be directed towards the floor.
As you go into this position, you can either stretch your hands overhead or put your palms together at your heart in Anjali Mudra. Gently moving your hips forward makes you feel the stretch in your hip flexors. This pose is about opening up the hip front and it is a way of promoting flexibility and strength.
Spinal Twist with Anjali Mudra
We are going to do a Spinal Twist now. Stay in your Low Lunge, bring your hands at your heart. When you exhale, slowly twist your torso to the right side, and keep your chest up. This twist is very beneficial as it increases the mobility of the spine and also helps in the process of digestion.
Be careful to keep your spine long and refrain from collapsing your chest. The inherent point of this posture is back stretching, while it is also a magnificent way to connect the breath with body movement.

Hamstring Stretch: Straightening the Leg
Having come to an end with the twist, now it is the turn of Hamstring Stretch. With hands back on the mat, extend your right leg straight and flex your foot. This position also goes to the name of Arda Hanumanasana, or Half Splits. In case of need, you can bend your knee very slightly as you please.
The hamstring stretches are the main focus of this posture and it also causes back of the legs flexibility. Breathe in a way that is deep so that you can relax your body into the stretch. Concentrate on lengthening your spine in this position as well as keeping your hips square.

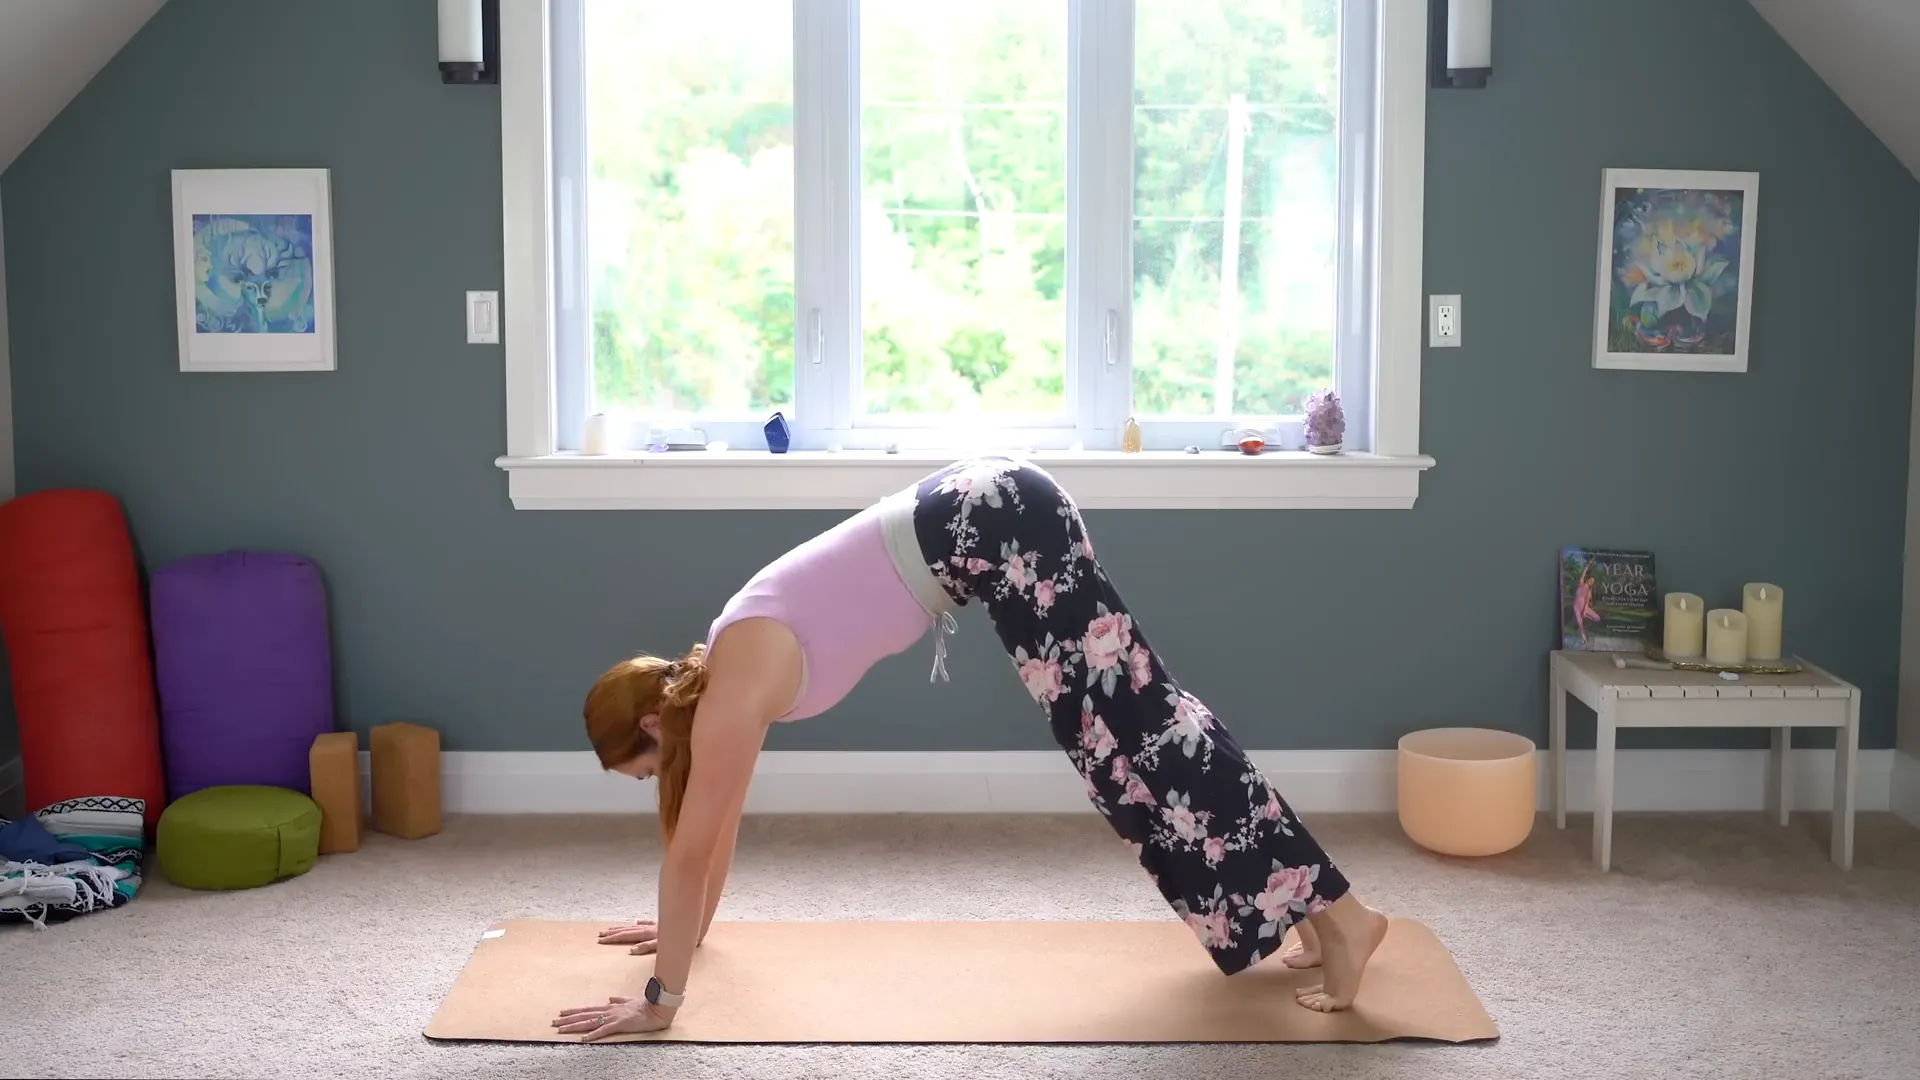
Downward Facing Dog Introduction
Switching to Downward Facing Dog, also known as Adho Mukha Svanasana, is the next pose we will perform. Not only is this pose excellent for stretching the whole body, but it is also a way of developing strength. Start off by placing your toes under your feet and then pushing your hips up and back to turn your body into a V-shape that is inverted.
Your arms need to be shoulder-width apart, and your feet should be hip-width apart. If your hamstrings are rigid, you can just bend your knees; it is more critical to keep your spine straight than to reach your heels to the floor. Inhale deeply through your nose and let your chest start moving towards your thighs.

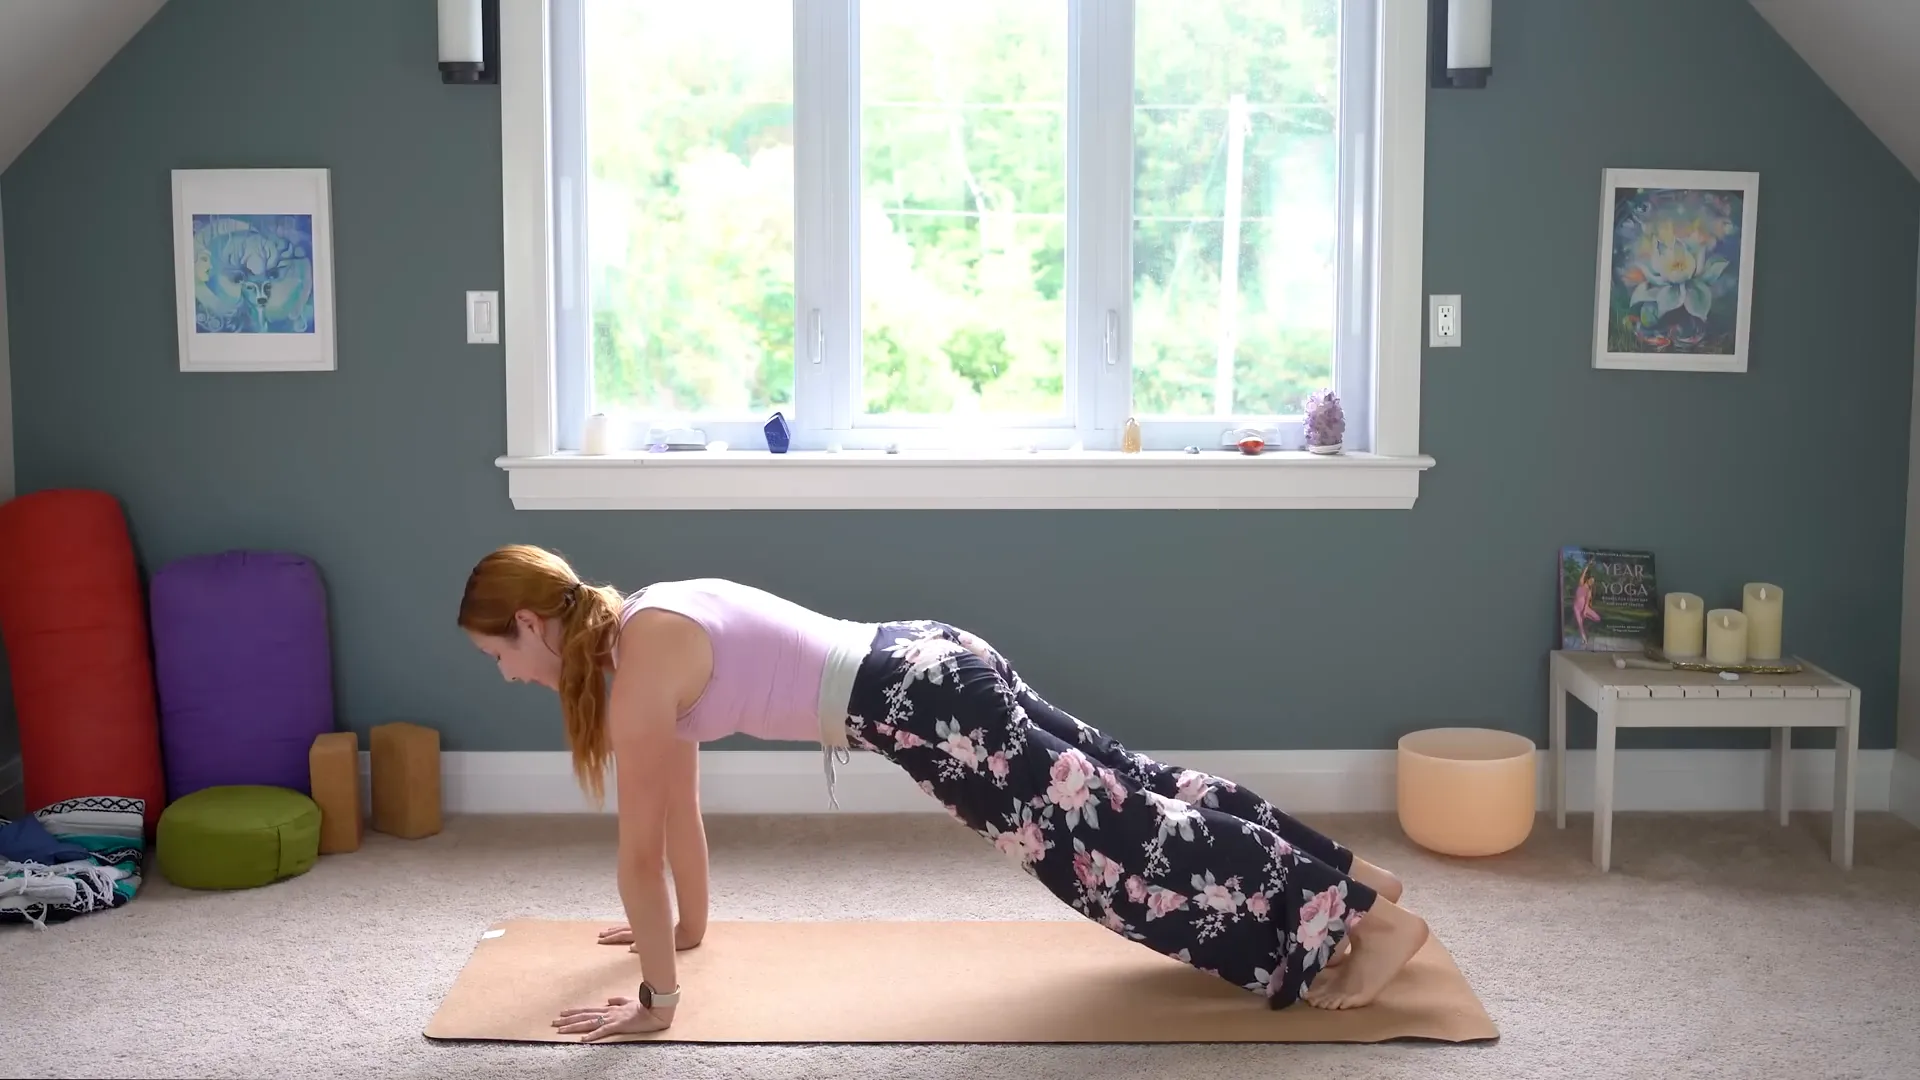
Plank Pose: Strengthening the Upper Body
Moving from Downward Facing Dog to Plank Pose will be our next flow. Move your weight to the front, making your shoulders on top of your wrists. Your knees can stay on the mat for assistance or you can raise them for a full plank position.
Make certain that your head and heels are in a straight line. Pull your core and close your glutes for the holding to be stable. This position contributes to the strengthening of muscles in arms, shoulders, and core, so is one of the essential elements in your Yoga for Beginners practice.
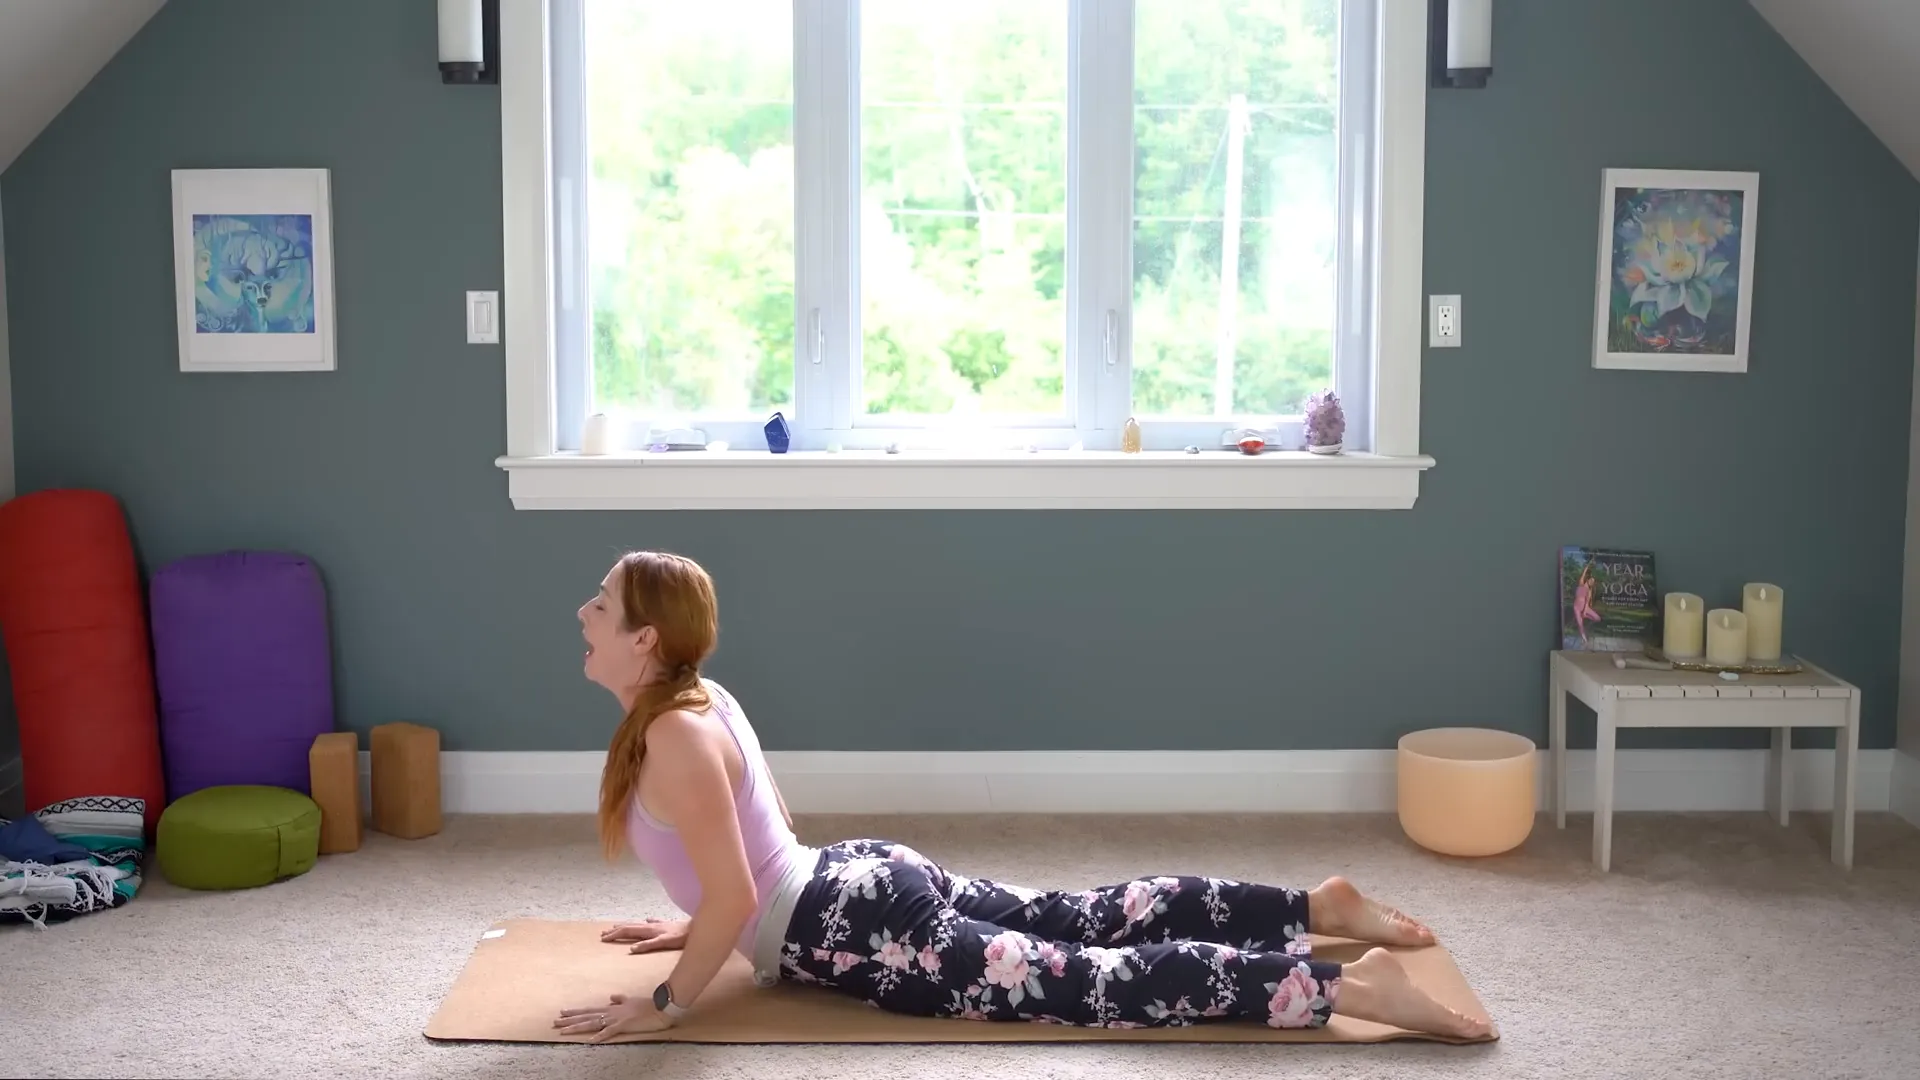
Cobra Pose (Bhujangasana)
We will now transition to the Cobra Pose or Bhujangasana. From the Plank position, lower your body down to the mat, ensuring that your elbows are close to your sides. Bring your feet back by pointing your toes and pressing the tops of your feet into the floor.
As you breathe in, hoist your chest up away from the mat, rolling your shoulders backward and downward. Let your elbows be a bit curved and fix your gaze horizontally. This posture is really good for the power of the spine and for the chest to go wide, which is helpful for the state of your posture.
Building Strength with Tabletop Pose
Cobra is not the only pose we should check out. Next, go back to Tabletop Pose which is the first position that helps you align correctly and core your core. From Cobra, inhale as you tuck your toes and lift your hips, exhaling as you push back into Tabletop.
Position yourself in such a way that your wrists are aligned with your shoulders and your knees are aligned under your hips. In order to hold your flat back, enlist the help of your lower abdominals, and get ready to move on to the next action.
Low Lunge on the Other Side
Now, let's try to find our Low Lunge on the other side. Move your left foot forward between your hands, making sure that your knee is exactly above the ankle. Similar to the last situation, strength the core and rise the upper body while your hips are pressing down towards the mat.
Experience the lengthening in your hip flexors and thighs. Besides, you can also reach your arms above for an additional stretch, holding your gaze straight ahead or slightly up. This pose is the one that improves flexibility and builds strength in the lower body.
Half Splits Pose for Flexibility
Transiting Half Splits Pose or Arda Hanumanasana is the next pose we are going to do. While keeping your right knee bent, straight your left leg forward. Flex your left foot, and if it is comfortable for you, slightly lean forward to deepen the stretch in your hamstrings.
Keeping a small bend in your knee is not at all an issue, it is absolutely fine. Concentrate on your inhalation and exhalation, and your body will find its way to relax into the stretch. This position is highly effective in enhancing flexibility and relieving stress in the legs.
Return to Downward Facing Dog
To conclude, we will get back to Downward Facing Dog. Bending your right knee, place your palms securely on the mat. Tucking your back toes under, lift your back knee off the floor and step your left foot back to meet the right.
Now, just pause for a second and observe how you're feeling in your body. You might feel even more space and comfort in this pose, as it reflects the improvement you have done with the previous poses. Take a deep breath and let the stretch through your whole body be a source of joy.
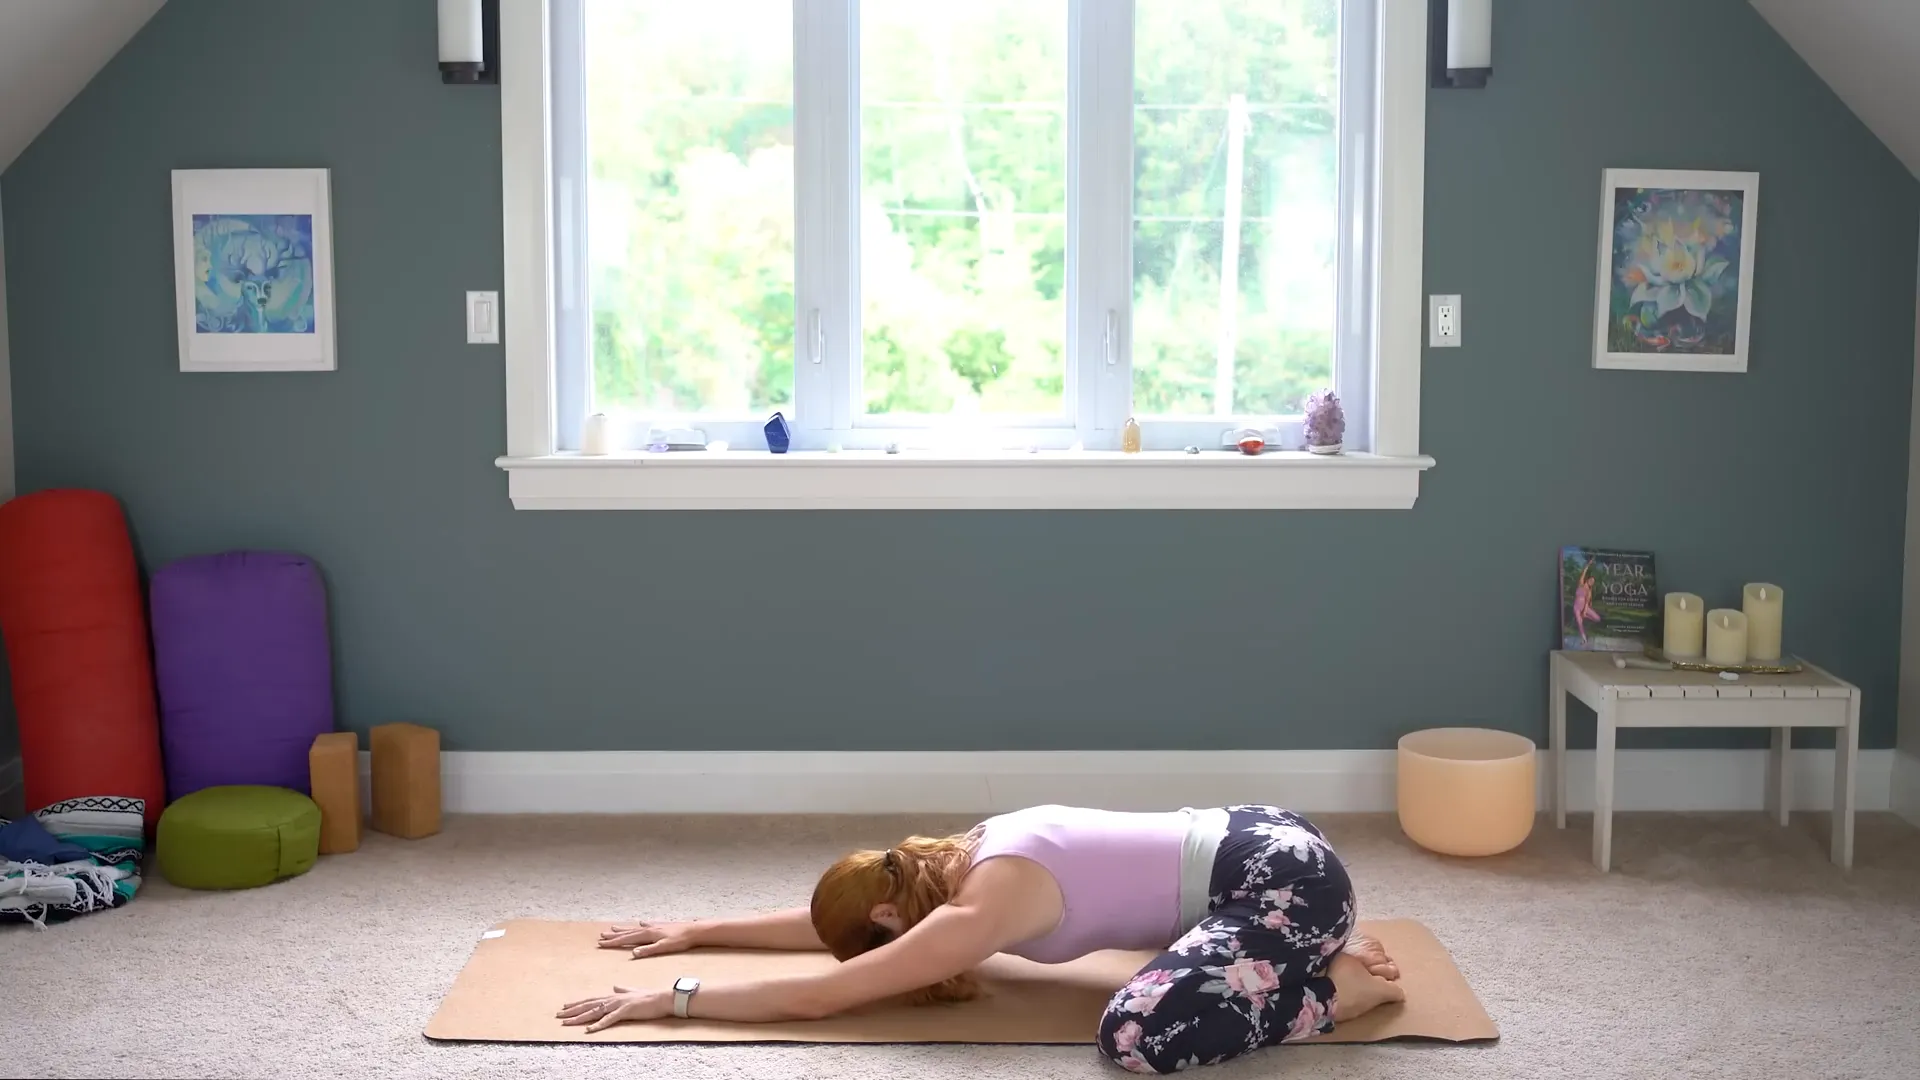
Child's Pose (Balasana) for Relaxation
The first thing you need to do is to stretch your body. Next, you can get into Pre-Church's pose or Balasana. It is a yoga posture perfect for relaxation and grounding. First, bring your feet the big toes to each other and then spread your knees widely apart. Then sit back on your heels and lower the upper part of your body down into the space that is created between your thighs.
Lay your forehead down on the mat and first let your shoulders down to relax and come out of the tension. Sit for a while with a few of the deep breaths and feel how your body becomes soft and your mind quiets. Child's Pose is a great spot to get back to your breathing and find your inner peace.

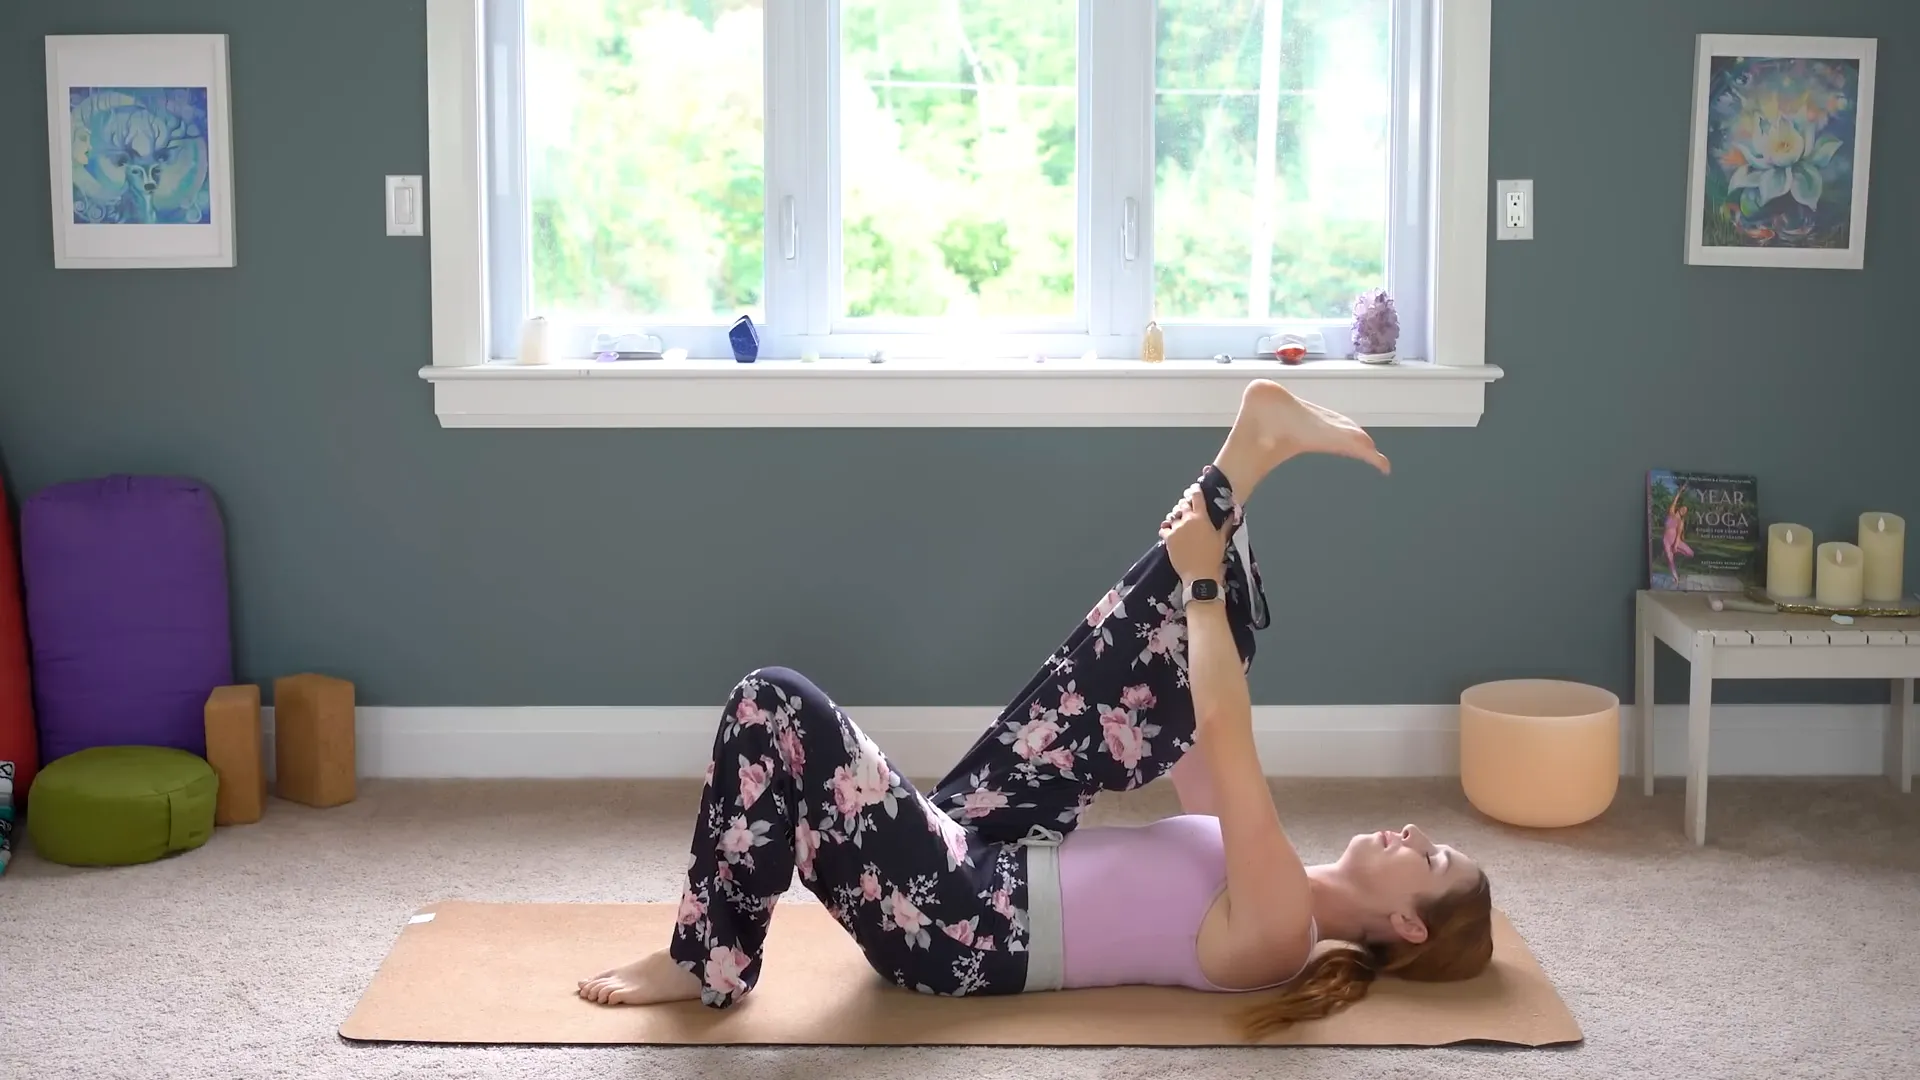
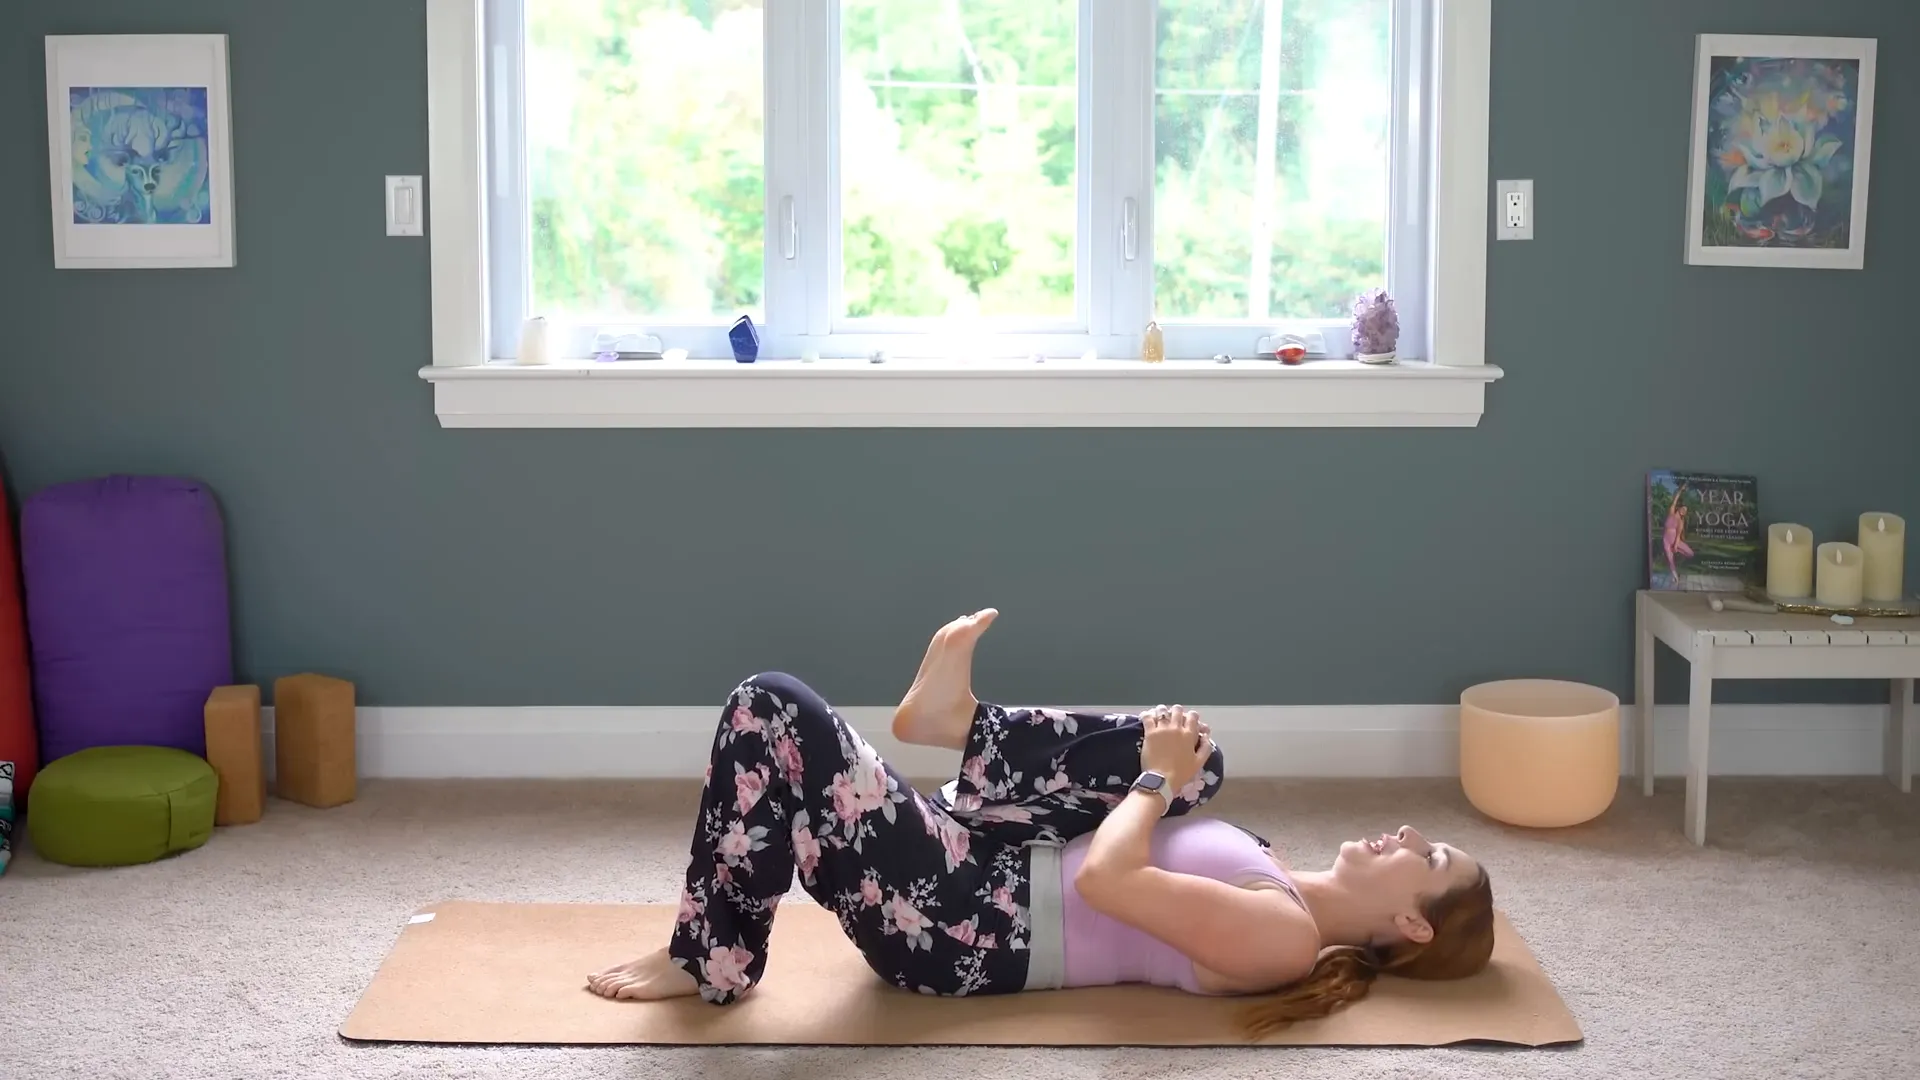
Lying Down: Knee Pulls and Stretching
Gently transitioning from your current position on Child's Pose, lift yourself up and move to your back. Bend your knees and put your feet flat on the mat. Start by pulling your right knee towards your chest and holding onto your shin or thigh. This stretch is really helpful for your lower back as it reduces the tension.
When you extend your right leg towards the sky, you must flex your foot and hold it for a few breaths. You will feel the stretching of your hamstring. Change the position and pull your left knee to the chest while doing the same stretch. The movement is so simple yet effective in boosting your flexibility and only requires a moment to prepare your muscles for deeper stretches.
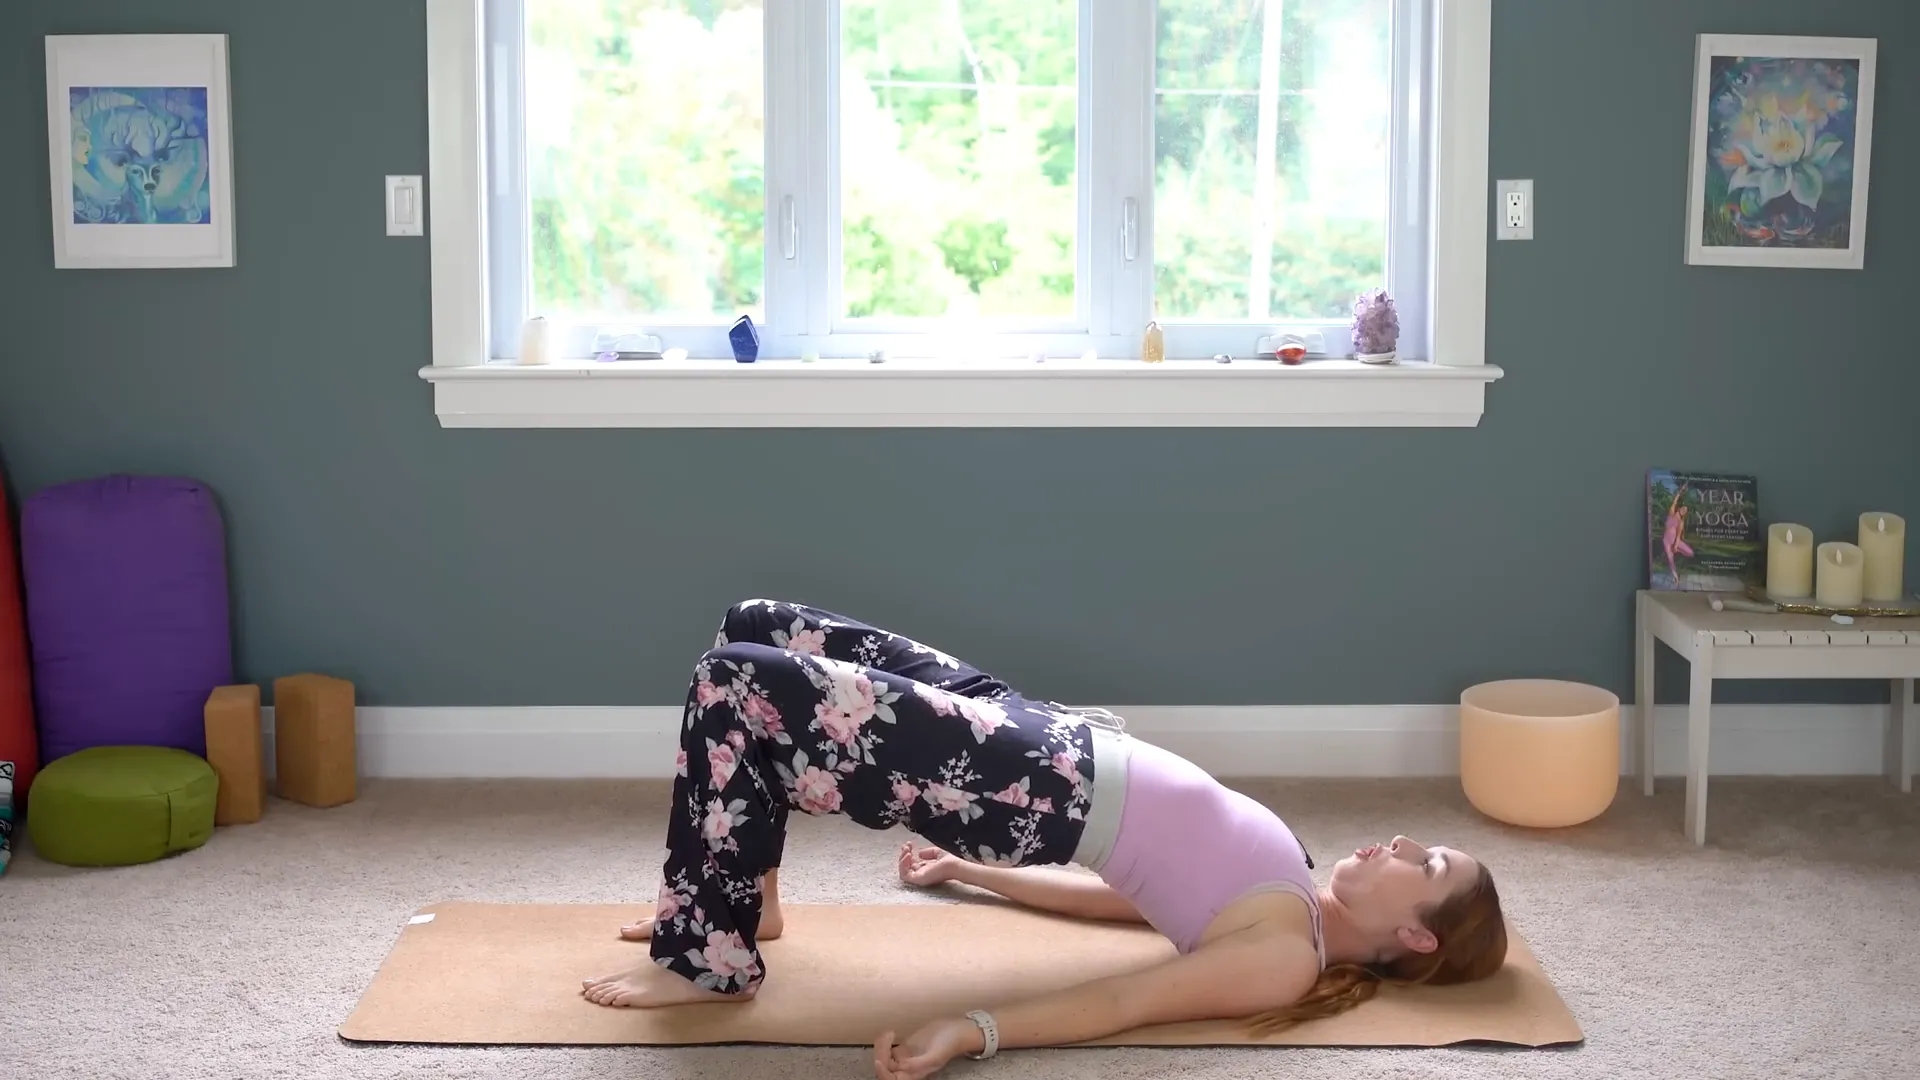
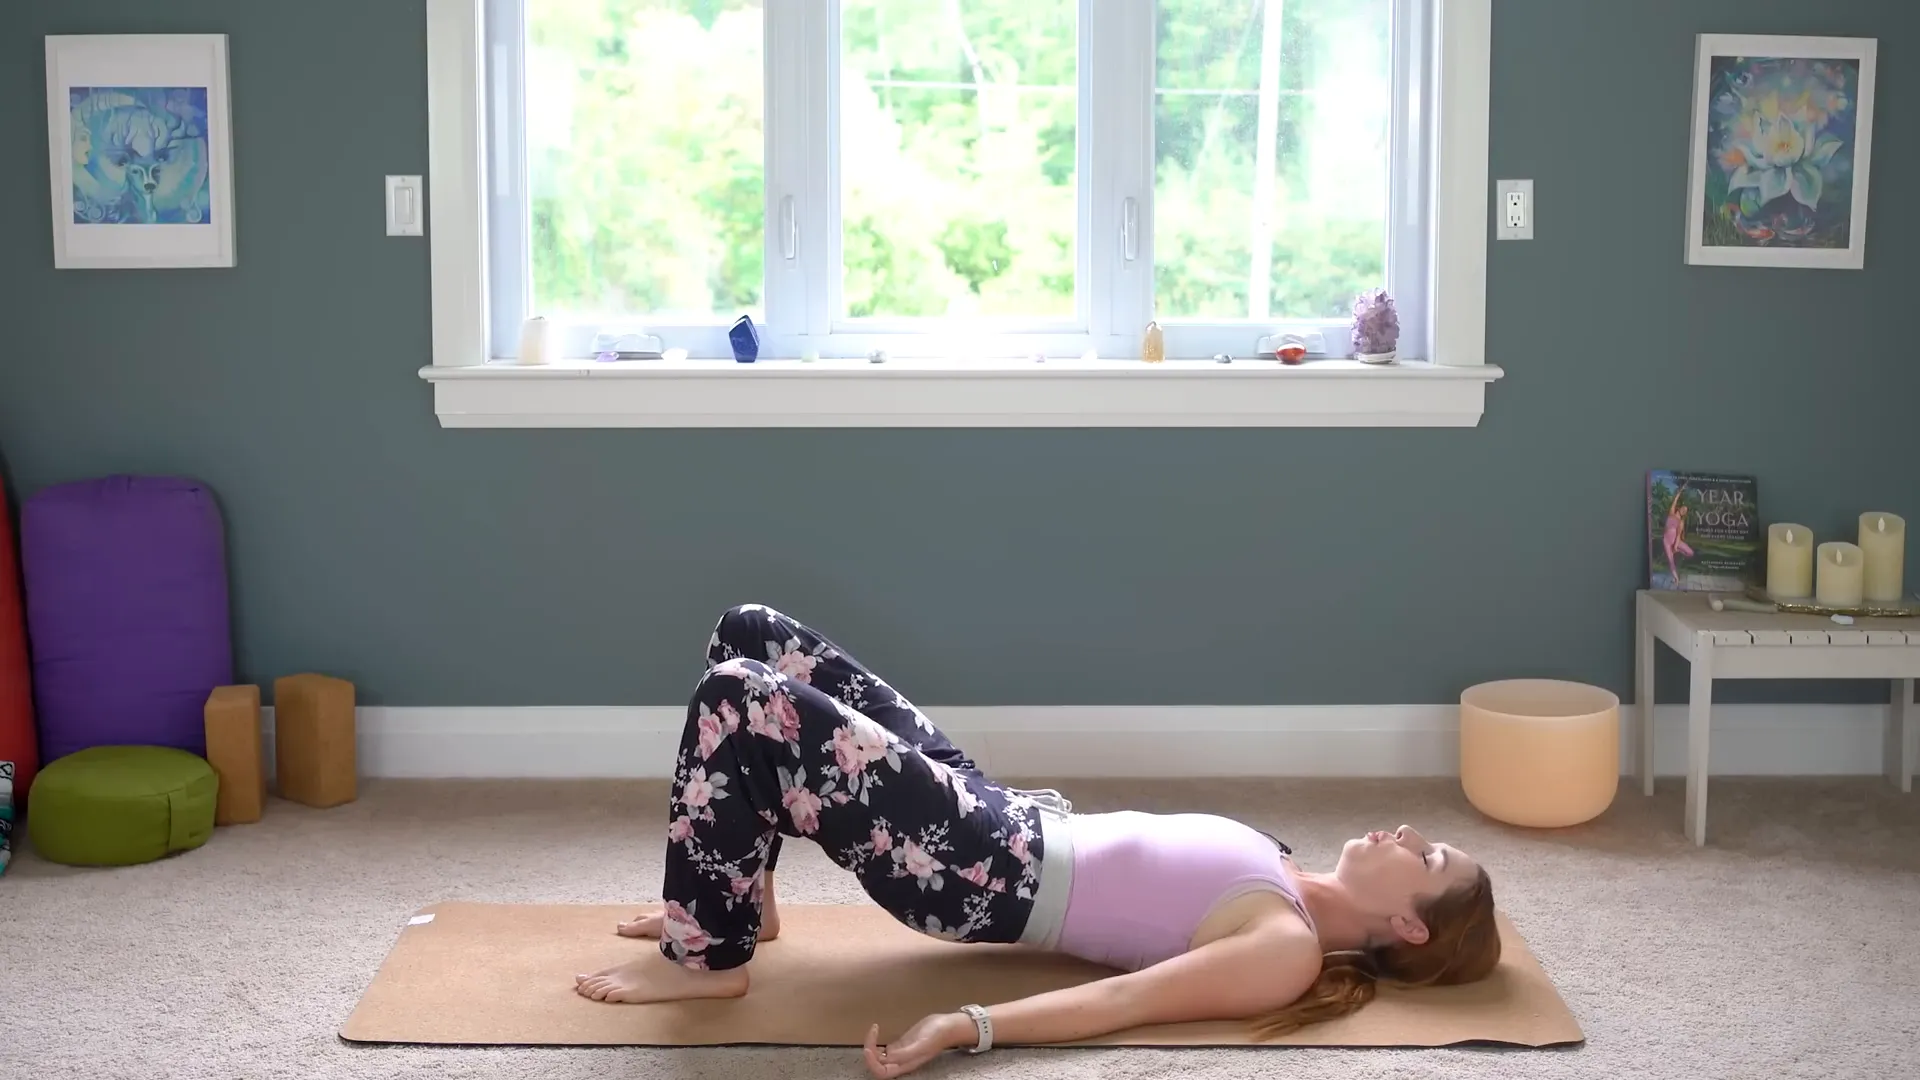
Bridge Pose (Setu Bandha Sarvangasana)
Following that, we shall transition to the Bridge Pose, which is also called Setu Bandha Sarvangasana. Your feet are flat on the floor and your knees are bent, now press your feet against the mat and lift your hips towards the ceiling. Make your shoulders remain relaxed and roll them away from your ears.
With the engagement of your glutes and inner thighs, you can form the structure and support of the asana. You could choose to clasp your hands under your back or keep your arms besides your body. In this pose, you can focus on your deep breathing, which will expand your chest and build strength in your legs. The yoga position not only increases the strength of your back but also illustrates the wide-range of the heart.
Final Stretch and Release
Following the Bridge Pose, you can gradually tone down your hips back on the mat. Give yourself a short time to perceive the ground under you. Now, let's switch to a cool stretch for the lumbar region. Bring your thighs once again to your belly and gently move from side to side.
This exercise eliminates any residual tightness in the muscles of your back. Permit your body to surrender to the mat and take in deep breaths as you get ready for the last few minutes of your exercise.
Closing the Class with Gratitude
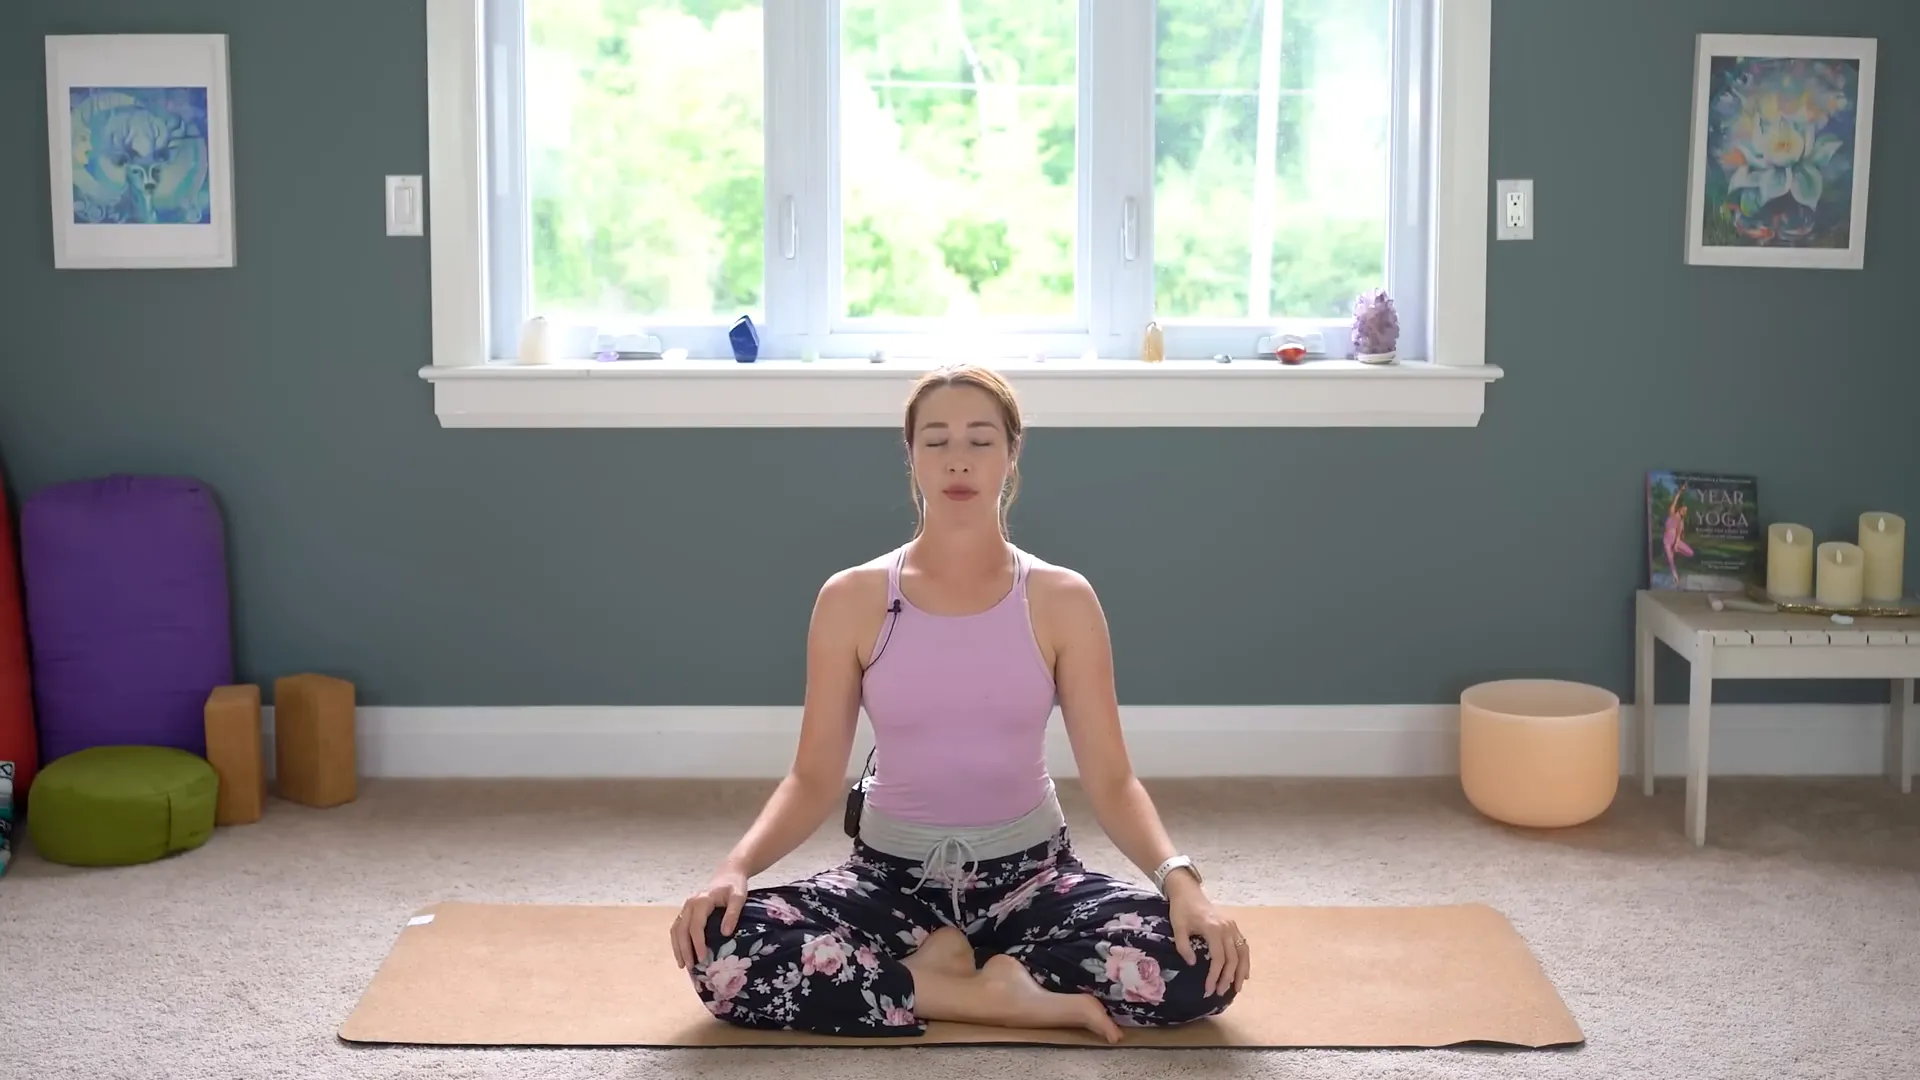
Firstly, let's adjust ourselves to a good sitting position. You may either cross your legs or sit on your heels. Then, bring your hands together in front of your heart in Anjali Mudra. After that, you can shut your eyes and think for a moment about your poise of study.
Be thankful for the self-care hours that you have spent today. Recognize the strength and the flexibility you have formed, regardless of their size. Now as we end the session, shall we both inhale deeply and gently exhale?
FAQ
What is Yoga for Beginners?
Beginner Yoga is a kind of exercise that is intended for people who are completely new to yoga or want to start it again. It emphasizes basic postures that help with building strength, flexibility, and balance.
How often should I practice yoga as a beginner?
It's recommended that a beginner should try to practice yoga 2-3 times weekly. To build strength and flexibility, you have to be consistent, and it is important to pay attention to your body and take rest when necessary.
Do I need any special equipment for Yoga for Beginners?
Essential things to do yoga are only a comfortable yoga mat. Blocks, straps, and blankets that you can use to support your practice are some of the optional props, however, they are not required for beginners.
Can I practice yoga at home?
Definitely! Doing yoga at home gives you the privilege to personalize the space that you feel relaxed and secure. Follow along with novice videos or directives that will assist you in the postures.
What should I wear for yoga practice?
Choose clothing that is comfortable, stretchy, and allows freedom of movement. It is best to avoid clothing that is extremely loose as it might obstruct your practice.
Our Top Picks - Courses & Resources
#1

Losing weight is hard. It's one of the hardest things to do, and it often feels like you're fighting a losing battle. Most people who try to lose weight will yo-yo diet for the rest of their lives.
This unique formula with Java Burn helps you burn fat faster than ever before, without all the fuss and bother of traditional diets and fitness programs.
#2

Custom meal plan service was designed to help men and women all over the world turn their lives around and take charge of their health and figure.
Tom Hunter’s program based on recent scientific studies on how gut health impacts weight loss.
They use scientific research and proven studies to create personalised Ketogenic diet plans that maximise fat burning via the correct calories and macronutrients for each individual.

Facebook Comments