Yoga For Beginners

Restorative Yoga Poses for Reflection: A Journey Inward

In this blog, we explore restorative yoga poses for reflection that help you retreat inward, fostering a deeper connection with your mind, body, and spirit. Join me as we navigate through calming postures designed to create a sense of clarity and allow for meaningful self-reflection.The content of this blog post is curated from this video: 15 Min Relaxing Yoga | Restorative Yoga for Reflection. Yoga with Allie Van Fossen offers a holistic approach to yoga, blending body, mind, and soul practices to help you transform your life on and off the mat—definitely worth checking out!

Table of Contents

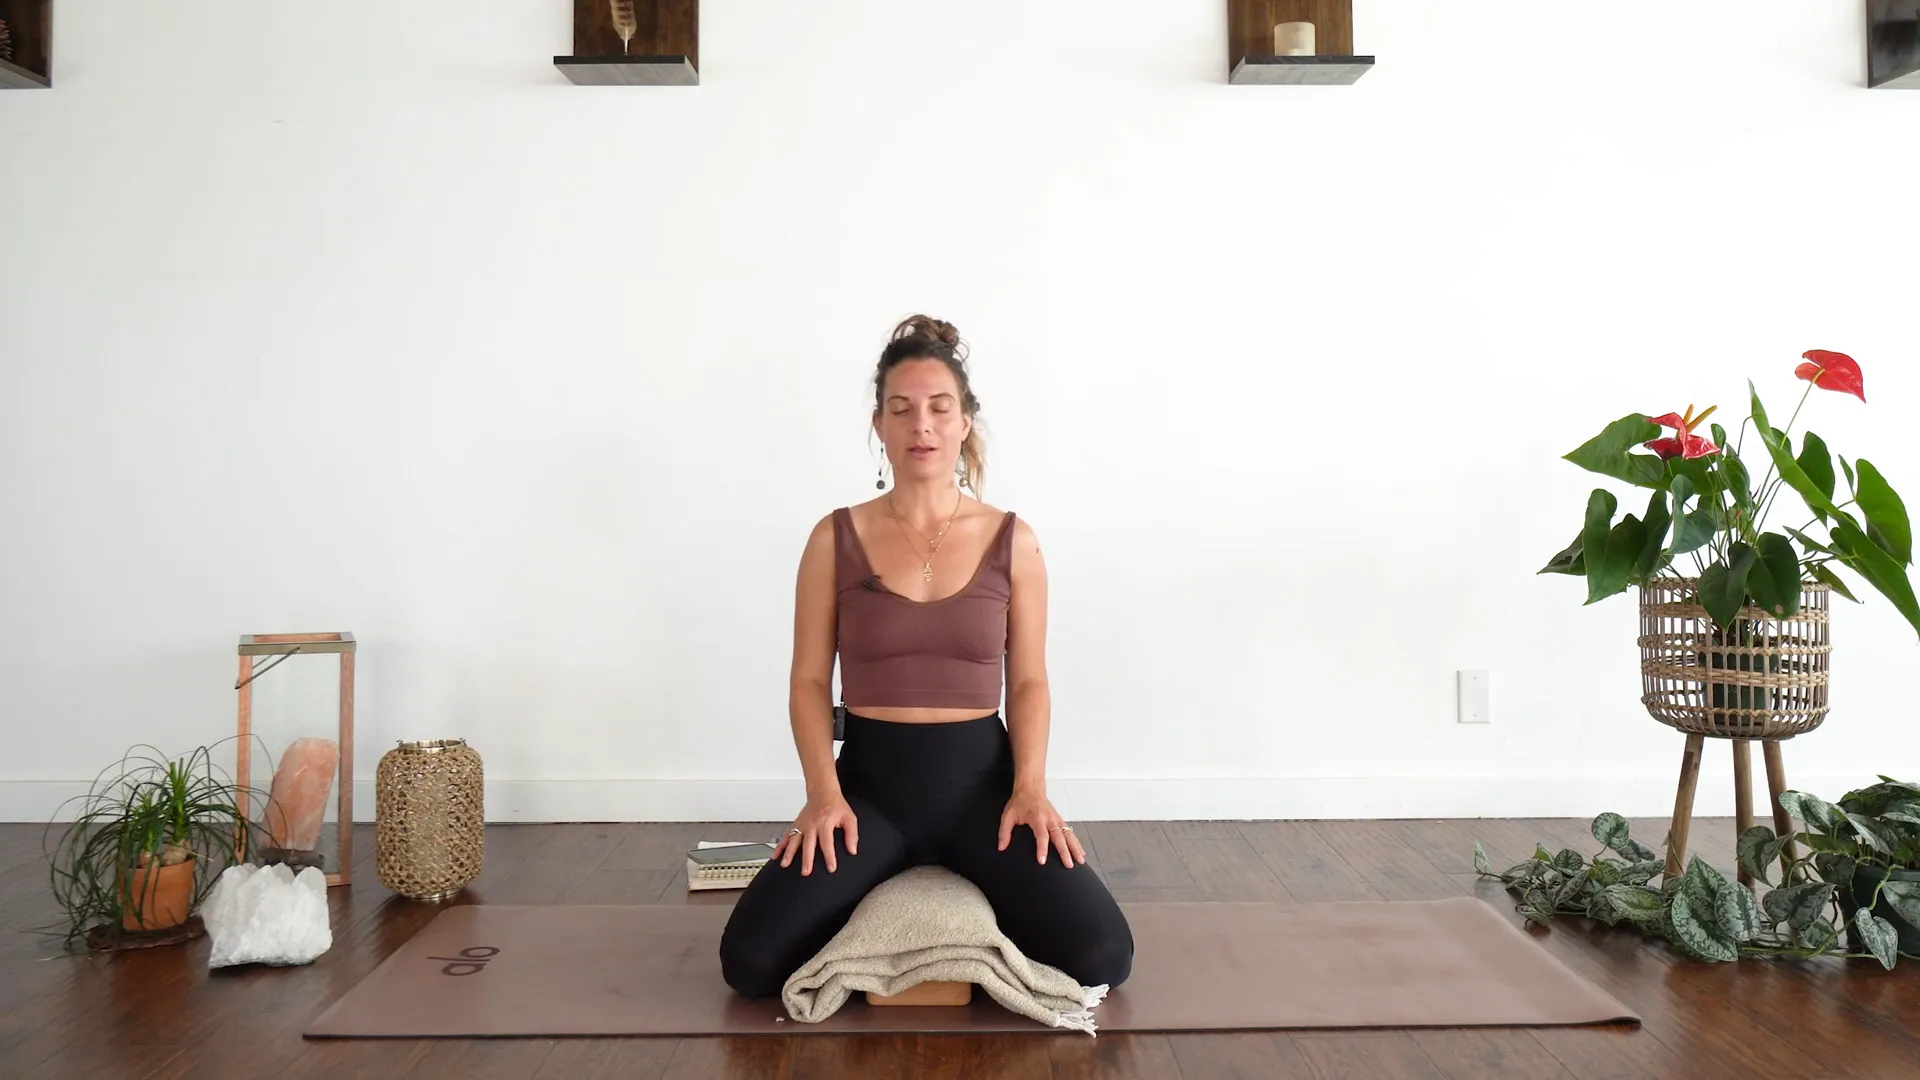
Welcome to Your Practice

Welcome to your mat, a sacred space for exploration and reflection. Here, we cultivate a practice that nurtures not just the body, but also the mind and spirit. Embrace this moment as an invitation to delve deeper into yourself. Allow the energy of your surroundings to guide you inward, where true transformation begins.

The Importance of Forward Folds

Forward folds are more than mere physical postures; they’re a powerful tool for introspection. By bending forward, we symbolically release the weight of our thoughts and worries, creating a safe environment for reflection. This gentle act encourages us to retreat from the chaos of our external world.

  • Calming: Forward folds activate the parasympathetic nervous system, promoting relaxation.
  • Nurturing: These poses allow us to connect with our inner selves, fostering self-compassion.
  • Act of Surrender: In surrendering, we create space for acceptance and understanding.

Surrendering to Reflection

As you move through your practice, focus on one element of your life that deserves your attention. It might be an opportunity waiting to unfold or an obstacle that needs addressing. Acknowledge its presence and invite it into your awareness. This is your moment to explore the depths of your feelings and thoughts.

Ask yourself, “Why is this important?” Engage with this question, allowing it to guide your exploration. What emotions arise? What insights surface? Let this inquiry unfold naturally, without judgment.

Gathering Your Props

Before we begin, it’s helpful to gather props that will support your practice. If you have two yoga blocks, they will enhance your experience, but don’t worry if you don’t. You can still enjoy the benefits of restorative yoga without them. Props allow for greater comfort and accessibility, making it easier to focus on your reflections.

Gathering yoga props for practice

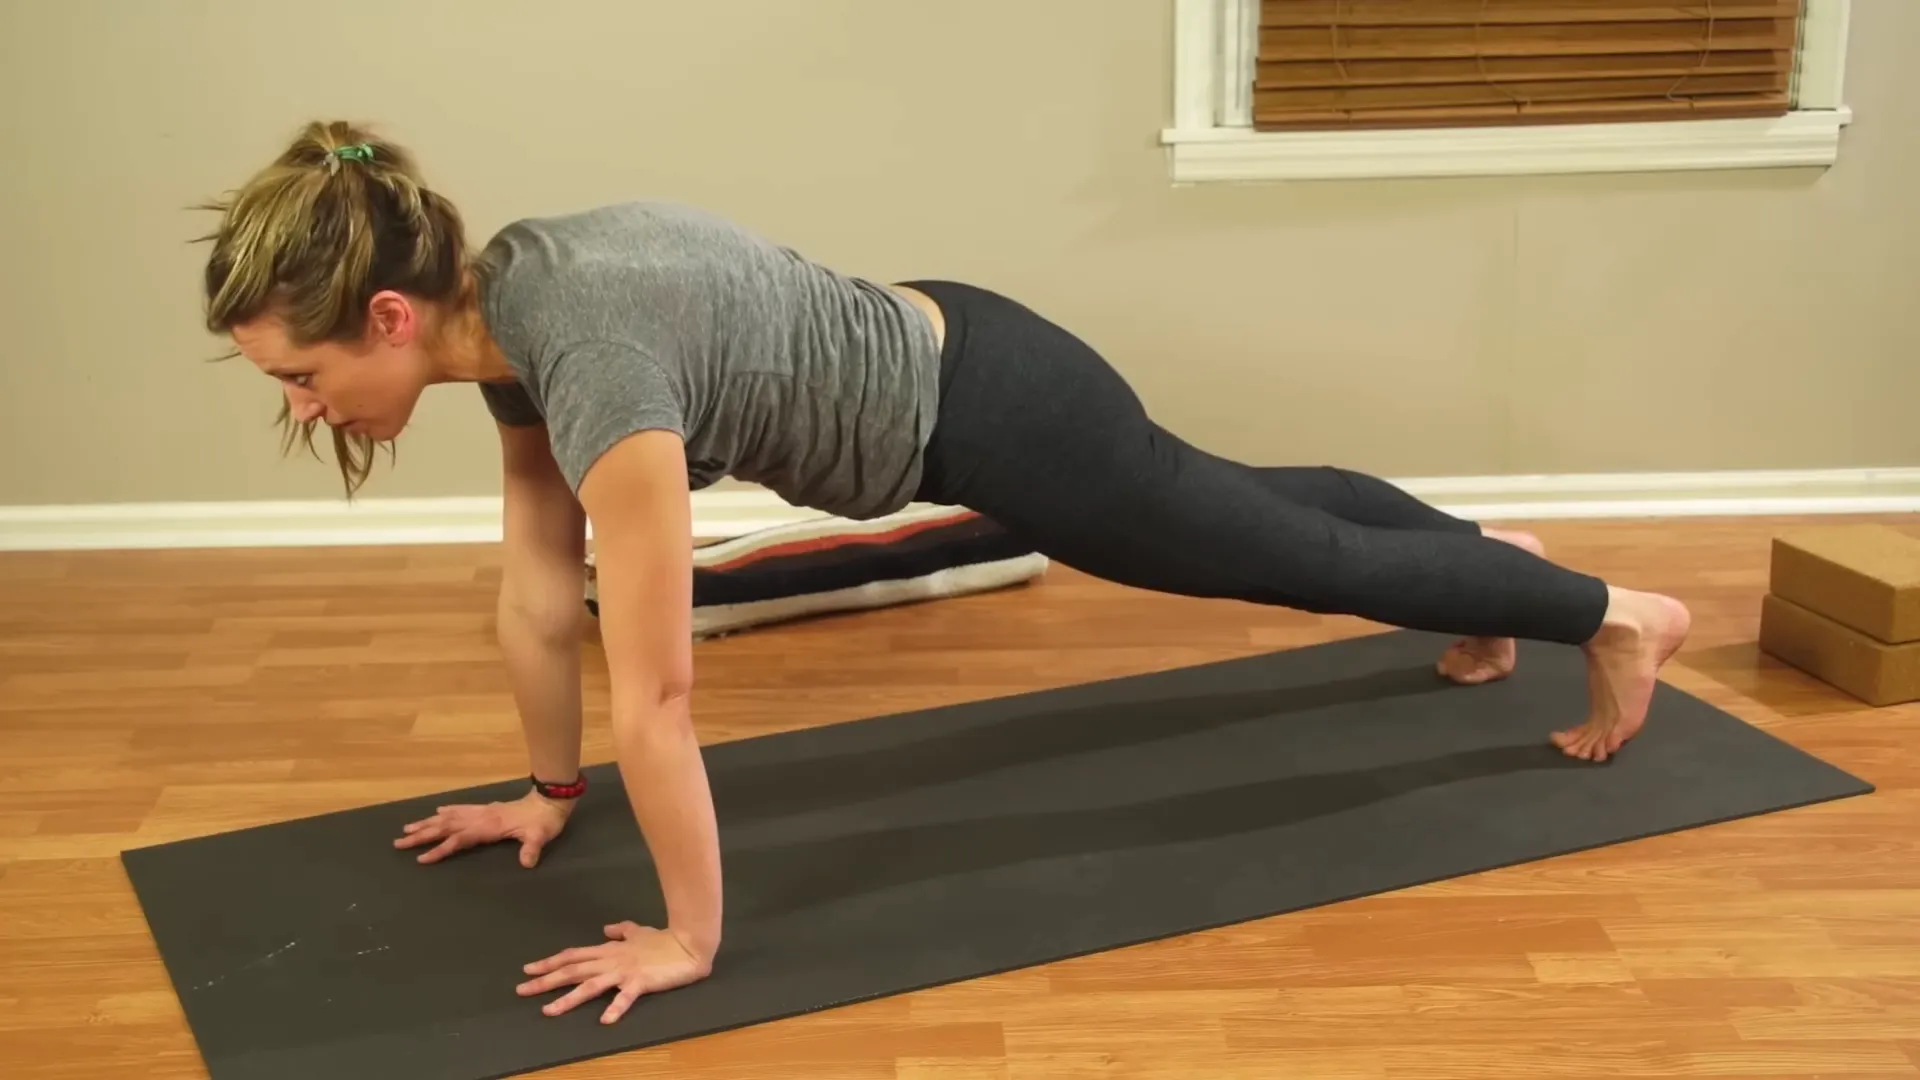
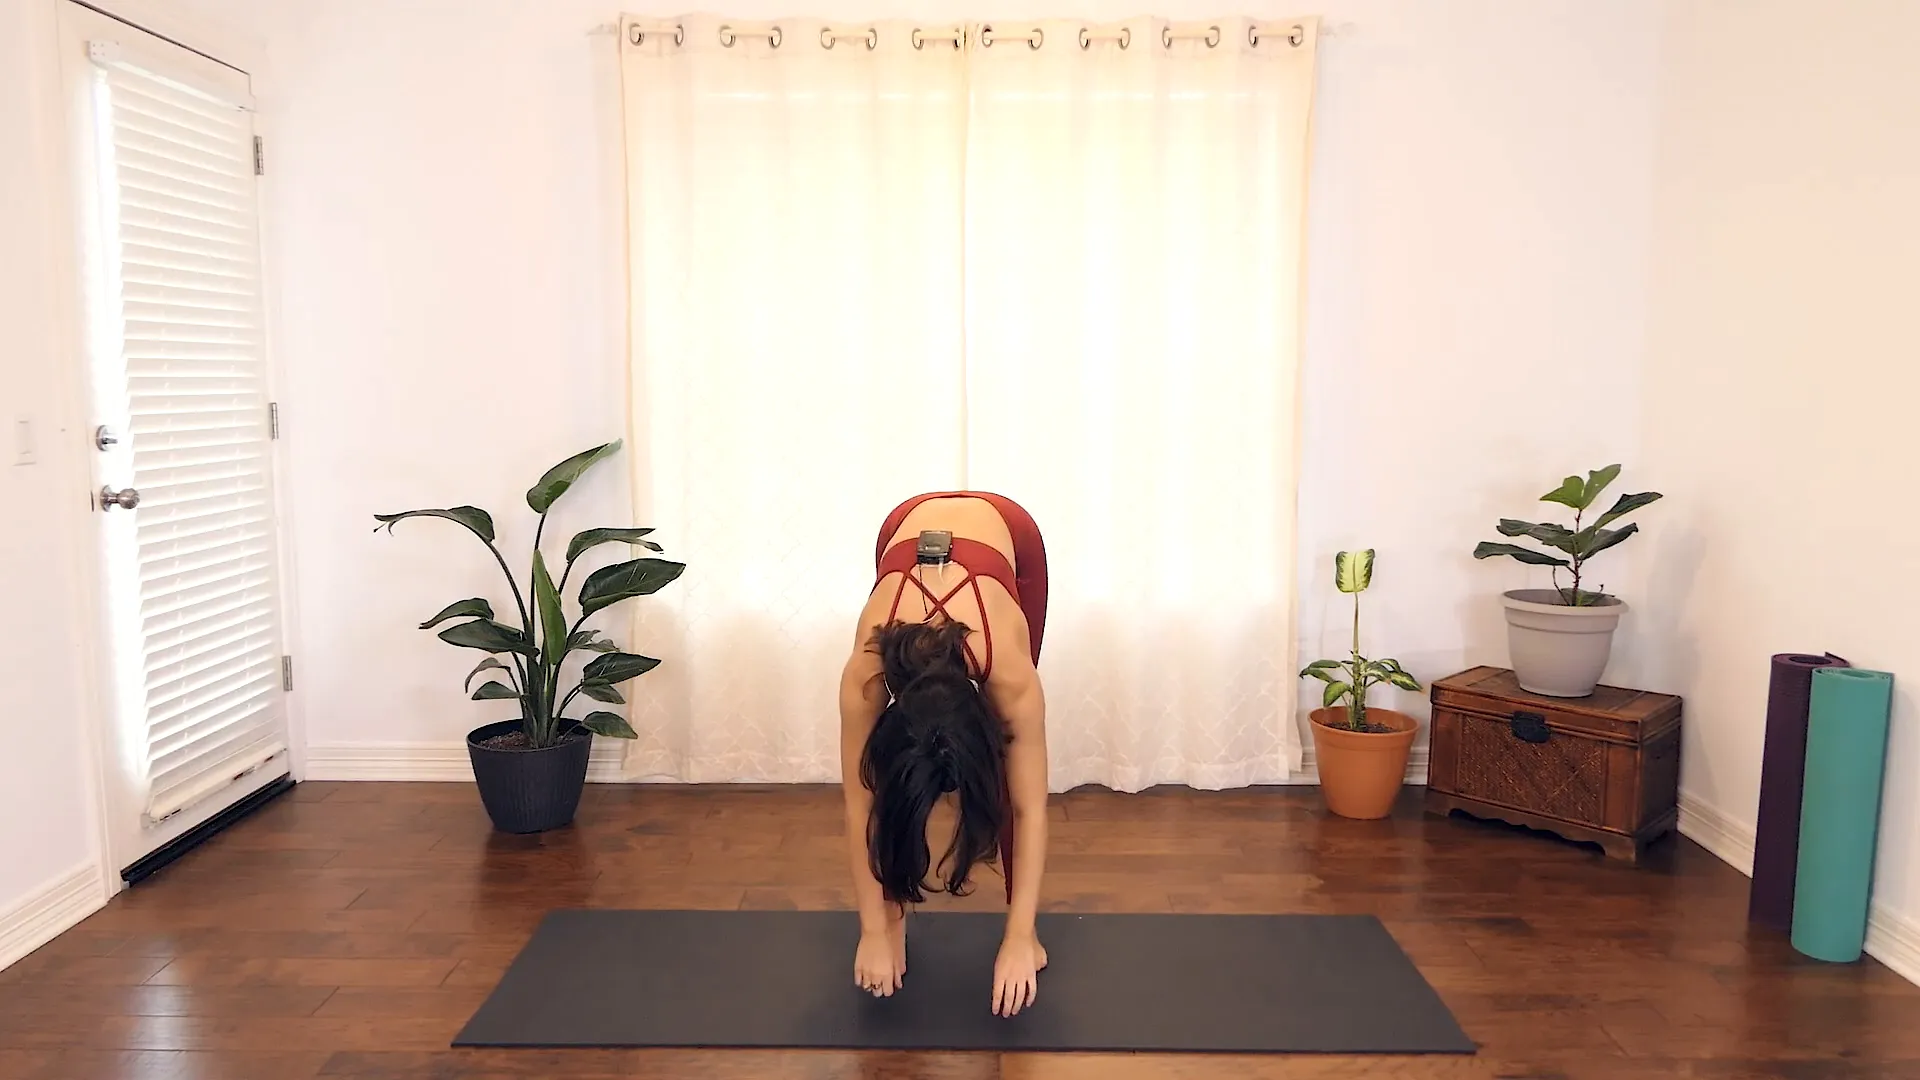
Starting with Uttanasana

Let’s begin with Uttanasana, or the Standing Forward Fold. This pose sets the tone for our reflective practice. Bend your knees generously, allowing your torso to drape forward. If you have blocks, rest your forearms on them, creating a stable base. This position encourages a gentle release of tension.

As you settle into this pose, bring the element of reflection into your awareness. Why does it matter? Spend a few breaths contemplating this question, allowing your thoughts to flow without restraint.

Practicing Uttanasana with blocks

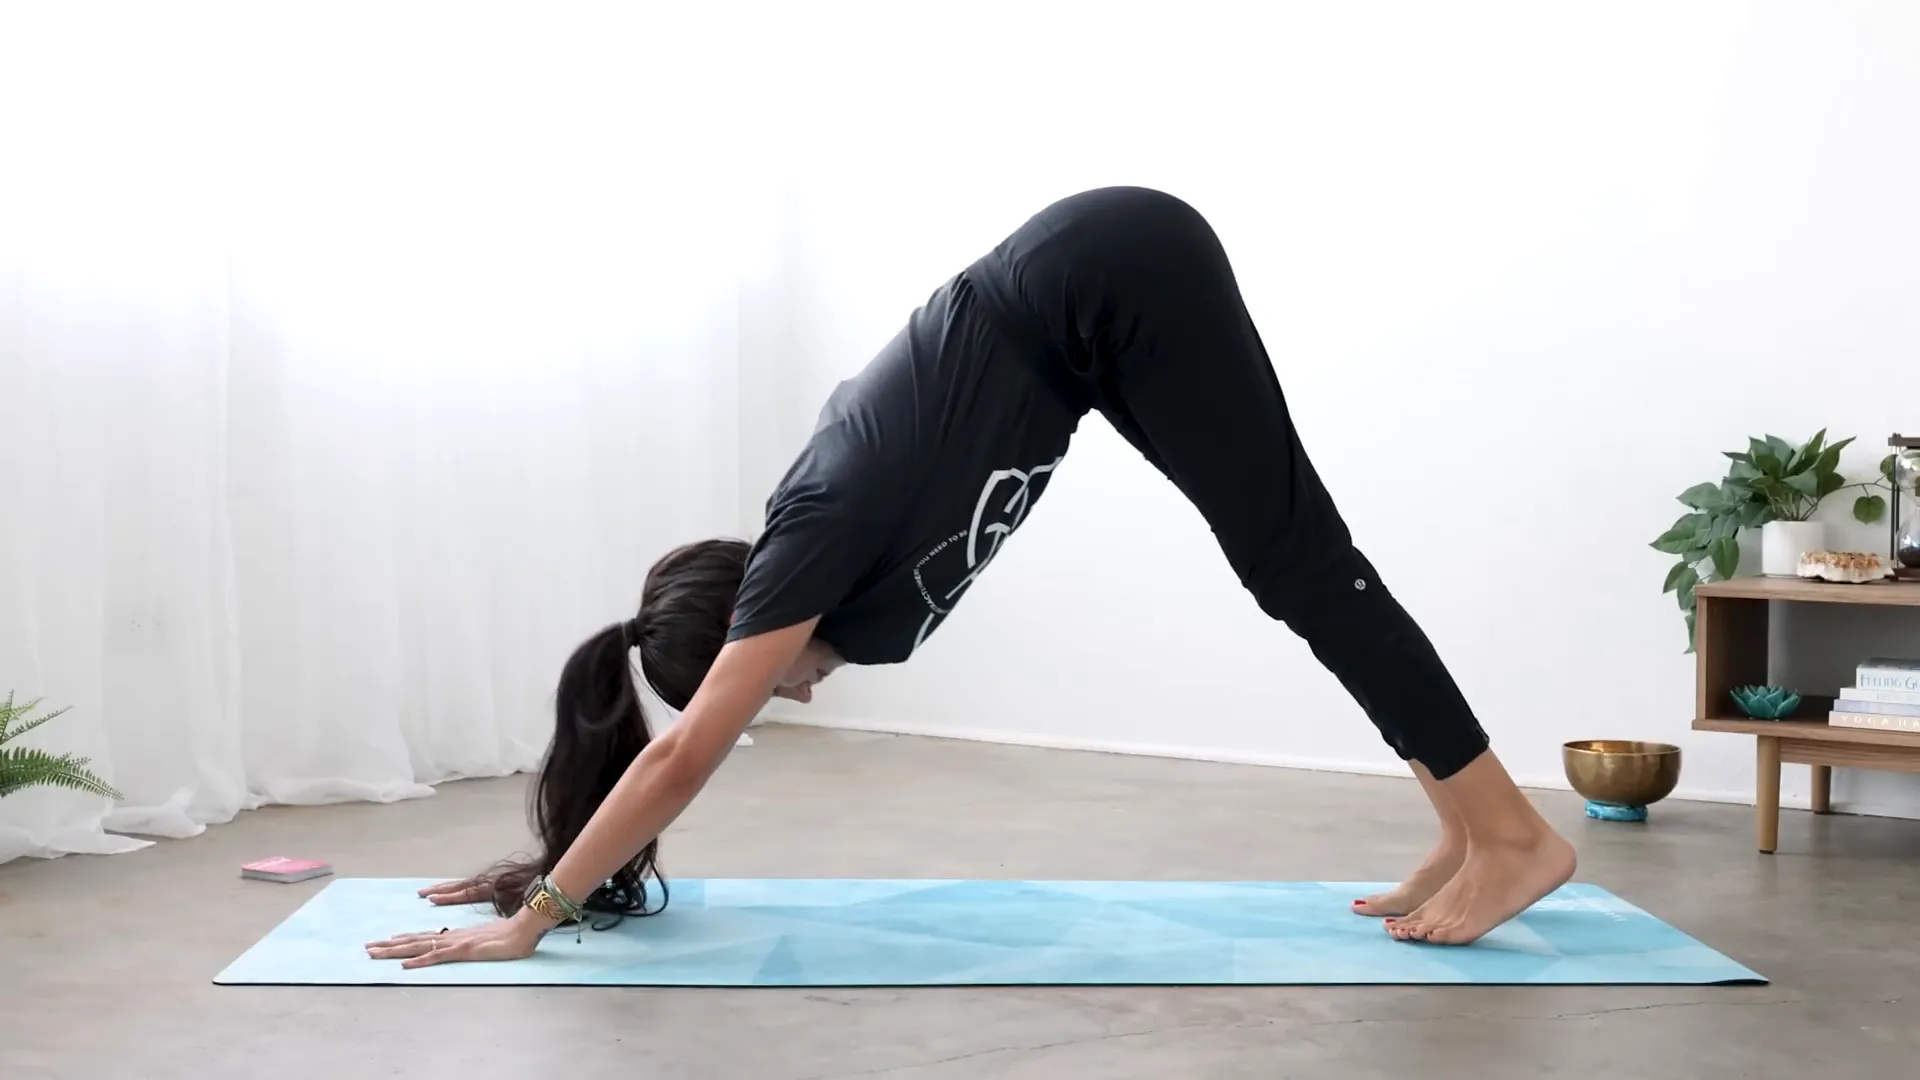
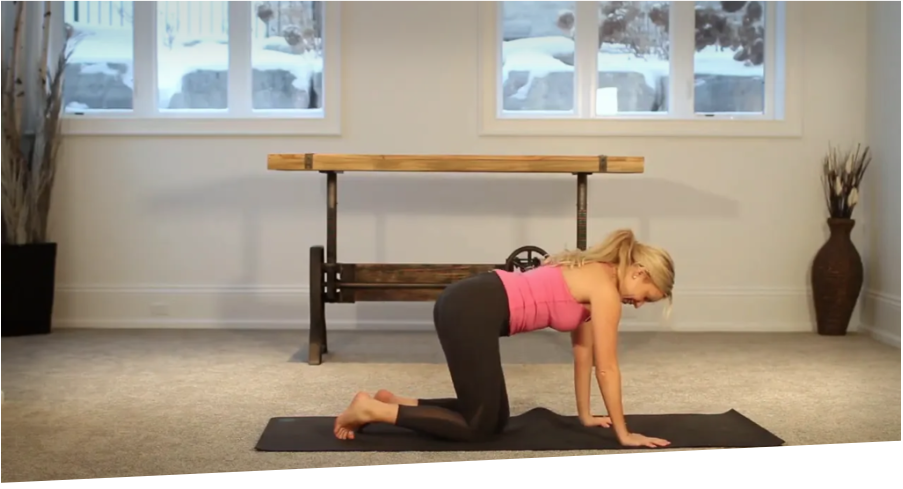
Downward Facing Dog: A Moment of Stillness

Transition into Downward Facing Dog, a pose that encourages grounding and stability. Place one block off to the side and rest your head on the remaining block if you’re using one. This pose invites you to connect with your breath as you create space for introspection.

Maintain a generous bend in your knees, which allows your sacrum to rise towards the ceiling. Here, reflect on the thoughts that arise. There’s no need to overanalyze—simply allow whatever surfaces to be part of your journey.

Practicing Downward Facing Dog

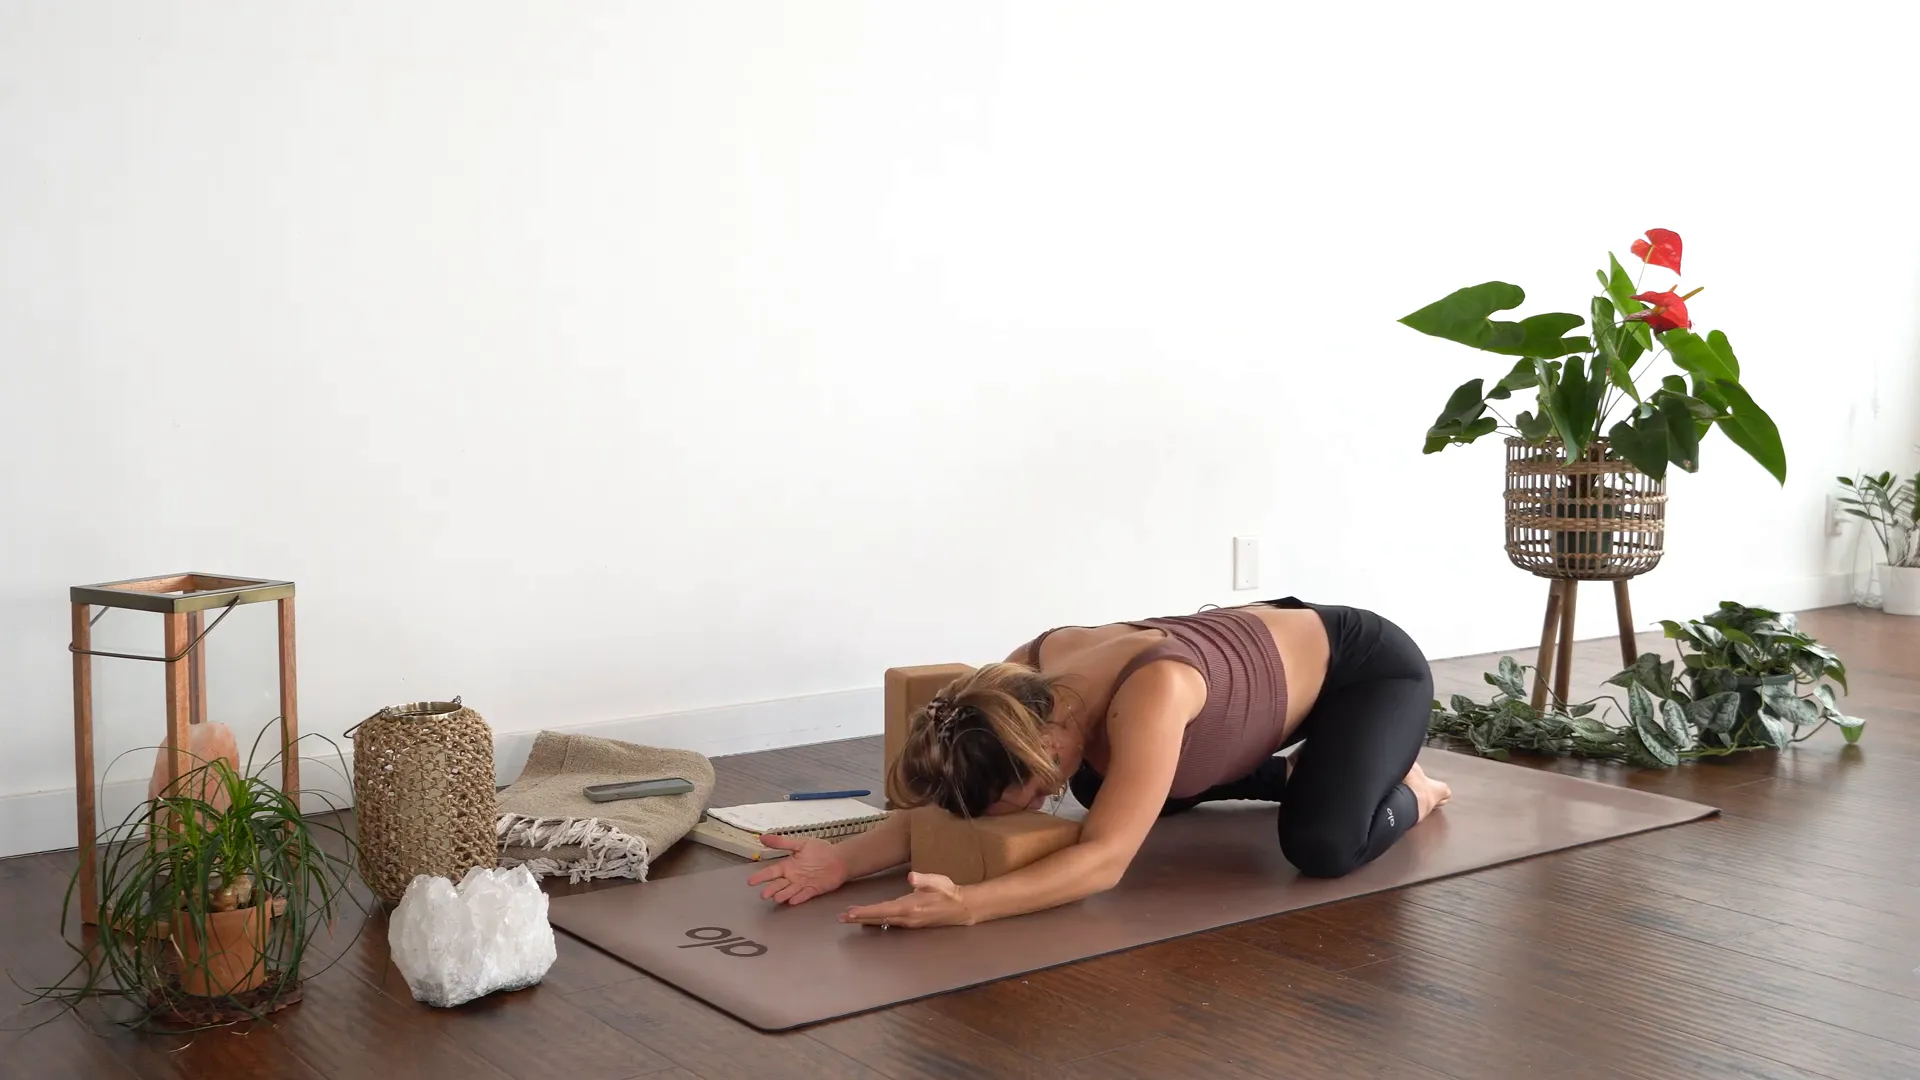
Child’s Pose: Embracing Stability

From Downward Facing Dog, soften your knees and transition into Child’s Pose. If you have a block, place it under your forehead for added comfort. This pose symbolizes safety and stability, allowing you to connect with your innate wisdom.

As you settle into Child’s Pose, consider what it means to receive. Are you open to the insights that come from within? Allow this moment to be a gentle reminder of your strength and trust in the process.

Practicing Child's Pose with a block

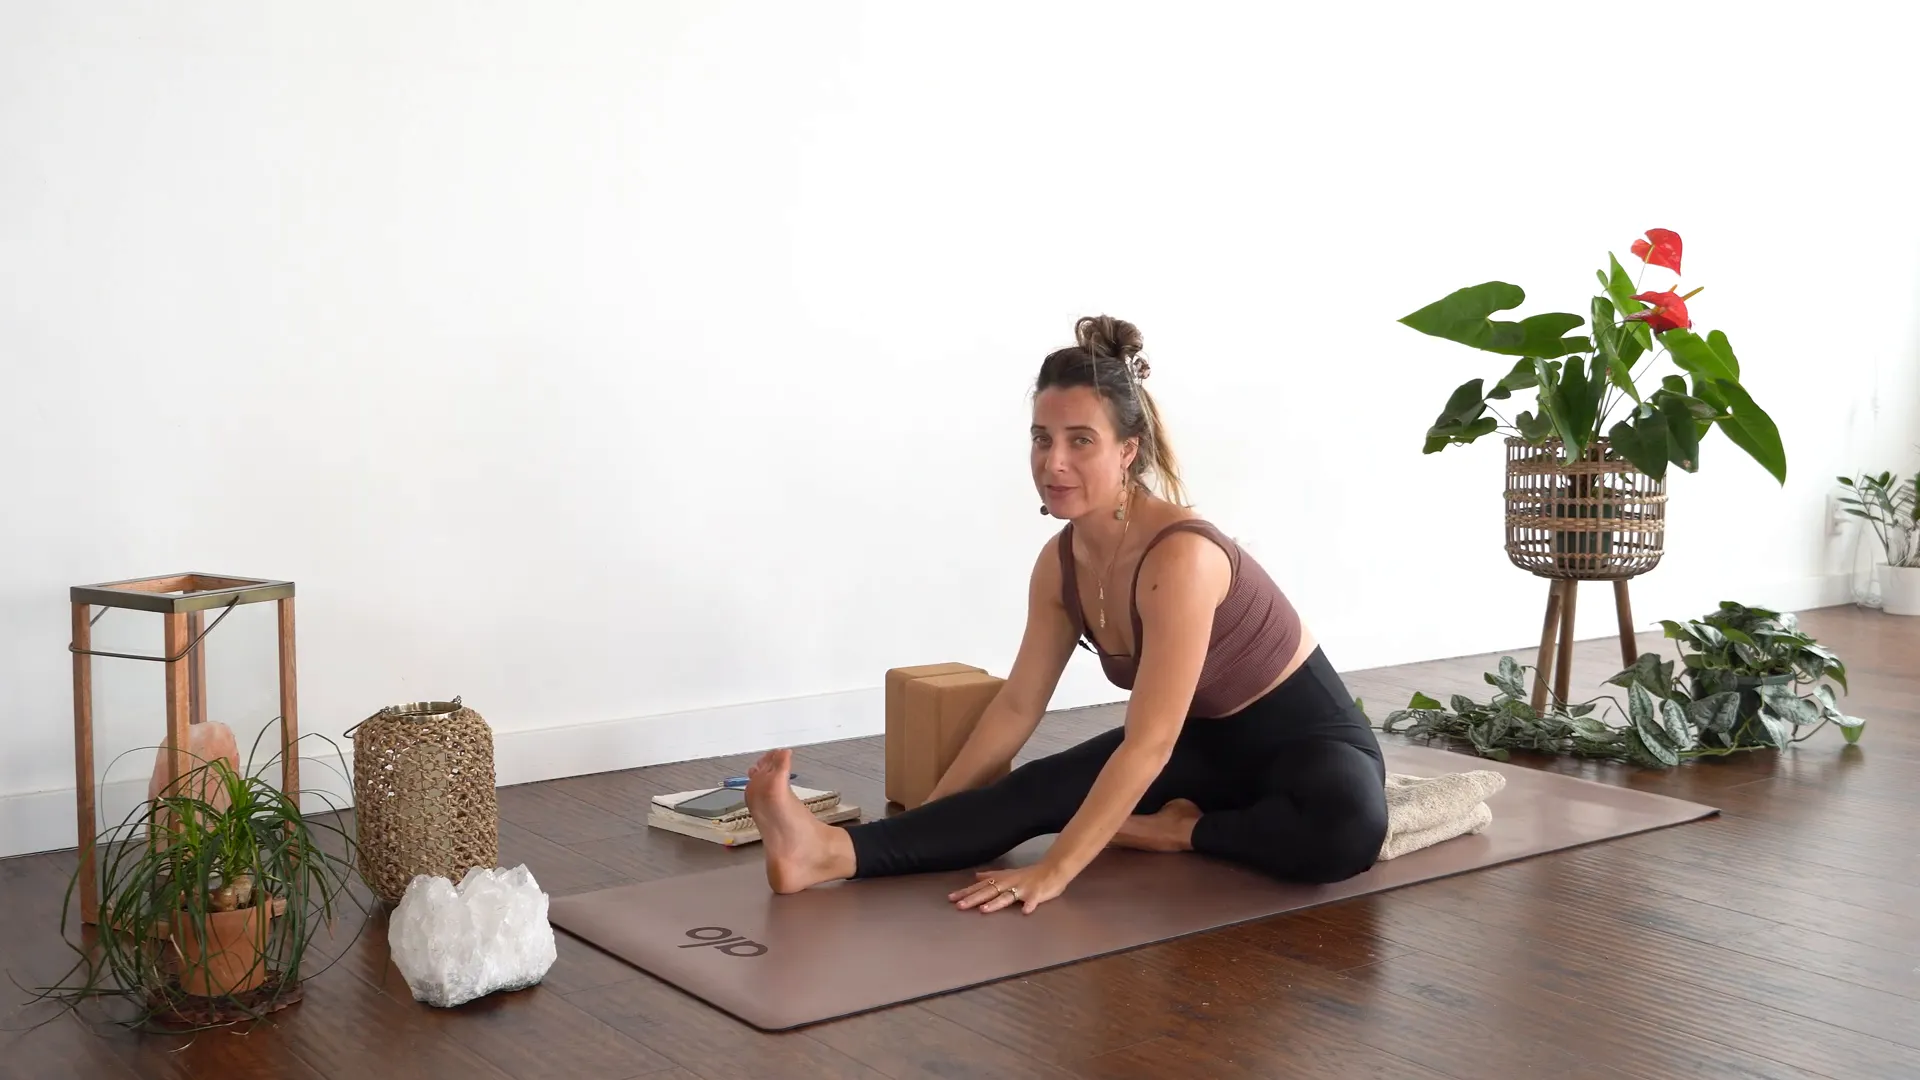
Janu Sirsasana A: Finding Your Depth

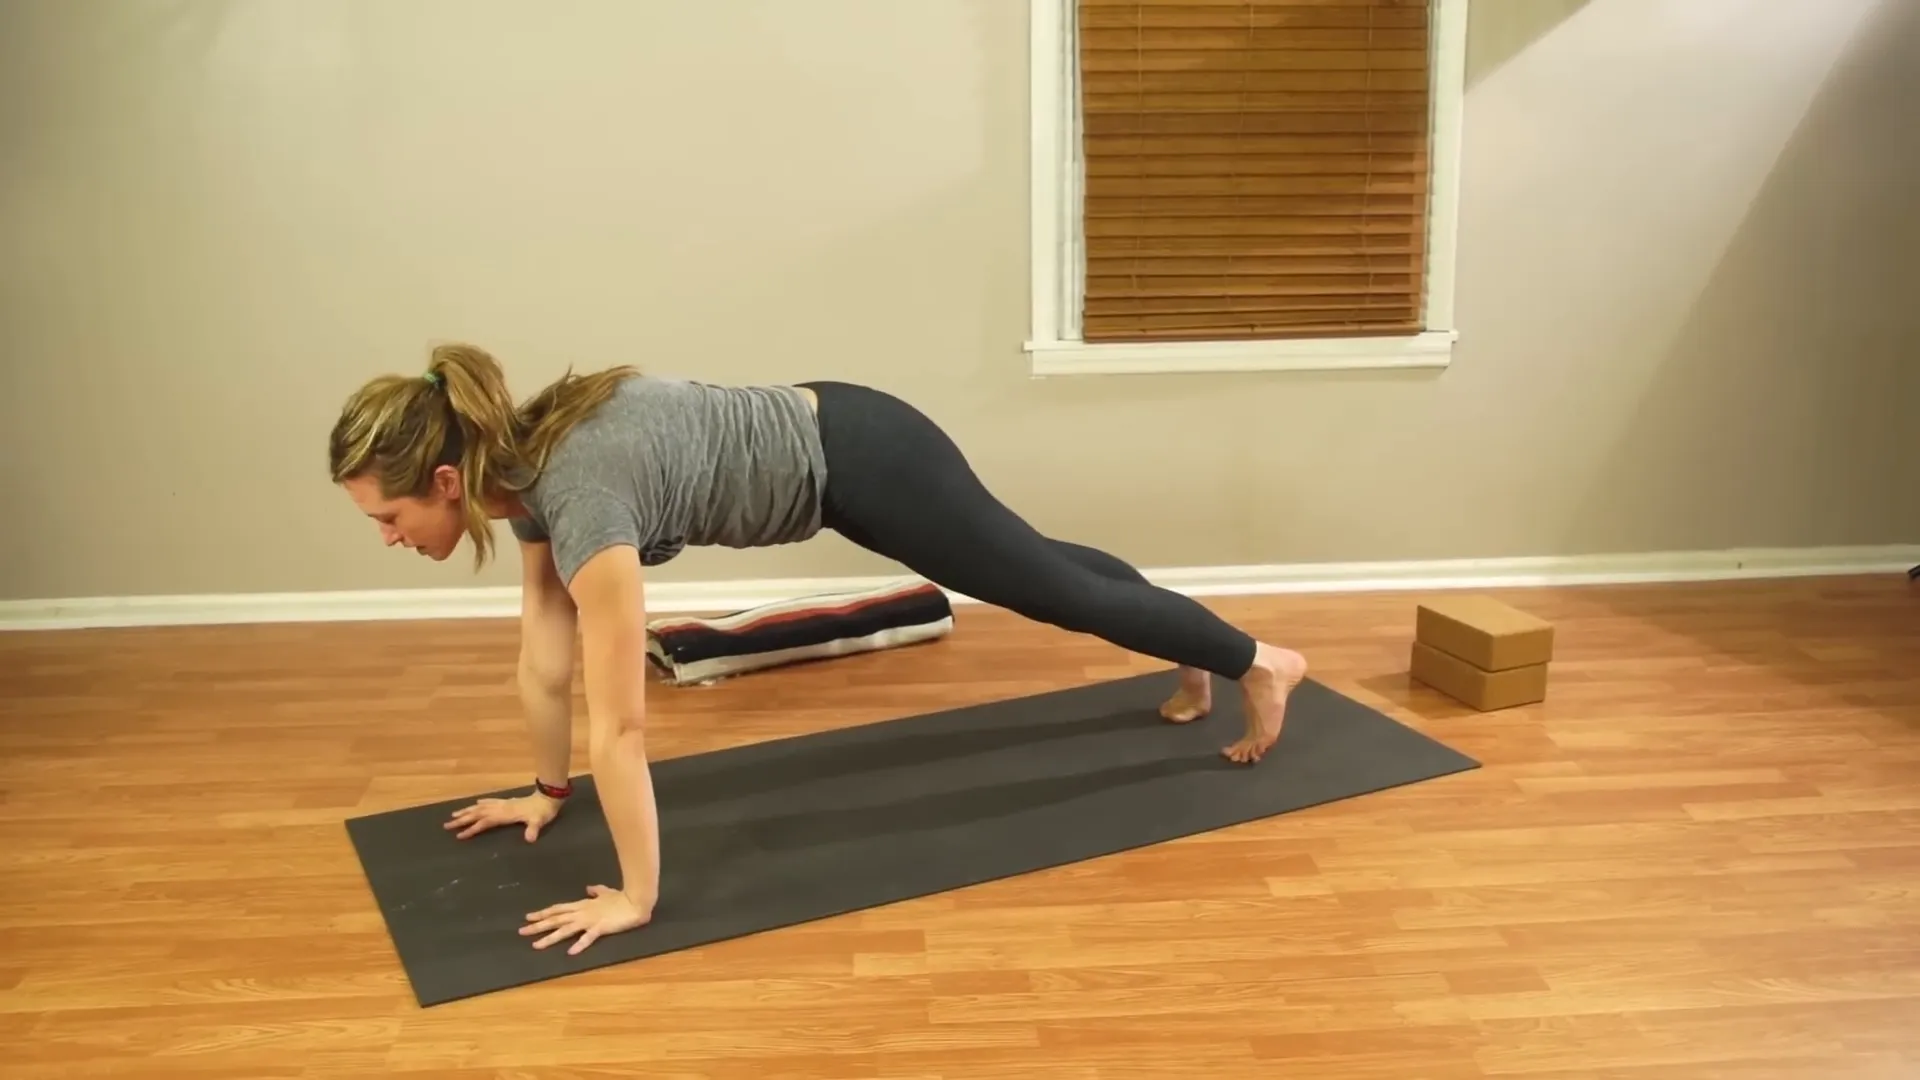
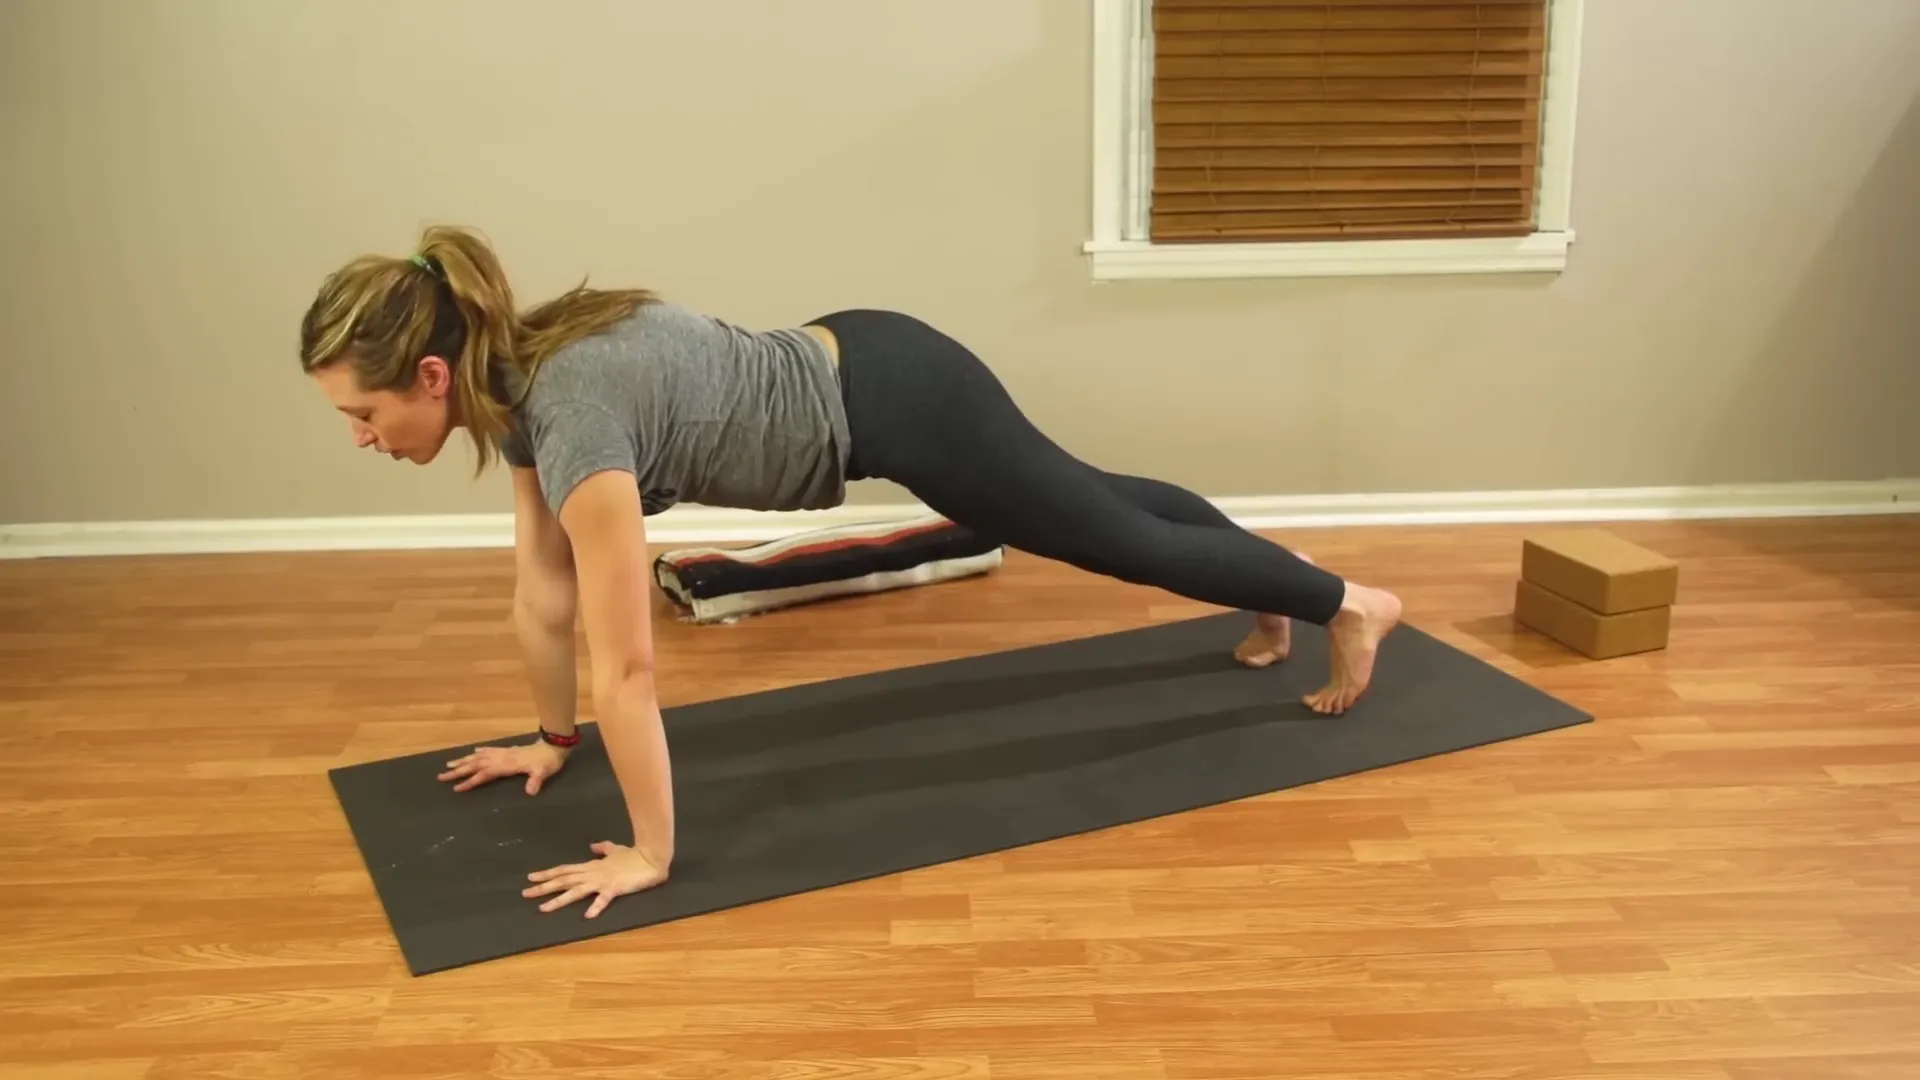
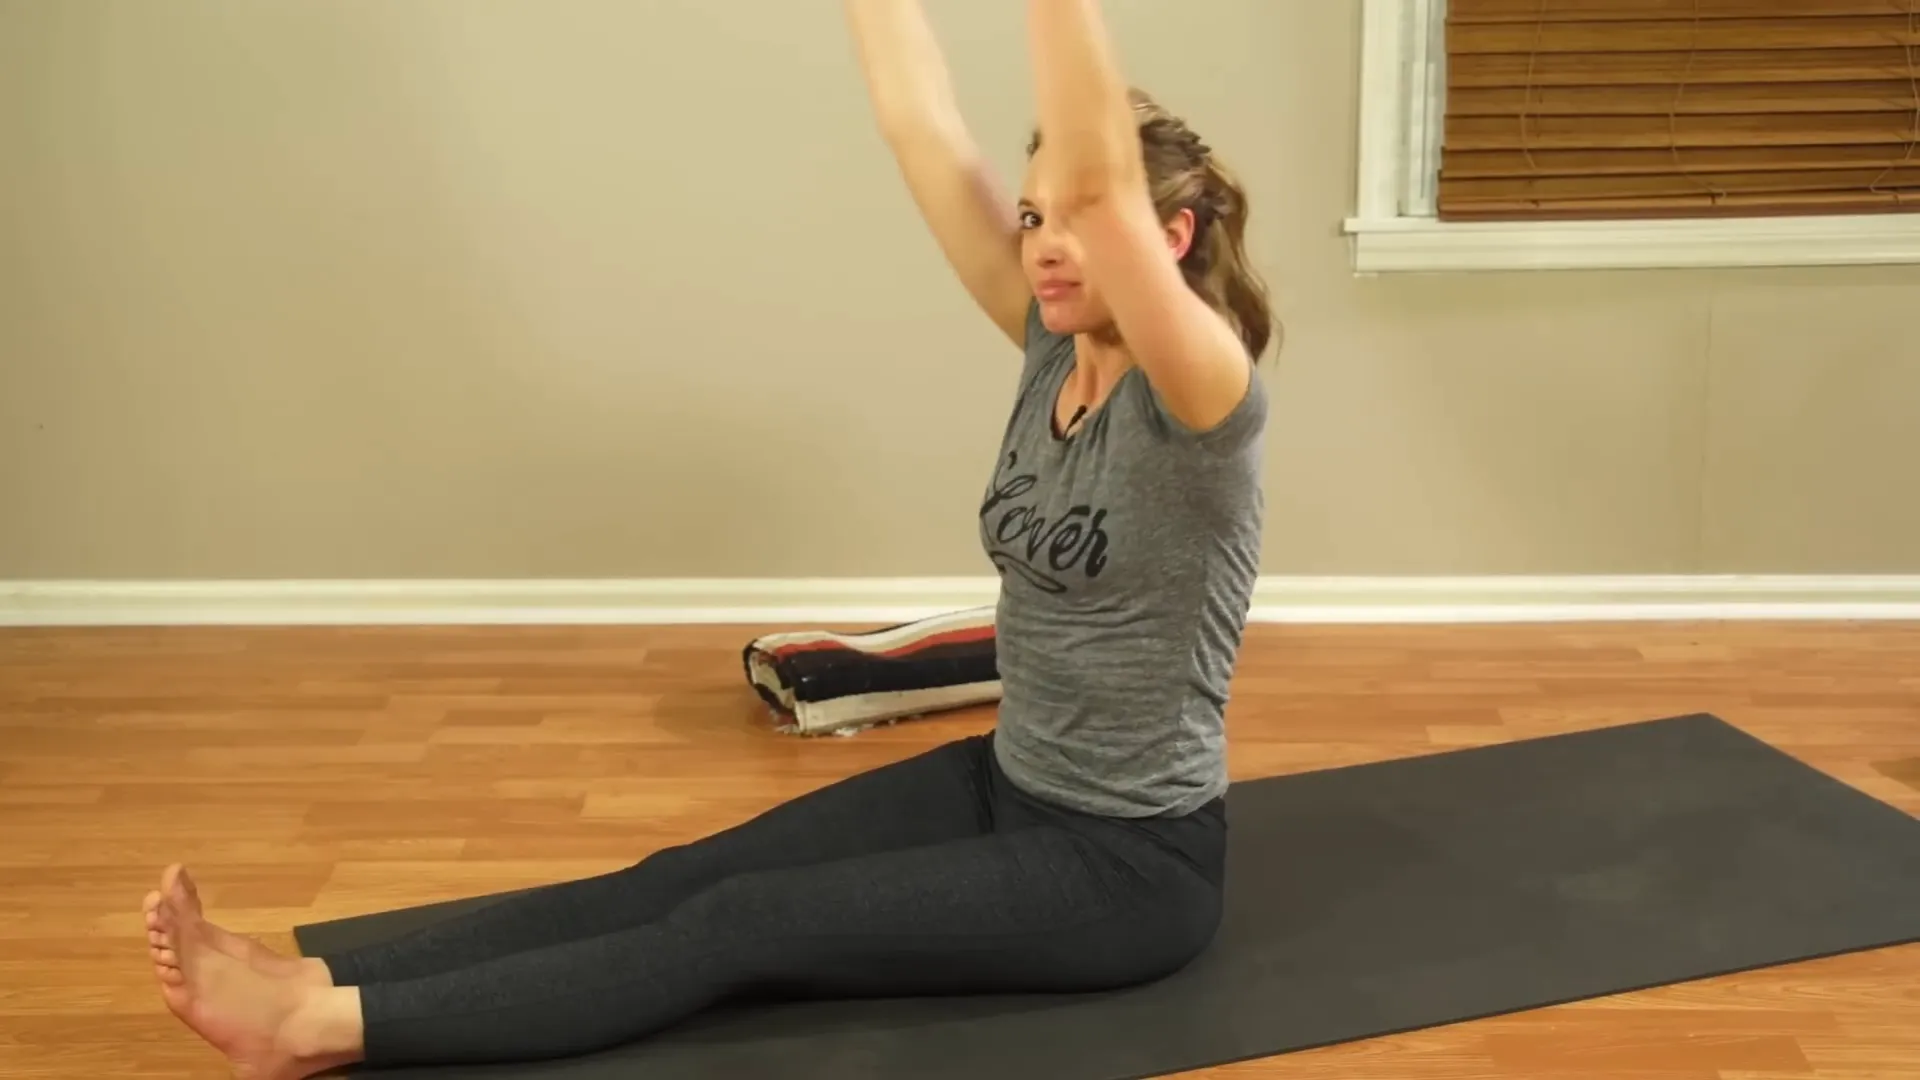
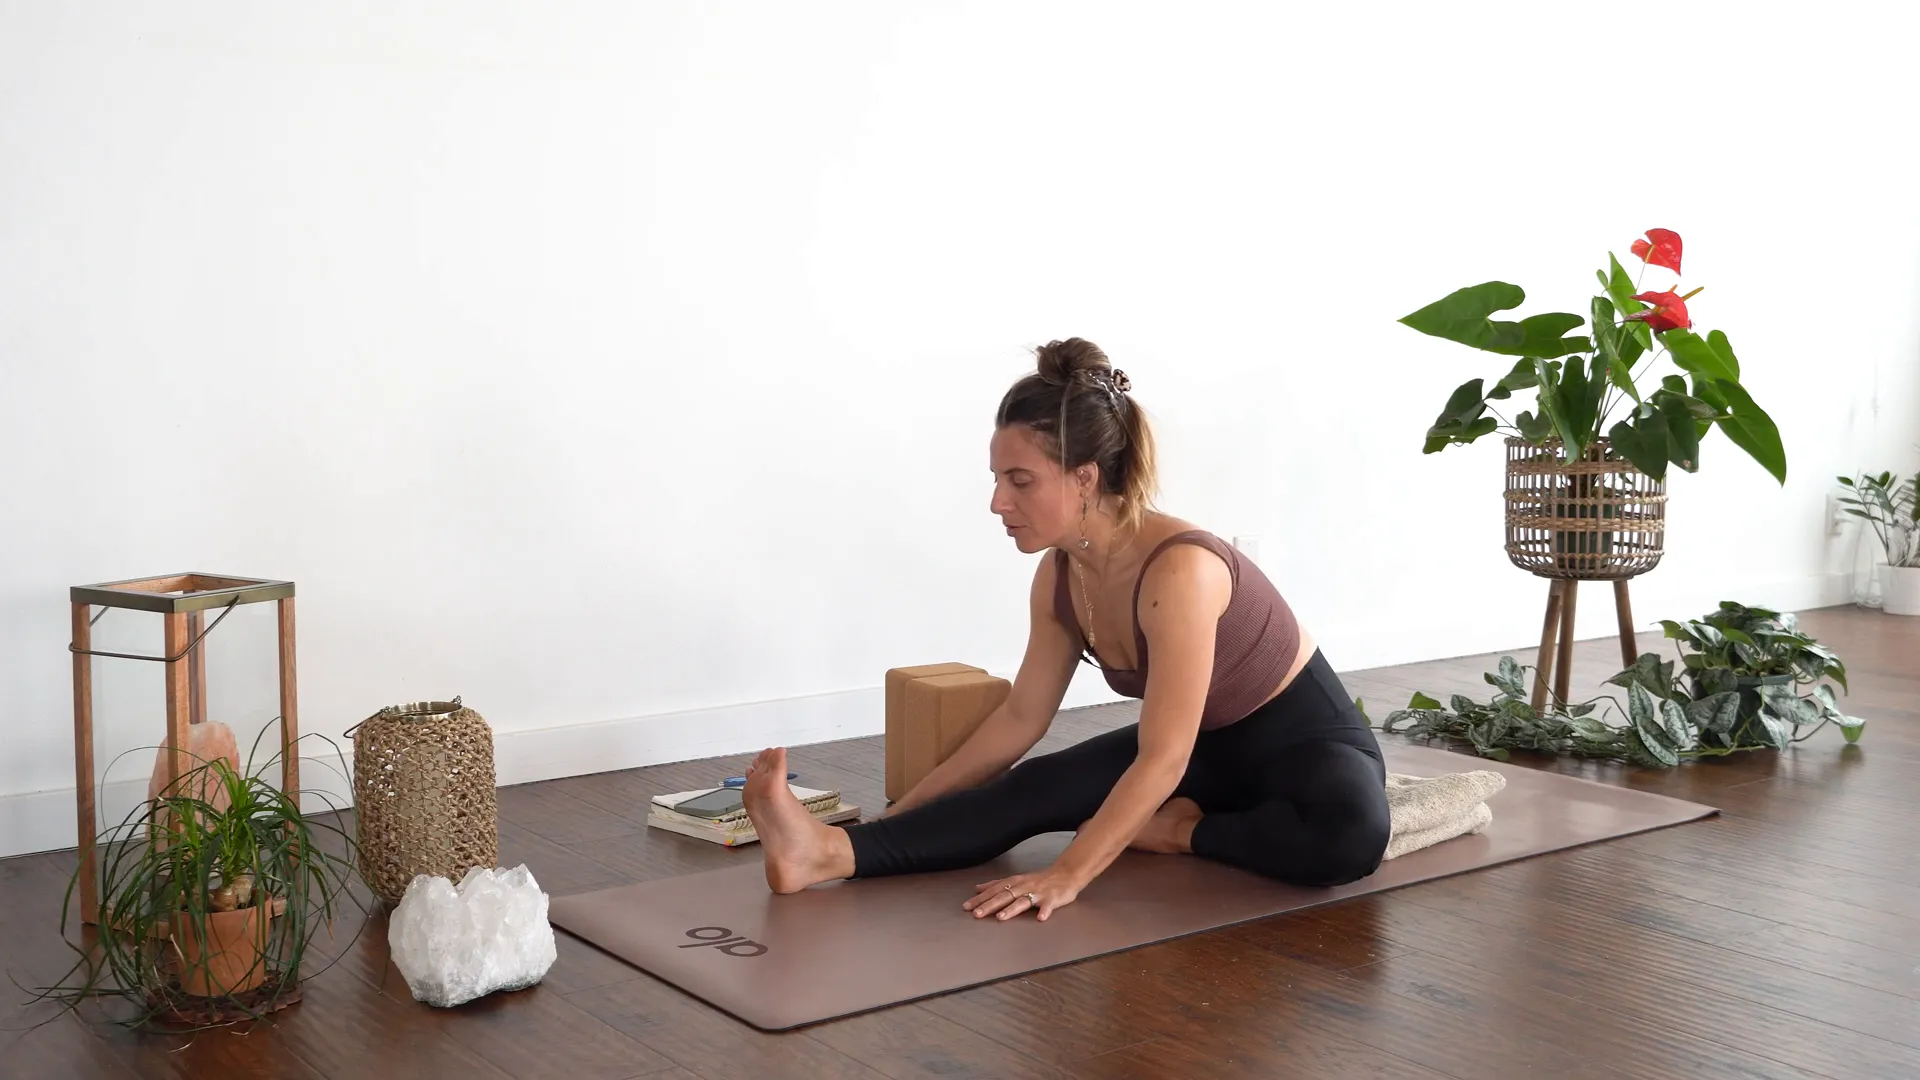
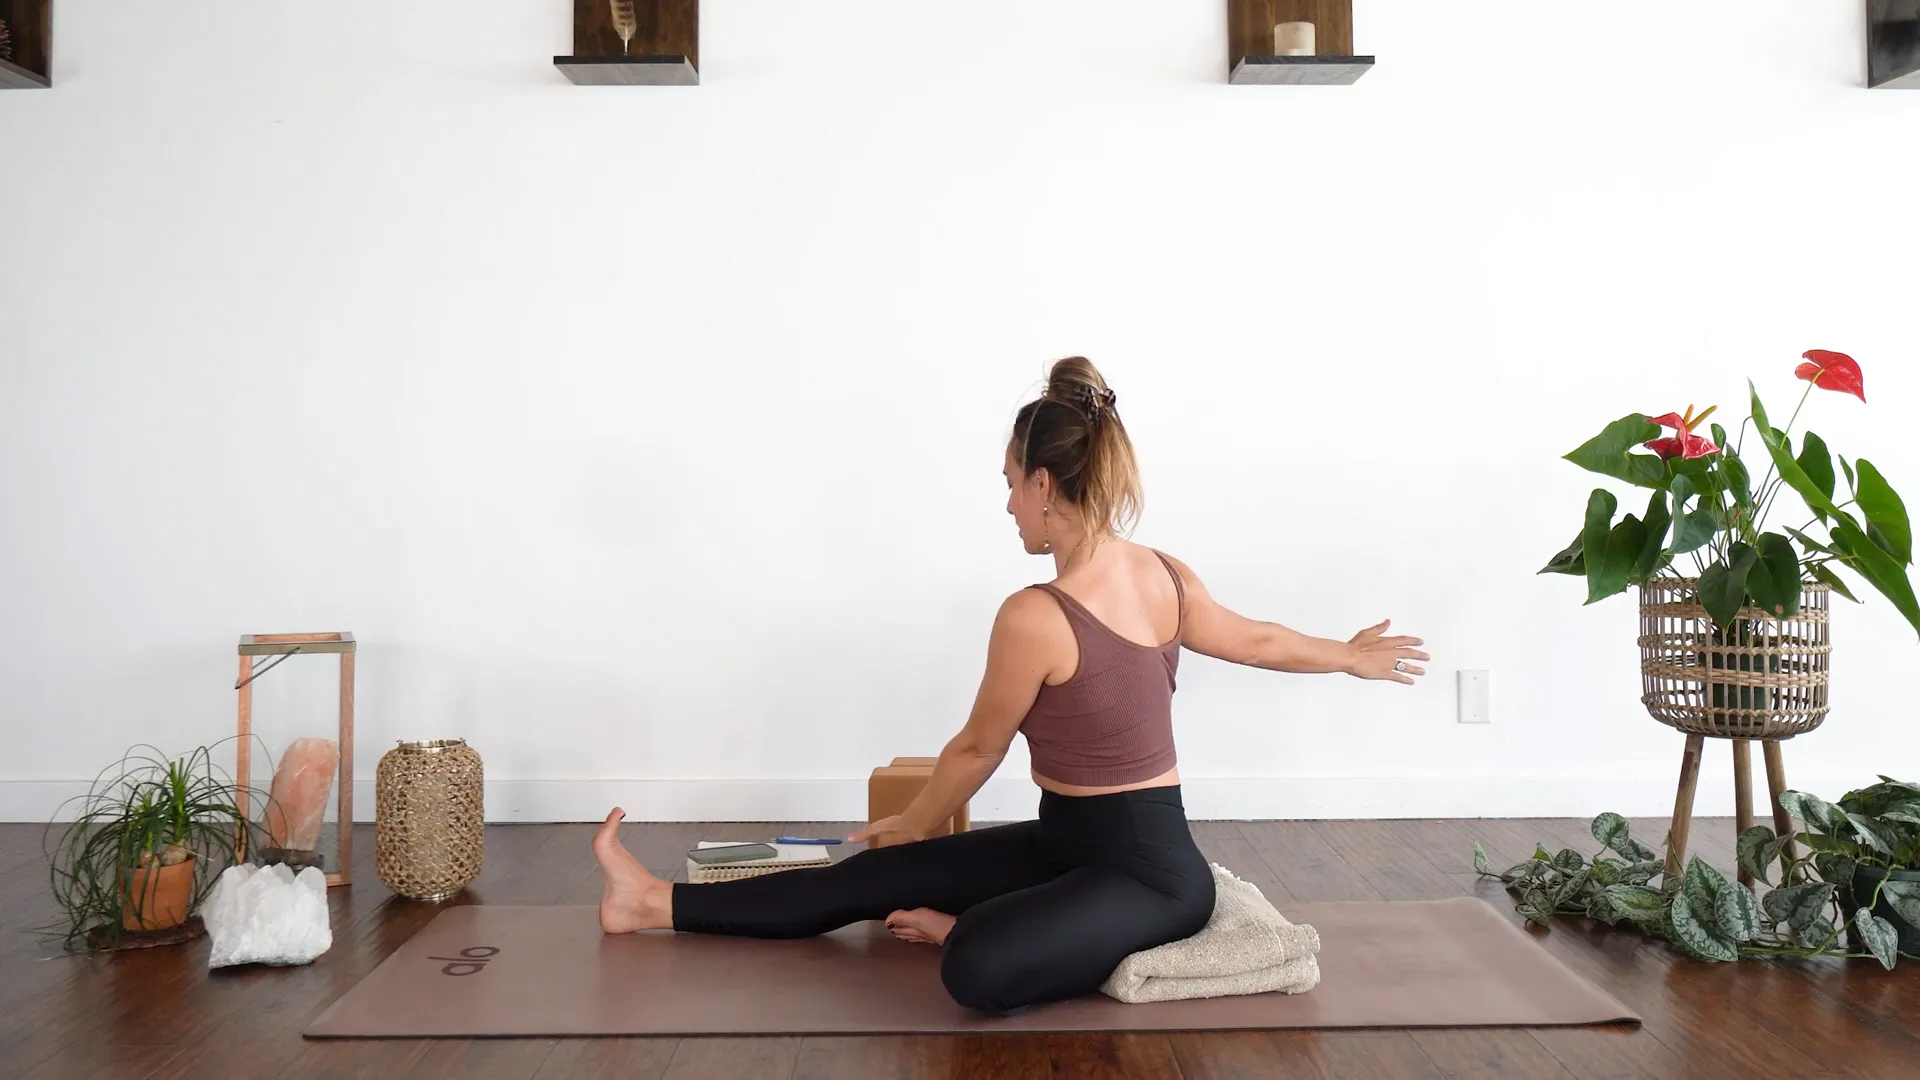
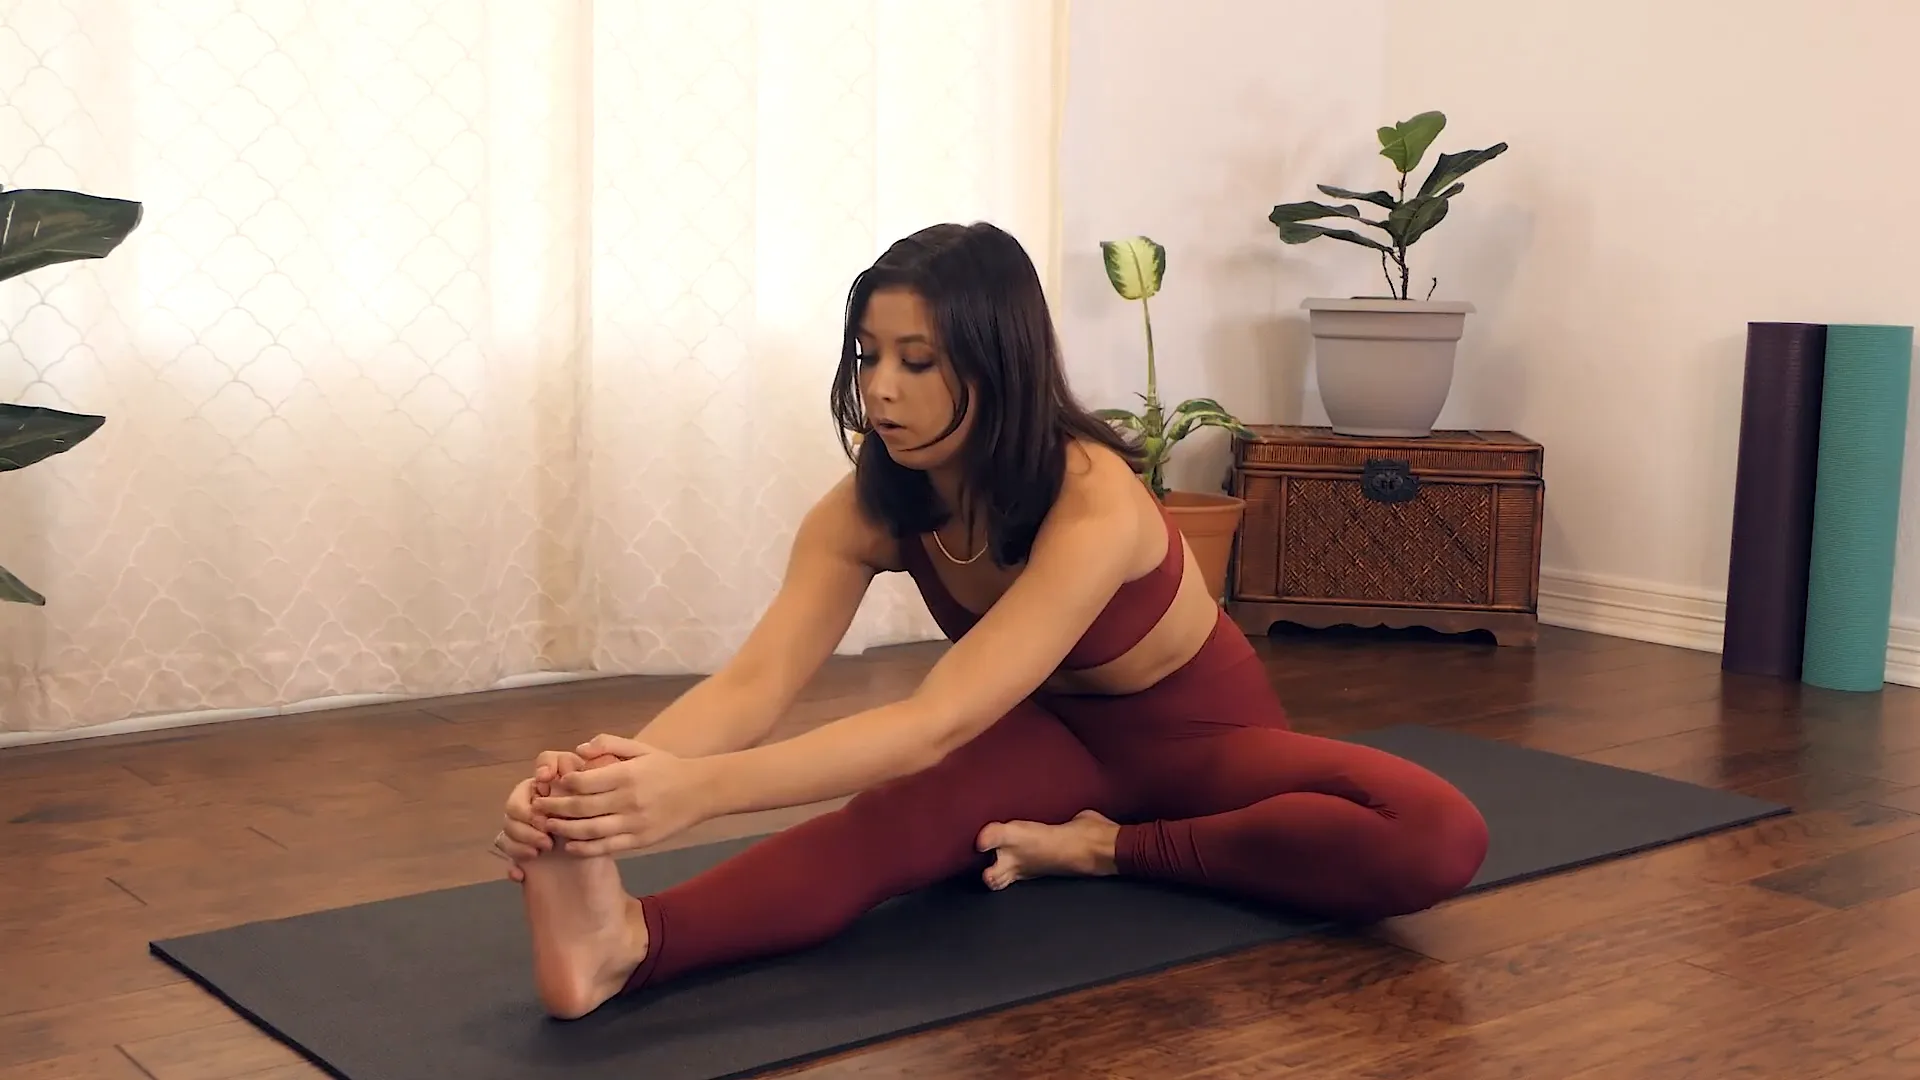
As we transition into Janu Sirsasana A, or Head-to-Knee Pose, let’s take a moment to appreciate the beauty of this restorative yoga pose. This posture encourages us to find our depth—both physically and emotionally. Extend your right leg long, bringing the sole of your left foot to your inner thigh. Inhale deeply, reaching your fingertips high, and as you exhale, hinge forward gently over your extended leg.

Practicing Janu Sirsasana A with left foot on inner thigh

Finding your depth in this pose may differ from day to day. One day you might touch your toes, while another day, you may only reach your knee. Embrace this variability as part of your journey. As you fold forward, invite reflection on the obstacles or opportunities you are currently facing. Allow five breaths here to welcome any insights that arise.

Reflecting in Janu Sirsasana A

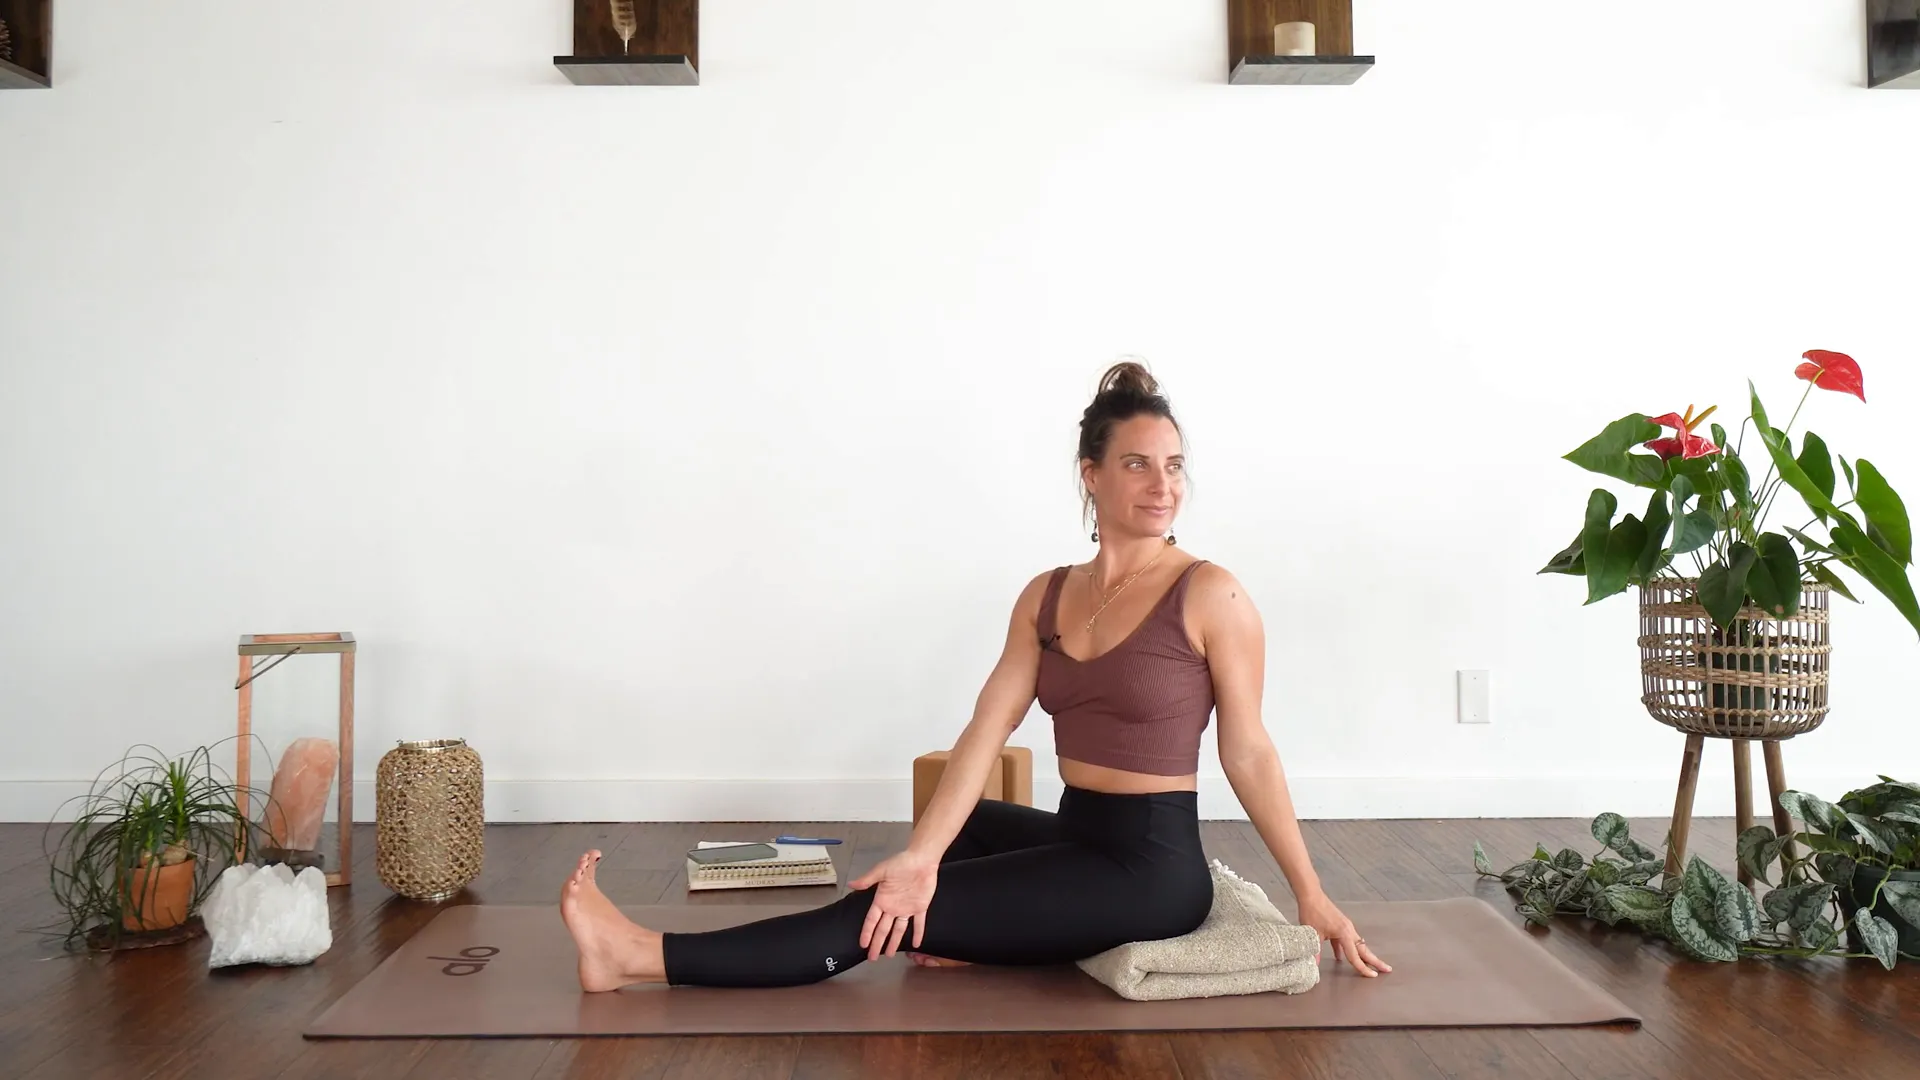
After five breaths, crawl your hands back, sit upright, and gently twist over to the right. Use your left hand against your right knee for support and your right hand as a kickstand behind you. This twist not only aids in digestion but also enhances your ability to reflect on the thoughts and feelings that surface during your practice.

Twisting in Janu Sirsasana A

Switch sides and repeat the process with your left leg extended. Remember, the focus remains on reflection and not flexibility. Each breath is an opportunity to delve deeper into your inner landscape. As you practice, consider how this pose serves as a metaphor for your life: Are you reaching for something just out of grasp? Are you allowing yourself to explore your boundaries?

Practicing Janu Sirsasana A on the left side

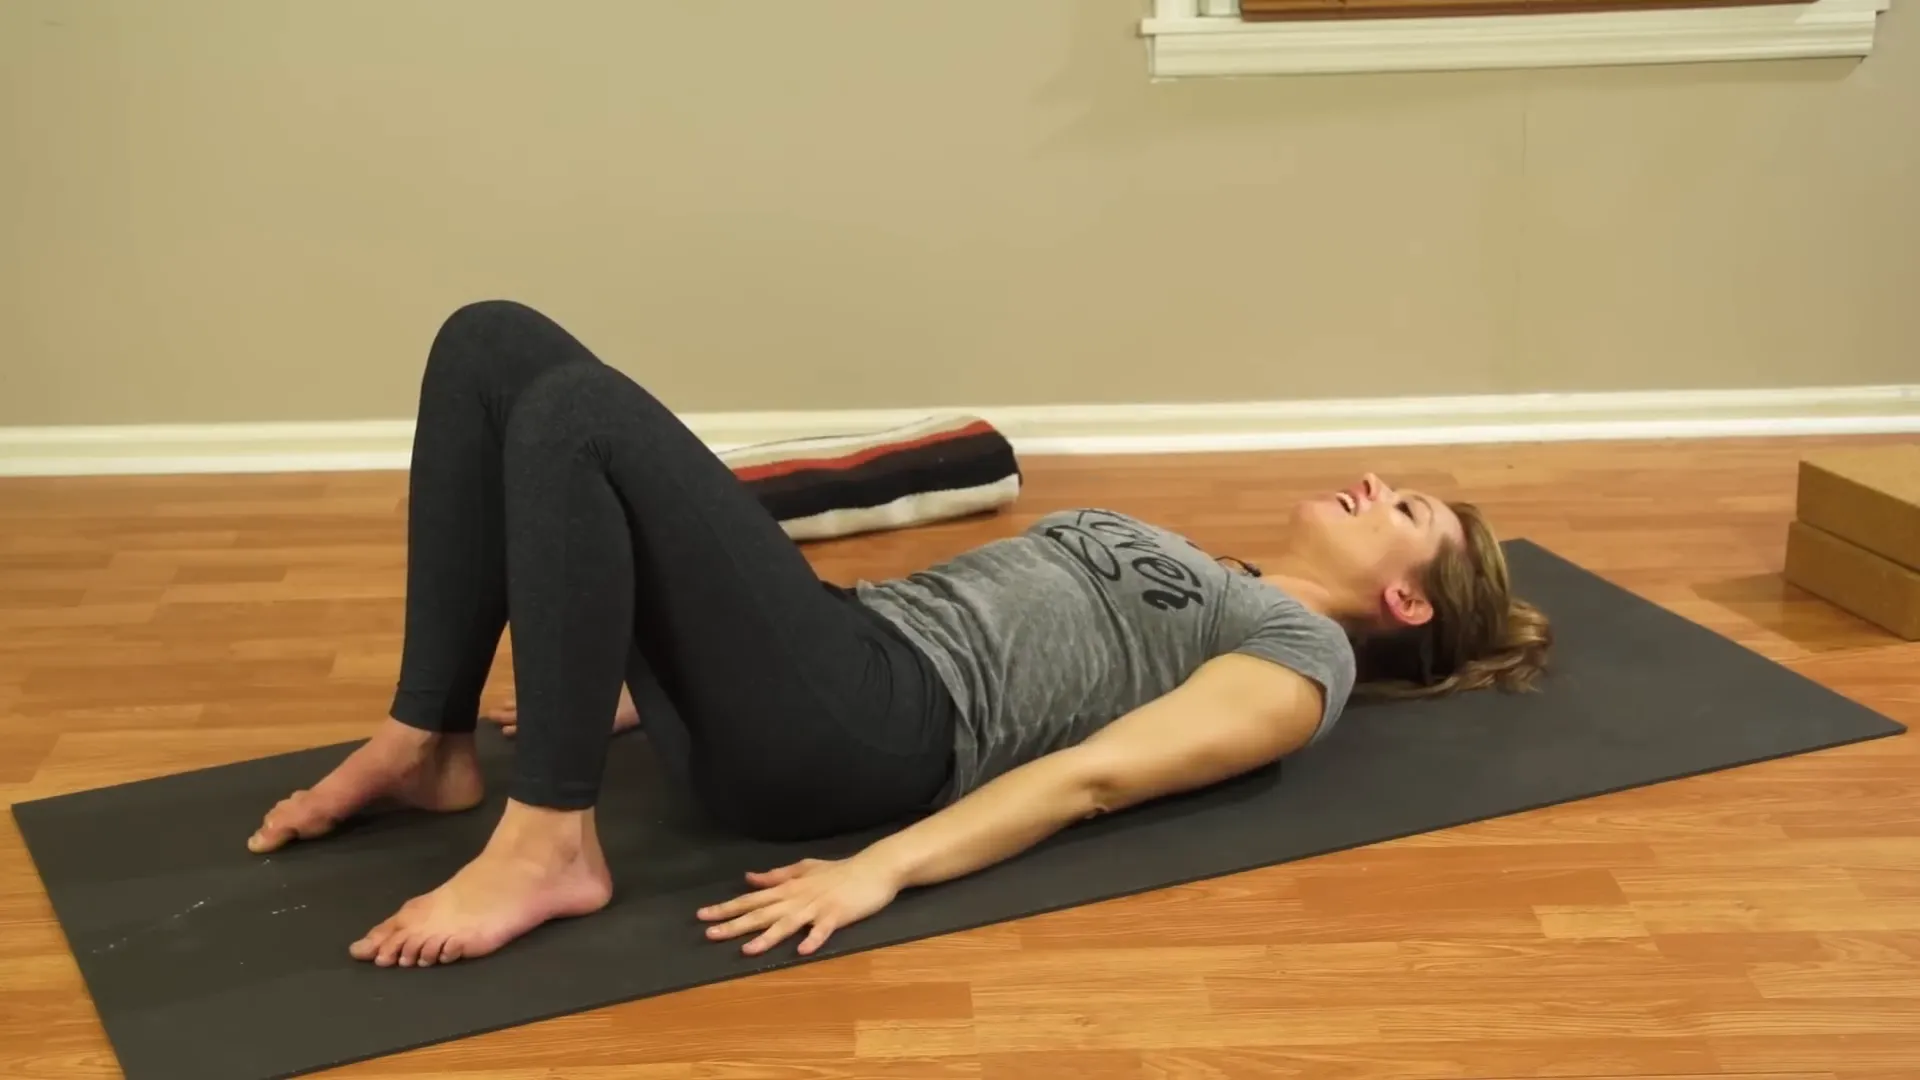
Prone Shavasana: Rest and Reflect

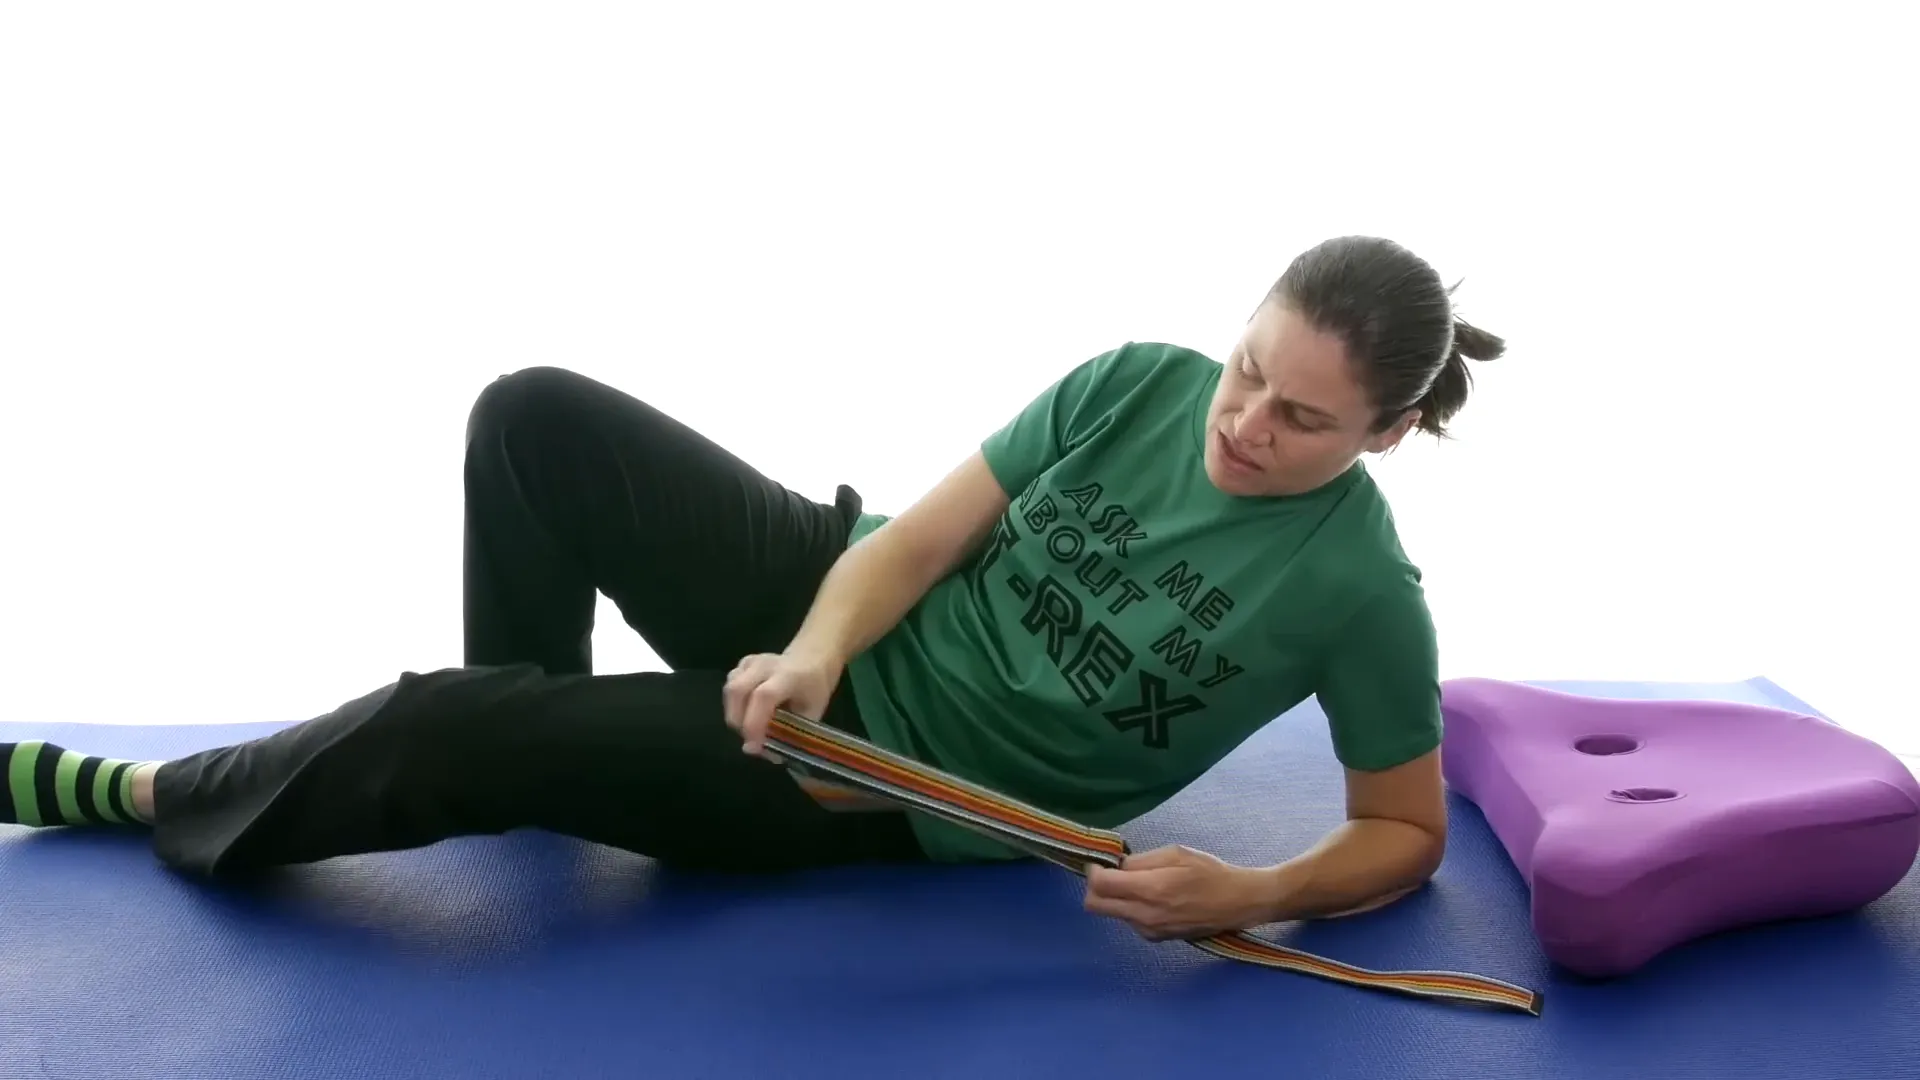
Now, let’s transition into Prone Shavasana. This restorative pose invites a sense of surrender and encourages deep relaxation. If you have blocks, create a bolster-like shape with them and place them towards the middle of your mat. Rest your pelvis over the props, or simply lay flat on your belly if you don’t have any. This is your time to rest and reflect.

Setting up for Prone Shavasana

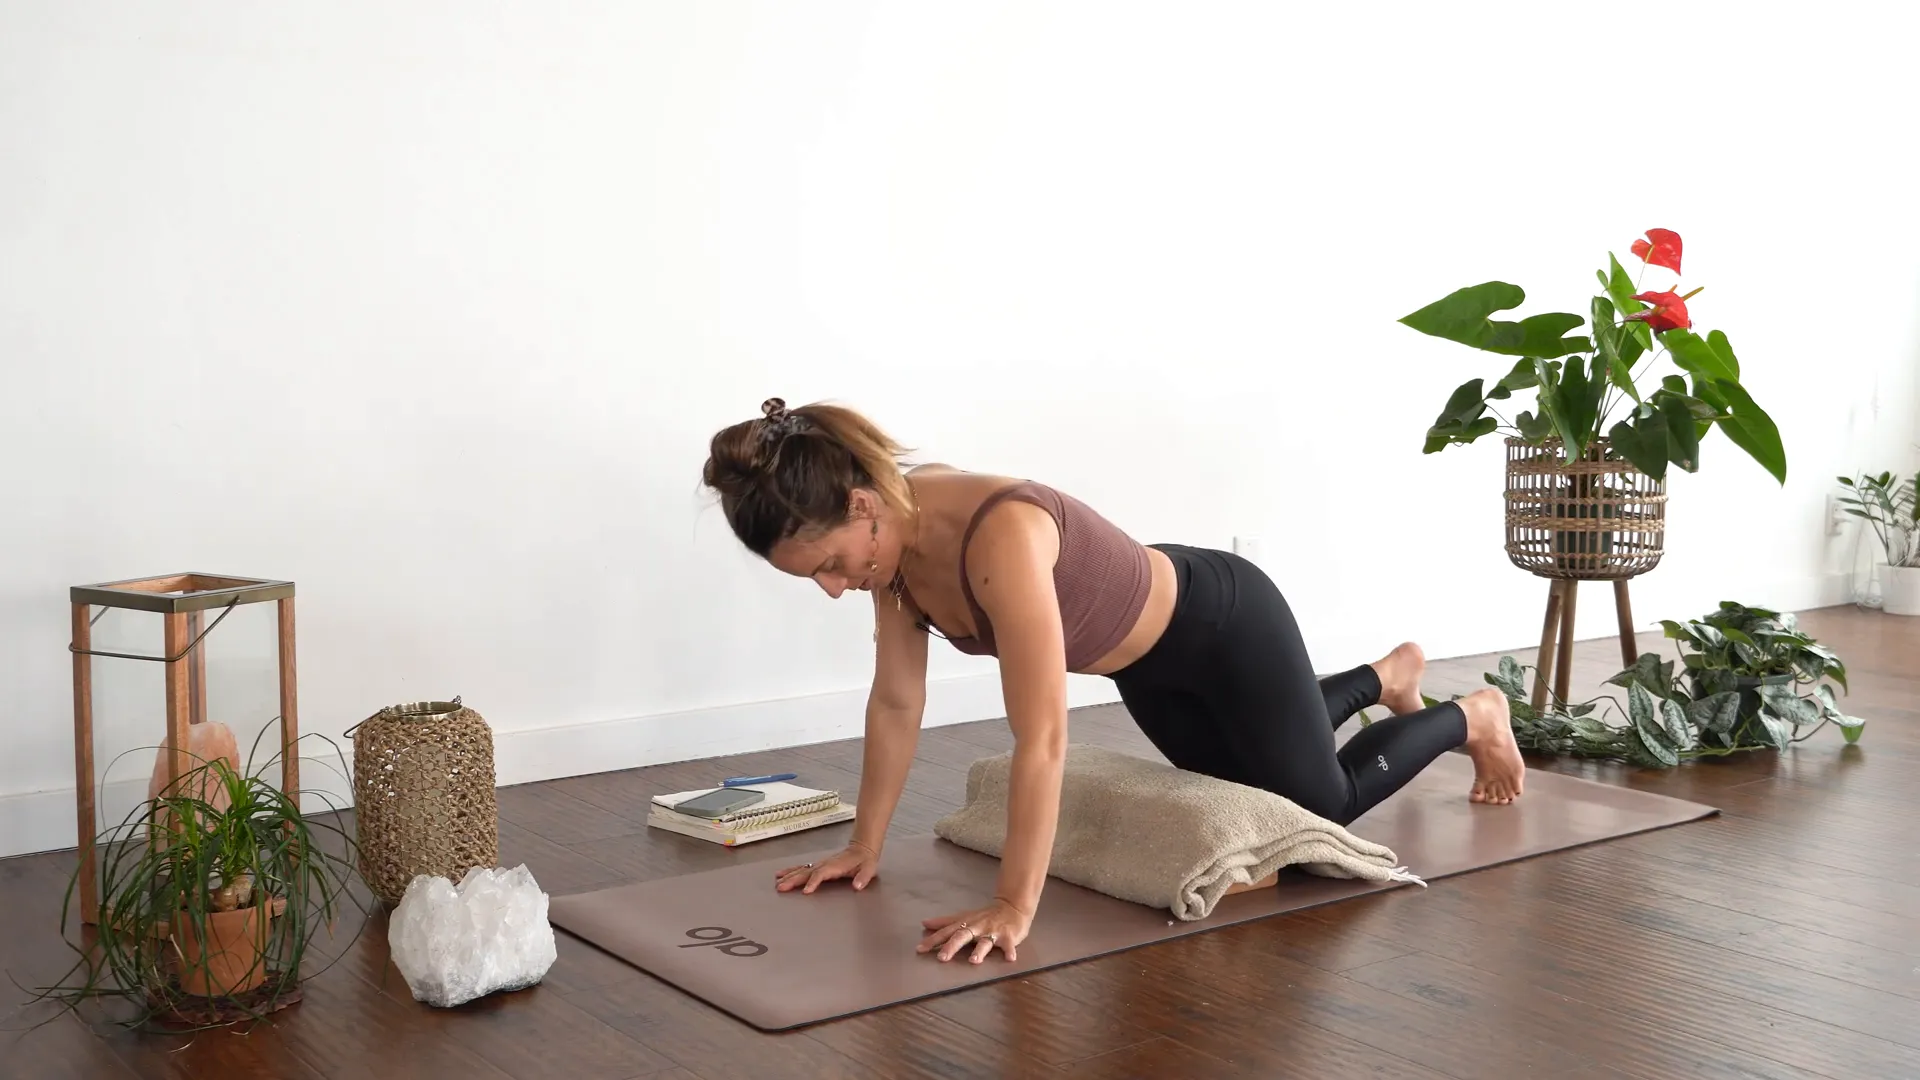
Stack your hands and rest your forehead down, allowing your body to melt into the mat. This position promotes a sense of grounding, providing a perfect backdrop for introspection. As you settle in, focus on your breath and let go of any lingering tension. Allow the stillness of this pose to create a spacious environment for your thoughts to bubble to the surface.

Relaxing in Prone Shavasana

While in this pose, contemplate the themes of your life that are calling for attention. What insights can arise from this stillness? Use this time to carve out inner resolve and the courage to face what needs to be addressed. After three minutes, gently slide your hands down by your ribs and push up to a seated position.

Transitioning from Prone Shavasana to seated position

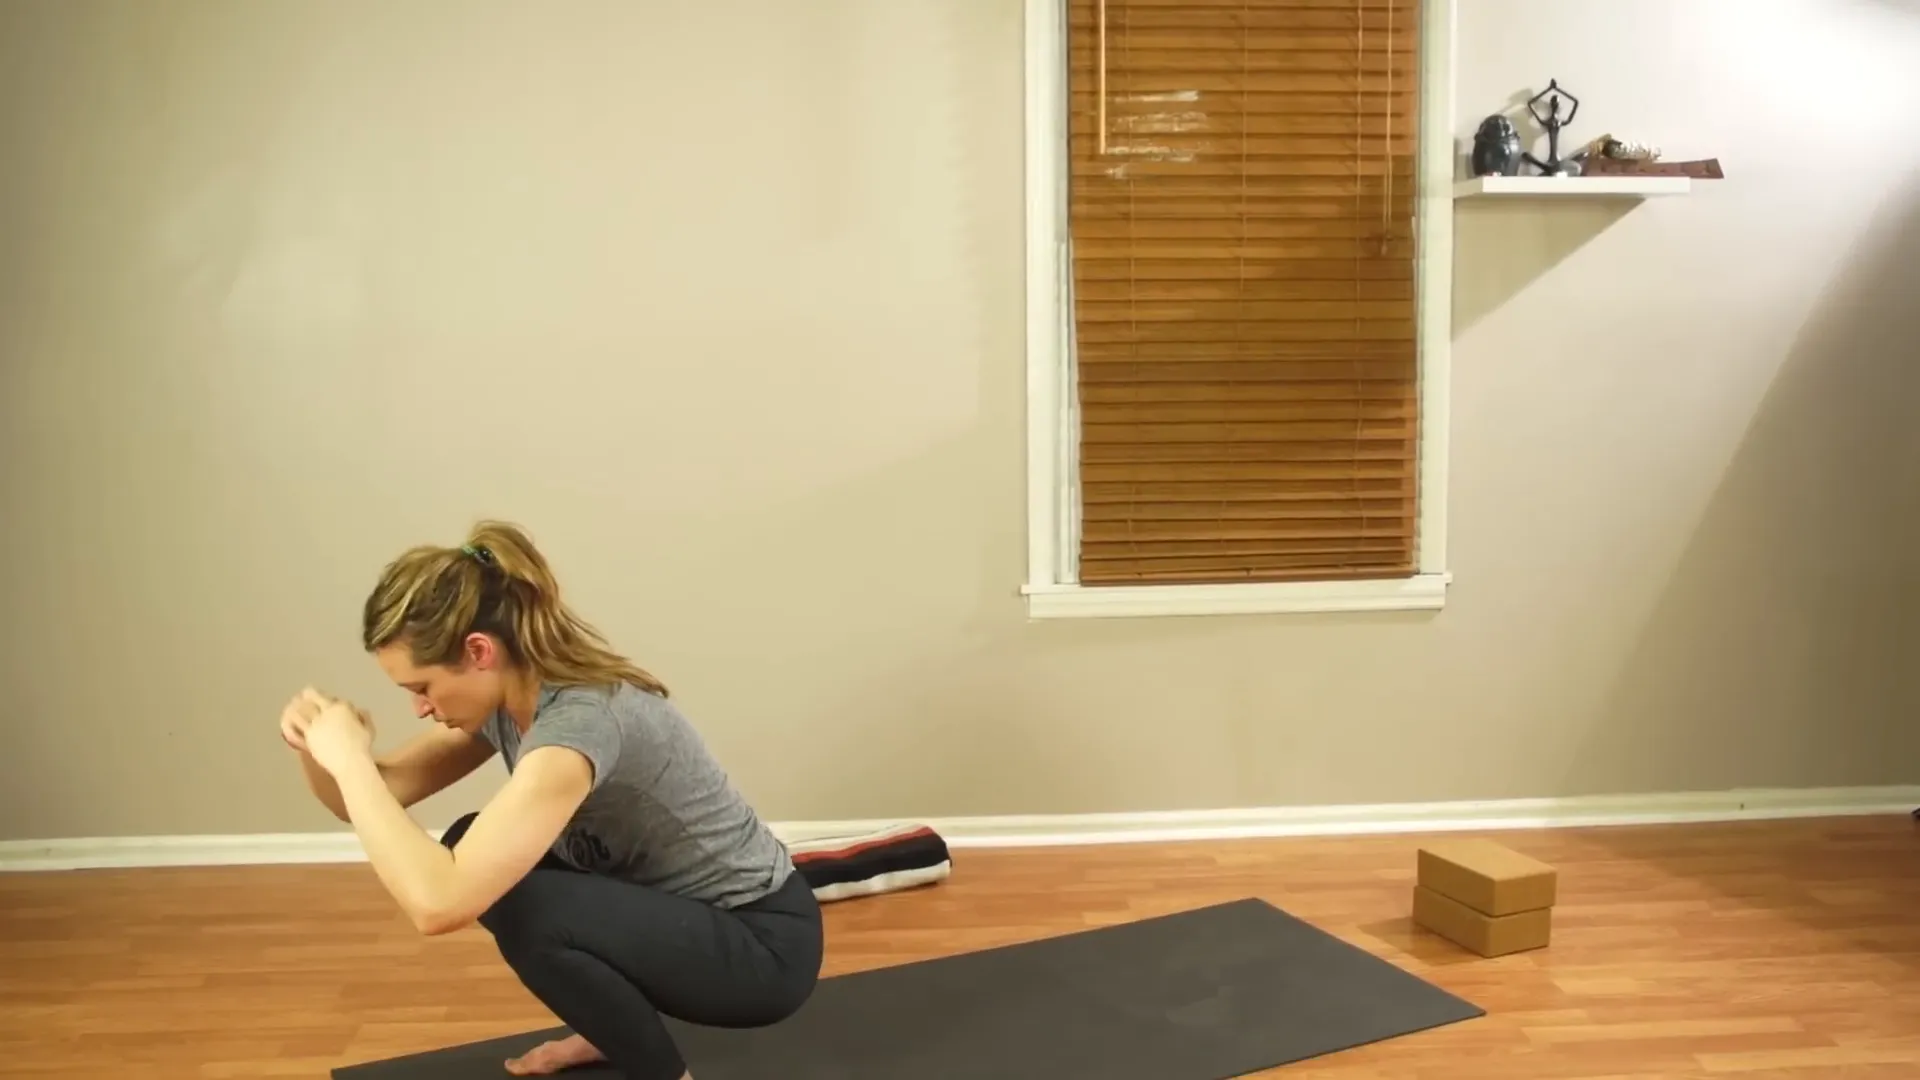
Returning to a Seated Position

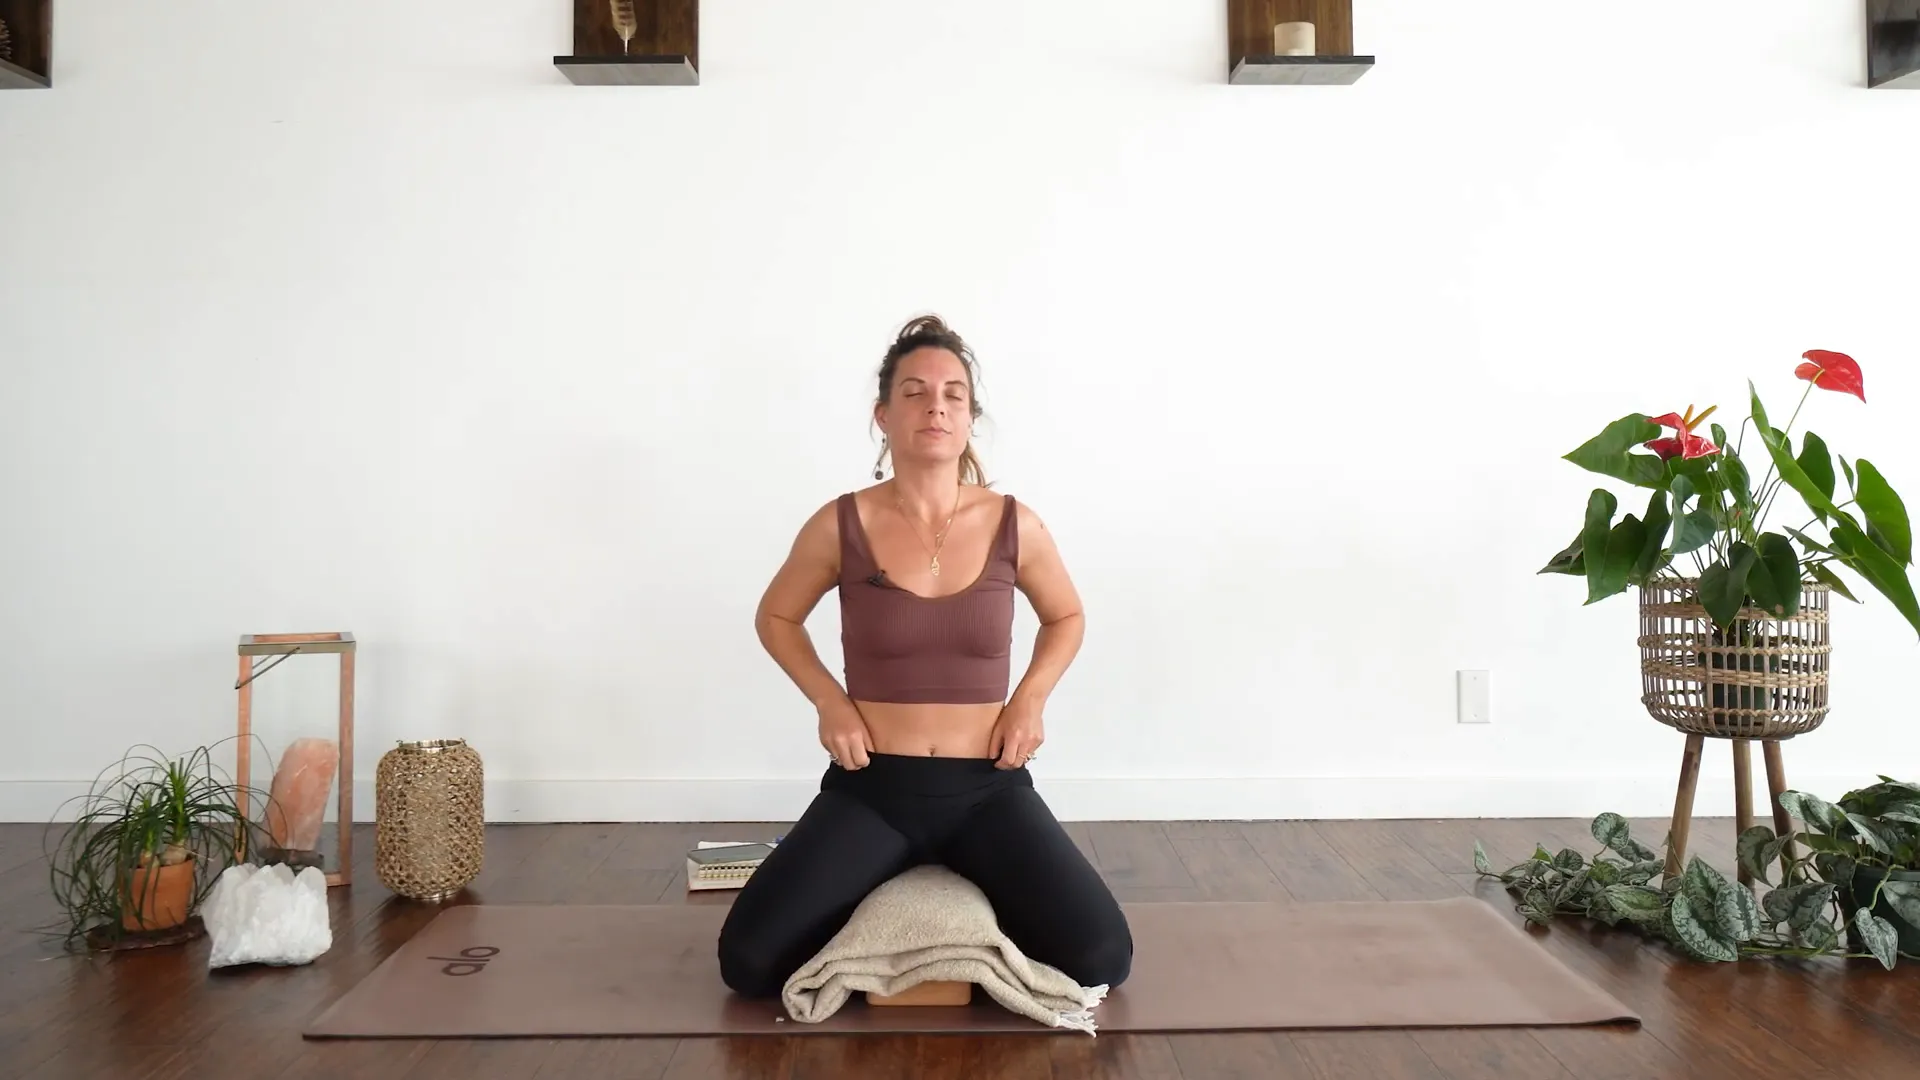
As you come to a seated position, take a moment to acknowledge the shift in your energy. Feel the inner strength that arises from leaning into reflection. It’s essential to create space for the opportunities and obstacles that linger on the back burner of your consciousness. Bring your hands into prayer at your heart centre, honouring this moment of connection.

Seated with hands in prayer

Take a few deep breaths here, grounding yourself in the present. As you inhale, envision drawing in clarity and insight. As you exhale, release any doubts or fears. This practice is all about nurturing your inner landscape and fostering a sense of community connection through shared experiences.

Reflective Practices and Community Connection

Reflective practices are vital not only for personal growth but also for fostering community connection. As we share our reflections—whether through conversation, journaling, or social media—we create a tapestry of experiences that enrich our collective journey. Consider reaching out to a friend or a yoga buddy to discuss your insights and reflections after your practice.

Engaging in dialogue about your experiences can illuminate perspectives you may not have considered. It also reinforces the idea that we are not alone in our challenges and triumphs. Sharing is an act of vulnerability that can deepen relationships and create a supportive network.

Yoga Reset Guide: Your Holistic Toolkit

If you’re interested in expanding your practice beyond these restorative yoga poses for reflection, consider exploring my Yoga Reset Guide. This comprehensive resource is designed to help you navigate your journey through the chakra system, offering both on and off the mat experiences. It’s a holistic toolkit for your wellness journey.

Yoga Reset Guide overview

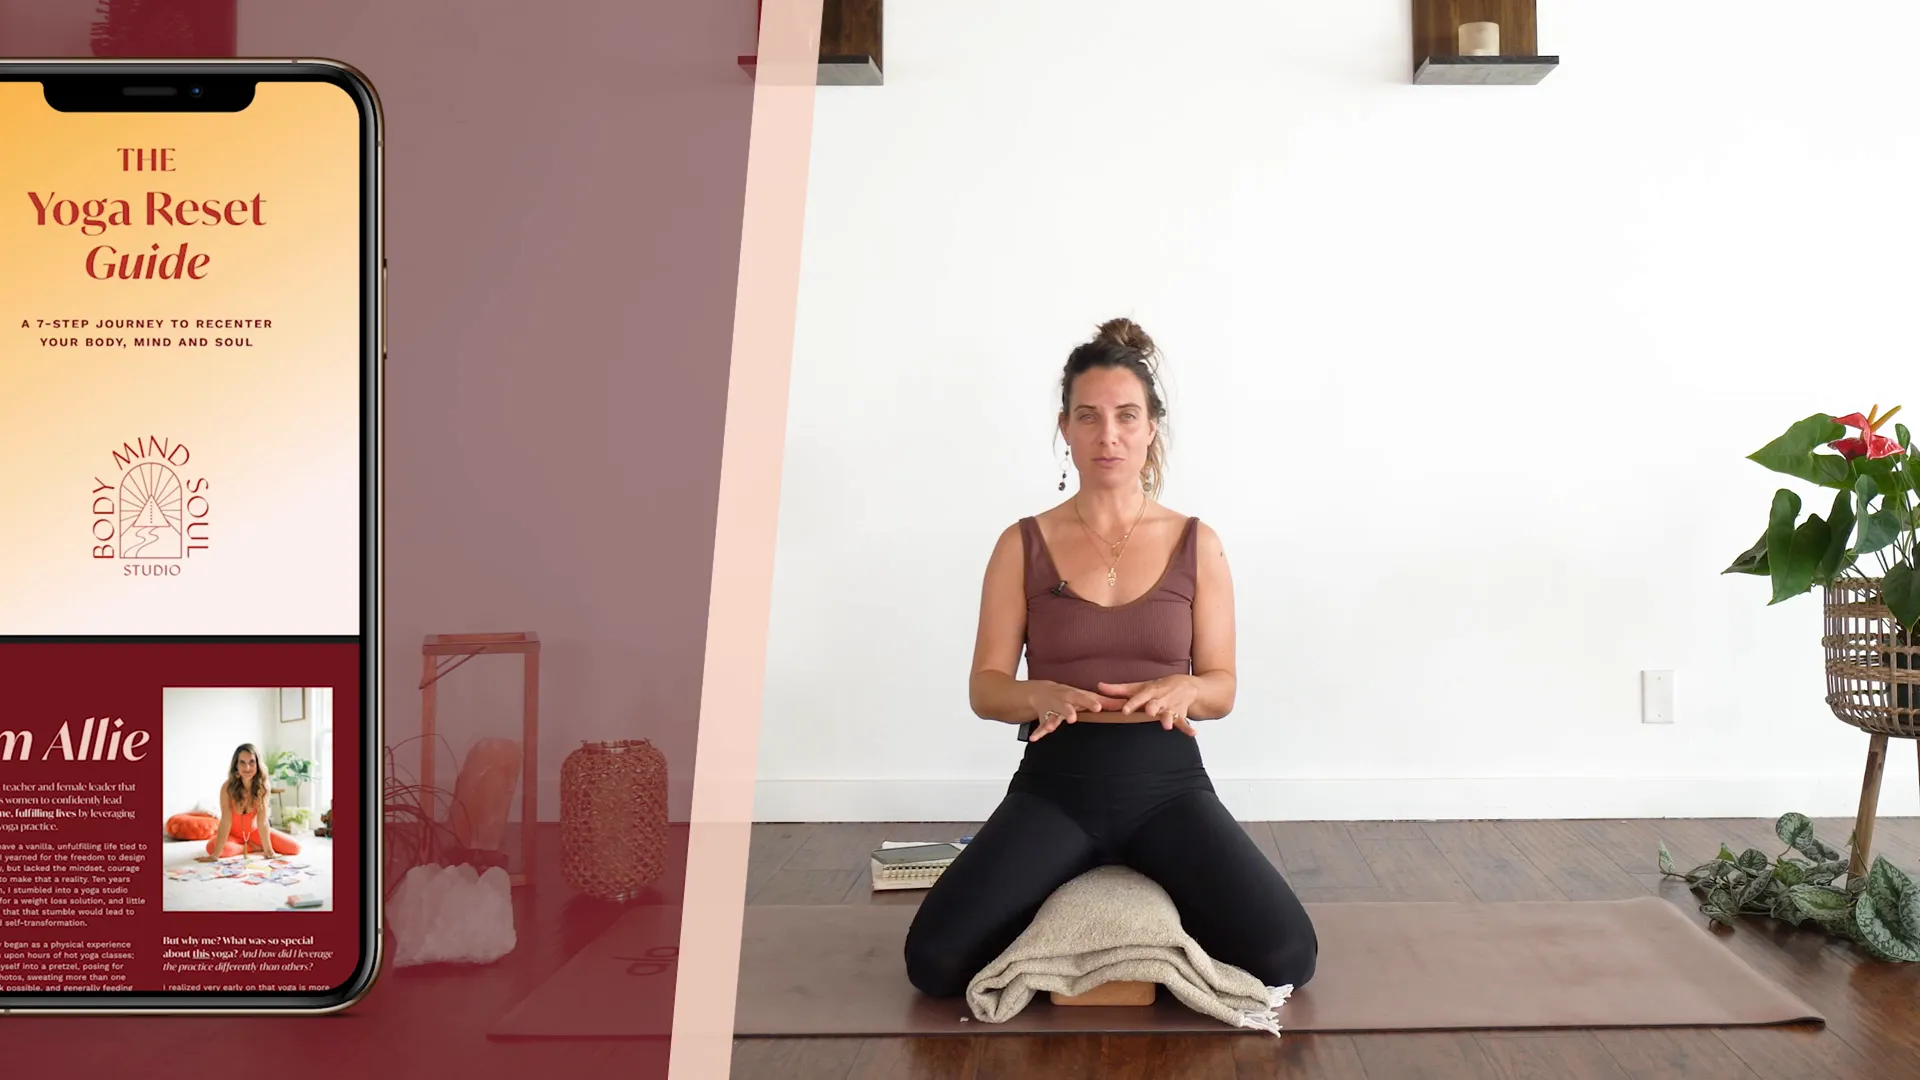
Thousands have already embraced this guide, leveraging its teachings to enhance their practices. Whether you’re new to yoga or a seasoned practitioner, this guide offers valuable insights and tools to support your growth. Download it today and start building your lifelong toolkit as a yoga student.

Exploring the Yoga Reset Guide

FAQs

What are restorative yoga poses for reflection?

Restorative yoga poses for reflection are gentle postures that encourage introspection and self-awareness. They provide a calming environment to explore thoughts and feelings, promoting emotional healing and mental clarity.

How can I incorporate reflective practices into my yoga routine?

To incorporate reflective practices, choose a specific theme or question to focus on during your practice. Use poses that allow stillness, like forward folds and seated postures, and take time to breathe deeply and observe your thoughts.

What should I do if I can’t reach my full expression in a pose?

It’s essential to listen to your body and honour where you are at that moment. Use props for support and remember that yoga is about the journey, not the destination. Embrace the experience rather than striving for perfection.

Can I practice these poses at home?

Absolutely! These restorative yoga poses can be practiced at home. Create a calming environment, gather any props you have, and dedicate time for your practice. Allow yourself to explore and reflect at your own pace.

Read More
Yoga For Weight Loss

Healthy Habits for Losing Weight: How Long Does It REALLY Take to Build a Healthy Habit?


This blog epitomizes the elementary ‘Healthy Habits for Losing Weight’ with fitness expert Evelyn Harper. The content of this blog post is curated from this video: How Long Does It REALLY Take to Build a Healthy Habit?. PsycheTruth explores why most of the people face difficulty to follow the healthy habits and share some useful approaches that would help you to achieve a fitness and wellness routine that you will stick to—definitely!video to watch We are being brought by her personal experience, her thoughts on the sustainable health habits that we can adopt, and her suggestions to be able to get the long-lasting results.

Table of Contents

Introduction

Evelyn Harper, a fitness expert renowned for her unique approach to sustainable health practices. If you’re ready to discover actionable tips for lasting change, you’re in the right place!

Meet Evelyn Harper

Evelyn Harper is not only a fitness coach but also a ray of hope for those who are trying to navigate their health journeys. Evelyn was introduced to sports such as gymnastics and volleyball, and her passion for fitness developed during her university years. There she discovered the incredible influence nutrition has on our energy levels as well as our general health. This was a very significant point that prompted her to start a journey towards a better understanding of the complex connection between food, exercise, and health.

Evelyn’s Journey into Fitness

Once Evelyn graduated from college, she entered into the corporate life where she felt distant from her love for health and hence unfulfilled. That was the time which made her take up an adventurous cross-country road trip. This adventure was not only a trip; it was a self-exploration journey. She visited her family and friends on the way, learned significant life skills from them also she got to know her life principles and objectives better.

While she was there, she occurred to understand the vital role of the community and support in the quest for health. The things she went through with her training were like a roadmap that led her to fitness and the true insight that real health is a matter of choice.

The Impact of Nutrition on Health

Diet has the greatest effect on our health. Evelyn makes it clear that the first step to achieve that is to learn how the different foods interact with the human body. A nutritionist found her during her studies at university, and this person made her realize that little changes can have a tremendous impact on a person’s health. Therefore, she started to learn about different diets that are more about balance than about cutting out fat.

From her observation of things, she has come to realize that the primary problem for most people is an information overload on diets and nutrition. Evelyn stands for the idea of the personalization of nutrition and promotes the notion of being in touch with the body’s needs and incorporating changes that are in harmony with one’s individuality. By adopting such a view, one builds a more positive and healthier relationship with food, and it also helps in building up steady practices.

Overcoming Barriers to Sustainable Health

The misunderstanding that one has to reach a perfect state consequently makes it one of the main obstacles on the way to achieving good health. As per Evelyn, the stage of loving the imperfection is crucial to the long-lasting success. In fact, a lot of people postpone their fitness journeys until they find the “perfect reason,” however, the truth is that problems are here to stay.

Evelyn maintains that the best way to address these barriers is for persons to tell themselves to follow the \”mini steps\” strategy. Thus, they can make slow progress, which will enable them to add the healthy habits into their daily life more easily. Focusing on the little but realistic changes helps one to build up the self-confidence and in the end it will have a turning point in his/her lifestyle.

Adventures Beyond the Corporate World

Leaving the corporate world was a significant leap for Evelyn. She sought experiences that would align more with her values and passion for health. Her time in Jackson Hole and later in Hawaii was filled with adventure and self-discovery. However, she faced challenges along the way, including weight gain and feelings of disconnection from her fitness goals.These experiences taught her valuable lessons about resilience and the importance of community. Evelyn emphasizes that finding your “tribe” can make all the difference in staying motivated and accountable. Returning to her roots on the East Coast allowed her to reconnect with her support system and put her learnings into practice.

Implementing Healthy Habits for Losing Weight

As Evelyn’s journey progressed, she honed in on the concept of “Healthy Habits for Losing Weight.” This approach encompasses more than just physical activity; it’s about cultivating a mindset that embraces growth and learning. Evelyn believes that understanding your body and its needs is crucial for achieving sustainable weight loss.

Ansperate basically stands for an approach towards balanced fitness where people are encouraged to do activities that they feel good doing rather than exercising as though it is an obligation. Sometimes all we need to is simply changing the interpretation. This is how we usually have this problem with motivation and consistency. For example, it can be yoga, hiking, or aerobics; the main thing is to have fun doing it.

Finding Your Tribe and Support System

Being part of a group of like-minded people is not just a personal experience but rather a healthy lifestyle journey; it is also about discovering your own community. Your “tribe” is the one who gives you the support, cheer, and accountability that are the brunt of your success. Forming a partnership with people who think similarly and have the same health goals can make your personal space so full of inspiration.

Interacting with a support system has resilience through difficulties and it is a great way to celebrate success. It doesn’t matter if it is a workout partner, a support group, or online communities, it is important to find people who uplift you. Keep in mind that this path is not just yours, and talking about your experiences could make the burden feel less heavy.

How to Find Your Support System

  • Join Local Fitness Classes: Participate in classes that interest you. This is a great way to meet new people who share your passion for fitness.
  • Online Communities: Engage with online platforms and groups focused on wellness, nutrition, and fitness.
  • Accountability Partners: Connect with someone who shares similar goals and can help keep you motivated.
  • Social Media: Follow fitness influencers and communities that resonate with your values and goals.

Learning from Challenges

Obstacles are unavoidable components of any health path. Instead of considering them as failures, replace them with the thoughts of growth opportunities. Every hurdle instructs you something important regarding yourself, your habits, and your strength.

In one perspective, difficulties may not simply be something you need to soldier through, they could also be potential teachers for you. Learnings grew more power over you and therefore will help you to future challenges with confidence. Look at it as each mistake you make being for a reason to help you learn about your own preferences and what you benefit from the most.

Strategies to Overcome Challenges

  1. Reflect: Take time to assess what went wrong and what could be improved.
  2. Adjust Your Goals: Modify your goals to make them more realistic and achievable.
  3. Seek Feedback: Don’t hesitate to ask for feedback from your support system or a mentor.
  4. Practice Self-Compassion: Be kind to yourself during tough times. Acknowledge that everyone faces challenges.

Starting When It’s Hard

The most common misunderstanding about going on a health journey is that it is necessary to wait for the ideal time. Unlike the misconception, the facts are just the opposite. Most often it is during the hard times you have to do something at most. Initiating the process during the difficult times brings about the inner strength to endure and also paves the way for the good habits to last.

When you make that initial move, even under difficult situations, you show your determination to achieve your target. This devotion can make, for you, the most magnetic chain reaction of all, resulting in your positive changes throughout your life.

Tips for Starting When It’s Hard

  • Set Small Goals: Begin with manageable tasks that can lead to bigger achievements.
  • Focus on Consistency: Aim for consistency rather than perfection. Small, regular efforts yield significant results over time.
  • Celebrate Small Wins: Acknowledge your progress, no matter how small. Celebrating these moments can boost your motivation.
  • Stay Flexible: Be open to adjusting your plan as needed. Life is unpredictable, and flexibility can help you stay on track.

The Importance of Daily Sustainable Practices

Sustainable healthy habits creation means incorporating daily actions that are conducive to your health. They ought to be aesthetically and practically pleasing, making them simpler to adhere to throughout the long run. It is the effects of choosing the seemingly insignificant, careful decisions that are most lasting.

Daily routines can healthfully involve physical activity, nutrition, and mental health. Attempt to design a balanced scheme that complements your lifestyle and suitability. Such activities will not only contribute to your physical health but also improve the standard of your entire life.

Daily Practices to Consider

  • Morning Movement: Start your day with a short workout or yoga session to energize your body.
  • Healthy Eating: Focus on whole foods that nourish your body. Meal prepping can simplify this process.
  • Mental Wellness: Incorporate mindfulness or journaling practices to support your mental health.
  • Hydration: Make it a habit to drink plenty of water throughout the day.

FAQ: Common Questions on Building Healthy Habits

1. How long does it take to build a healthy habit?

From 21 to 66 days, it takes to build a healthy habit depending on the person and the difficulty of the habit. The key is to stay consistent, so work on the daily plan that includes the habit.

2. What if I slip up?

Blunders are an unavoidable element of the journey. In place of being tough on self, you must contemplate what were the reasons for the blunder and the manner in which you can modify your strategy for the future.

3. How can I stay motivated?

Keeping the motivation high by discovering the activities you like, target the realistic goals, and being with the people who support you the most. Consistently re-evaluate your objectives to ensure they stay in sync with your changing preferences and requirements.

4. Should I seek professional help?

If you’re struggling to make progress, consider consulting a nutritionist or a fitness coach. They can provide personalized guidance tailored to your unique circumstances.

5. How do I track my progress?

One could utilize various methods to track their progress, for instance, keeping a journal, downloading applications, or taking a camera shot at the same location every time. The most important thing is to select the method that you find most appropriate for you and the one that will make you accountable.

Read More
Yoga For Weight Loss

Yoga for Toning: Sculpt Your Body in Just 10 Minutes

This energising session of Yoga for Toning, where we blend strength-building poses with mindful breathing. In just ten minutes, you’ll sculpt your body and embrace the mantra, ‘I am confident’, unlocking your inner power on the mat.

Table of Contents

Introduction to Yoga for Toning

The content of this blog post is curated from this video: Toning & Sculpting. SarahBethYoga’s dynamic 10-minute routine using yoga to help with weight loss combines strength, flexibility, and toning exercises to help you build core and arm strength while keeping your heart rate up—definitely worth checking out! Yoga for Toning is not just about physical strength; it’s about cultivating a mindset of confidence and empowerment. Each pose is designed to engage your muscles while allowing you to connect deeply with your breath. As we progress through our practice, remember our mantra: ‘I am confident.’ This mantra is your anchor, reminding you to embrace your inner power with every movement.

Embracing Confidence

Confidence begins with self-acceptance. In our practice, we challenge ourselves to step outside our comfort zones, embracing the strength that comes from vulnerability. Each time you face a challenging pose, remind yourself of your mantra. Let it resonate within you, reinforcing the belief that you are capable and strong. Confidence is not loud; it’s a quiet strength that emerges from deep within.

Hero Pose: Grounding and Breathing

To start, let’s find our grounding in Hero Pose. Sit comfortably, either on your heels or cross-legged, and close your eyes. Take a deep inhale through your nose, feeling your chest expand. Hold that breath for a moment, then exhale slowly, releasing tension. This pose helps you centre yourself, providing a solid foundation for the practice ahead.

Hero Pose for grounding and breathing

Building Strength in Plank

Transition into a high plank position. Engage your core, pressing through your palms and extending your heels back. This pose is foundational for building overall strength. Focus on your breath as you hold the position, feeling the power in your body. Remember, you can modify by lowering your knees if needed. Stay strong and steady.

High Plank for strength building

Mastering Modified Chaturanga

From plank, we move into Chaturanga. Lower your body halfway down while keeping your elbows close to your ribs. This modified version allows you to build strength safely. Feel the challenge, but also embrace the power that comes from mastering this transition. Every time you perform this move, you’re sculpting your arms and core.

Modified Chaturanga for strength

Activating Upward Facing Dog

Next, we flow into Upward Facing Dog. Flip onto the tops of your feet and press up through your chest. This pose activates your back muscles and opens your heart. Feel the stretch along your spine and the energy flowing through your body. It’s a beautiful reminder of your strength and flexibility.

Upward Facing Dog for activation

Finding Release in Downward Facing Dog

From Upward Facing Dog, transition into Downward Facing Dog. Curl your toes under and lift your hips high. This pose elongates your spine and releases tension in your back. Take a moment to breathe deeply here, allowing your body to relax and recharge. It’s a powerful pose for grounding and connecting with your breath.

Downward Facing Dog for release

Dynamic Vinyasa Flow

Let’s combine these poses in a dynamic flow. Start from Downward Facing Dog, moving back to High Plank, then into Chaturanga, followed by Upward Facing Dog, and returning to Downward Facing Dog. This flow not only enhances your physical strength but also boosts your metabolism. Feel the rhythm of your breath as you move through each transition.

Dynamic Vinyasa Flow

Deep Forward Fold: Relax and Reflect

After our flow, step to the front of your mat and hang in a deep Forward Fold. Allow your neck to relax and your head to hang heavy. This pose encourages introspection and reflection. Breathe deeply, and with each exhale, let go of any lingering tension. Embrace the calmness as you prepare to rise back into standing.

Deep Forward Fold for relaxation

Active Chair Pose with Twists

Let’s dive into the Active Chair Pose with a twist. Begin in a standing position, feet hip-width apart. Inhale, raising your arms overhead, and as you exhale, bend your knees into a chair pose. Visualise someone pulling a chair beneath you, and engage your legs as you lower your hips.

Now, add a twist! Reach your right arm back and your left arm forward, looking over your right shoulder. This twist not only engages your core but also enhances your balance. Hold for a few breaths, feeling the strength in your legs and the stretch in your spine. Inhale back to centre, and then switch sides.

Active Chair Pose with Twists

Dancer Pose: Finding Balance and Grace

Next, we’ll explore the Dancer Pose, a graceful expression of balance and strength. Stand tall and set your gaze on a fixed point ahead. Bend your right knee and reach back to grab your right foot. As you lift your left arm overhead, take a deep breath and lengthen through your spine.

As you exhale, kick your foot into your hand, allowing your body to gently bow forward. This pose requires focus and confidence. If you wobble or fall, simply return to the pose. Remember, it’s all about the journey and the practice of confidence!

Dancer Pose for balance and grace

Warrior Series: Strength and Poise

Now let’s move into the Warrior series. Start in Mountain Pose, inhaling to raise your arms overhead. Exhale and step your left foot back, spinning the back heel down into Warrior II. Sink low into your hips, feeling the strength in your legs.

From Warrior II, transition to Extended Side Angle, placing your right arm down and lifting your left arm high. Feel the power of your core as you straighten your right leg into Triangle Pose. Keep a micro-bend in your knee to maintain strength.

Switch sides, repeating the sequence. Each pose builds strength and poise, reinforcing your confidence on the mat.

Warrior Series for strength and poise

Final Plank: Core Engagement

Let’s engage our core with a final plank. Transition into a high plank position, ensuring your body is in a straight line from head to heels. Engage your core by drawing your lower belly in, and maintain calm in your breath.

This pose challenges your strength and stability. Hold for a few deep breaths, feeling the power radiating through your body. Remember, you can lower your knees if needed, but keep that core engaged!

Final Plank for core engagement

Returning to Hero Pose

After our intense series, let’s return to Hero Pose. Take a seat on your mat, bringing your hands together at heart centre. Close your eyes and take a moment to reconnect with your breath.

Reflect on your practice, embracing the quiet confidence that comes from within. This is a beautiful way to ground yourself after building strength throughout the session.

Returning to Hero Pose

Closing with Namaste

As we conclude our practice, let’s seal our energy with a Namaste. Bring your hands to heart centre, bowing your head slightly. This gesture acknowledges the light within you and the light in others.

Take a moment to express gratitude for your body, your practice, and this time spent nurturing your confidence. Remember, you are strong, you are capable, and you are confident.

Closing with Namaste

Try This Next: Extend Your Practice

If you enjoyed this session, consider extending your practice with additional resources. Check out our Core Yoga guide for exercises that enhance core strength, or explore our Yoga for Weight Loss session, which combines movement and mindfulness for a holistic approach to fitness.

FAQ: Your Yoga for Toning Questions

  • What is Yoga for Toning? Yoga for Toning focuses on poses that strengthen and sculpt the body while cultivating mindfulness and confidence.
  • How often should I practice? For optimal results, aim for at least three times a week. Incorporate various sessions to engage different muscle groups.
  • Can beginners join? Absolutely! This practice is designed for all levels, offering modifications to ensure everyone can participate.
  • What should I bring to class? A yoga mat, comfortable clothing, and a water bottle are essential. Consider bringing a towel for added comfort
Read More
Yoga For Weight Loss

Enhance Your Flexibility with Effective Hamstring Yoga

Enticing yourself in the exerciser yoga for hamstrings is the best thing to do to get higher flexibility? Yoga can be hard to learn if you are just starting out, but I will show you various simple yet effective stretches that are perfect for anyone, regardless of their skill level. Let’s practice yoga and go together into a spiritual realm!This article was curated from the video You’ve got to try this Lower Body Full Flexibility Yoga Workout for Hamstrings, Beginner Friendly! Click the link here to vist this YouTubers Channel to learn more about their amazing content.

Table of Contents

Introduction to Hamstring Stretches

A very effective way to improve flexibility and avoid injuries is to perform hamstring stretches. No matter if you are an athlete or a person who sits in a chair for a long time, the addition of these stretches to your daily routine can benefit your overall body movement. Tight hamstrings will be the reason back pain and also poor posture, so it is evident that learning to stay elastic is of great value. Now, let’s find out the best stretches for these significant muscles.

Warming Up: Roll Downs and Roll Ups

Let’s start with roll downs and roll ups as our first exercise to get ourselves moving. Keep your legs apart at the distance between your hips while standing. Slowly start bending your head over your body and roll down a bit at first, then just let your head hang down heavily. As you bend forward, feel the stretch in your spine, and then reverse it vertebra by vertebra by rolling slowly back up. This movement is not just a stress-relieving technique but also it is the means through which you are preparing yourself for the productive, deeper stretches.

Maggie demonstrating roll downs and roll ups

Deepening the Stretch: Cross Legged Position

Then you can move to a cross-legged position. With right leg in a cross on top of the left leg, don’t’ forget to keep the left leg strong. The hamstrings are the muscle group mostly benefited by this position. Pay attention to your breath, try to inhale deeply and exhale as you sink deeper into the stretch. Change legs and do again, feeling that both sides have different sensations.

Transitioning to Downward Dog

Transition from the cross-legged stretch to Downward Dog. Step forward and lower your torso, then walk your hands away from your body so that your feet are hip-width aside. Lower into your heels and push your feet airlessly to bhujangasana. This pose not only lengthens the hamstrings but also energizes your arms and back. Remember to use deep breaths, so your body can fully relax and accept this stretch.

Wide Legged Forward Fold

Now we will transfigure into Wide Legged Forward Fold. Start by standing with your feet at a distance that is greater than your shoulder-width while bending at the hips. You can either keep your arms dangling in front of you or stretch your arms behind you, whichever you choose to do for a deeper stretch. This pose not only opens your hips but also provides a great stretch for your hamstrings. Make sure to keep your back straight as you fold forward and focus on breathing deeply.

Targeting Each Leg: Right and Left Stretch

To focus on each leg separately, let’s do this. Move your hands to the side of your right leg while keeping the leg straight. Stay in this position and breathe, noticing how the stretch becomes stronger. After a couple of breaths, transfer your weight to the right side and do the same movement. You are actually making sure that you stretch each hamstring equally, thus helping to increase the balance of your flexibility. The movement described lay on the back of you burlap, in version 1.0. You are all set to now go, design your new, more personal model.

Remember, consistency is key. Incorporating these stretches into your routine not only enhances flexibility but also contributes to your overall well-being. If you’re looking for more yoga practices tailored to specific needs, check out Yoga for Pain and Yoga for Beginners.

Finding Your Deepest Stretch

For maximum benefits of a Hamstrings Yoga Workout, it’s important to find your deepest stretch. This entails being in touch with your body and knowing the exact places where you are feeling the most resistance. Begin by bending forward gently, maintaining a slightly bent knee if necessary. Give yourself the time to take deep breaths and release the tension on every exhale. Concentrate on the feelings of your hamstrings and back, and change your position to deepen the stretch without pushing it.

Seated Position: Stretching One Leg at a Time

Next, let’s switch to a sitting position. Bring one leg into your body while stretching the other one. In this pose, you can only focus on each hamstring individually. While leaning forward, you should pull your foot or ankle or even push lightly to stretch more deeply. Keep in mind that you should flex the foot of the leg that is stretched out to make the stretch even better.

Maggie in a seated position stretching one leg

Tips for the Seated Stretch

  • Use Props: If you find it challenging to reach your foot, consider using a towel or strap to assist.
  • Breath Awareness: With each inhale, lengthen your spine; with each exhale, fold deeper into the stretch.
  • Switch Sides: After holding for several breaths, switch legs to ensure both hamstrings receive equal attention.

Flat Back Stretch: Reaching for Your Toes

Let us now move to a flat back stretch. Start in a tall sitting position with both legs extended in front of you. While you are attempting to touch your toes, you should keep a flat back rather than rounding your spine. Besides stretching the hammies, this position also works on your core and helps you to sit straight. Breathe in and out a few times in the posture, and feel the increase in the stretch along the backsides of your legs.

Benefits of the Flat Back Stretch

  • Improves Flexibility: Regular practice can significantly increase hamstring flexibility.
  • Enhances Core Strength: Engaging your core during this stretch helps build stability.
  • Promotes Relaxation: Focusing on your breath while stretching can calm your mind and reduce stress.

Final Leg Pulls and Closing Thoughts

Before we finish off, let’s go ahead and pull some final legs. It is a great way to consolidate all the knowledge we have acquired. As you pull each leg into your body alternately, try to bring your leg a little higher than you did previous time. This action will not only make you stretch better but also recruit the muscles around your hamstrings.

Clarify that the primary purpose of a Yoga Workout for Hamstrings is much more than just the ability to touch your toes but to develop the flexibility and awareness of the body. Every practice is a way of learning about your body and what you can do with it. Hear it, honor it, and let the fun begin!

Explore More with Yoga Plus

Dive into your yoga practice this season with Yoga Plus. This application is a good choice for you because it has various programs for different yoga levels starting from beginner to advanced. You can design your own yoga routines, use your personalized library of poses, and go to classes that match your calendar.

Frequently Asked Questions

How often should I practice hamstring stretches?

To achieve the best results, you need to set the goal of doing the hamstring stretches 3-4 times a week preferably. Your hard work will surely pay off in the form of staying more flexible over time.

Can I do these stretches if I have tight hamstrings?

Of course! Approach it gently and be aware of what your body is telling you. It is crucial to do the stretches gradually and not overstrain yourself, mainly if you are experiencing tightness.

What are the benefits of yoga for hamstrings?

The practice of yoga offers various advantages such as promoting flexibility, building muscle strength, and allowing the individual to attain better overall physical awareness. On the other hand, a stretch of the hamstrings could help to alleviate the tension in the lower back while also improving the posture.

For more insights on yoga practices, check out Yoga for Strength and Yoga for Pregnancy. Your journey towards flexibility and wellness starts now!

Read More
Yoga For Men

Mastering Chaturanga for Beginners: A Comprehensive Guide

Behold, we give you the absolute beginner’s guide to chaturanga! This impropably to the point should you learn to push-ups, totaling a group of muscles -rep, is an essential yoga position that is excellent for the upper body weight training of closed-chain exercises. As a special guest, you have the privilege to learn technicals to promo utor supviicion and problem avoidance regarding the general back pitfall, to achieve the utmost dao-qi by doing it right.The ideas of this blog post are modified from the video: How to Do Chaturanga for Beginners. Man Flow Yoga on YouTube, offers excellent quality content that one should explore for invaluable yoga instruction.

Table of Contents

Introduction to Chaturanga

Chaturanga is a very important movement of yoga which is a basis for many yoga styles, especially vinyasa and power yoga. It is also known as the yoga push-up and does help developing strength, stability, and control, making it a basic position for building upper body strength. When you start with chaturanga for the first time, it is important to comprehend its mechanics so that not only you can take the maximum advantage from it but also avoid injuries that might result from it.

Understanding the Benefits

The practice of chaturanga not only helps in building strength but also has many other benefits. The following are some of its core advantages:

  • Upper Body Strength: Chaturanga targets the chest, shoulders, triceps, and core, providing a comprehensive workout for your upper body.
  • Improved Stability: The posture enhances balance and stability, crucial for transitioning between poses during your practice.
  • Core Engagement: By maintaining a strong core throughout the movement, you develop greater stability and strength in your abdominal region.
  • Enhanced Posture: Regular practice helps to strengthen the muscles that support good posture, reducing the risk of back pain.

The Basics of Chaturanga

The understanding of chaturanga’s fundamental layout is essential before starting the intricate moves. The progression of the work involves the continuous motion of two key positions: the high plank and the low plank. The correct alignment and the proper technique of each phase are prerequisites to achieving the maximum effectiveness and safety.

Getting into Position: High Plank

Before starting chaturanga, it is essential to learn the high plank position correctly. Just do the following steps:

  1. Start on Your Hands: Place your hands directly under your shoulders, ensuring they are shoulder-width apart.
  2. Engage Your Core: Activate your core muscles to create a straight line from your heels to your head. Your body should form a rigid plank.
  3. Align Your Arms: Your inner elbows and biceps should slightly wrap forward, and your arms should be fully extended.
  4. Finger Placement: Your index fingers and thumbs should form an ‘L’ shape, parallel to the mat.
High plank position demonstrating hand placement and body alignment

Transitioning to Low Plank

After you have achieved a stable position in the high plank, it is time to shift down to low plank. Here are the steps to follow:

  1. Pull Forward: As you lower yourself, pull your body forward, maintaining a strong core.
  2. Elbow Position: Allow your elbows to bend slightly and come back towards your ribs, keeping your forearms nearly perpendicular to the ground.
  3. Chest and Shoulder Alignment: Lead with your chest while keeping it open and your shoulders engaged. Squeeze your shoulder blades together.
  4. Lowering Down: As you descend, your heels may come slightly forward; ensure your lower back remains neutral.
Transitioning from high plank to low plank with proper elbow and shoulder alignment

Returning to High Plank

Transitioning from the low plank to the high plank appropriately requires the observer, who should maintain the correct position and bring the elbows back.

  1. Squeeze and Press: Engage your chest and triceps to press back up into the high plank position.
  2. Maintain Form: Ensure your body remains in a straight line throughout the movement, avoiding any sagging or arching.
  3. Modify if Necessary: If you struggle to maintain proper form, consider lowering your knees to the ground to ease the intensity.
Returning to high plank position showcasing proper body alignment

Modifications for Beginners

Chaturanga can be quite challenging, especially for those just starting their yoga journey. To help you build strength and confidence, here are some modifications:

  • Knees on the Ground: If you struggle with the traditional form, lower your knees to the mat. This modification allows you to maintain the alignment of your body without overstraining your shoulders.
  • Elevated Surface: Perform chaturanga with your hands on an elevated surface, such as a block or a sturdy chair. This reduces the intensity while still engaging your muscles.
  • Wall Support: Try practicing chaturanga against a wall. Stand a few feet away and lean into the wall while maintaining proper form. This helps you focus on technique without the full weight of your body.
Demonstration of modified chaturanga with knees on the ground

Common Mistakes to Avoid

Well-experienced professionals are not immune to the risk of getting into the bad posture automatically. The following are some typical errors to ignore when performing chaturanga:

  • Rounding Shoulders: Allowing your shoulders to round forward can lead to injury. Keep them engaged and pulled back.
  • Lowering Straight Down: Instead of dropping straight down, think of pulling your chest forward as you descend. This keeps your body aligned and protects your shoulders.
  • Neglecting Core Engagement: Failing to engage your core can result in a sagging lower back. Always activate your core muscles to maintain stability.
  • Misaligned Elbows: Your elbows should be close to your body, not flaring out. This position helps to protect your shoulder joints.

Practicing Chaturanga Safely

In order to facilitate secure and efficient training, you may want to keep in mind these recommendations:

  • Warm Up: Always begin your session with a proper warm-up. Focus on shoulder, wrist, and core stretches to prepare your body.
  • Listen to Your Body: Pay attention to any discomfort or pain. If something doesn’t feel right, modify the pose or take a break.
  • Use Props: Incorporate yoga blocks or straps to assist you in maintaining proper form, especially as you build strength.
  • Practice Regularly: Consistency is key. Regular practice will help you build the strength and technique needed for chaturanga.

Conclusion and Next Steps

For the novice, mastering chaturanga is a trip that demands both endurance and practice. Through the introduction of modifications, avoidance of common mistakes, and safe practice, you shall ensure your ticket to perform this crucial movement correctly and with full conviction.

As you progress, consider exploring other related practices that can enhance your overall yoga experience. For instance, check out our gentle yoga for beginners guide to build a strong foundation.

Be aware that yoga is all about discovering your unique rhythm. Have fun with the journey and do not be afraid to seek help or advice!

FAQ

What if I can’t do chaturanga at all?

There is no need to be upset by the fact that you have not yet been able to perform chaturanga. Set your priority to building strength through the poses and modifications which you are comfortable with. Hence, you can keep on progressing to the advanced level of the pose step by step.

How often should I practice chaturanga?

Incorporate chaturanga into your regular practice a few times a week. Be attentive to your body and be able to change it concerning your comfort rate and power.

Can chaturanga help with other yoga poses?

Indeed! Chaturanga is a yoga pose that strengthens the upper body and enhances stability, thereby proving helpful in various poses such as downward dog and upward dog.

Where can I find more resources on yoga?

For additional tips and insights, explore our yoga blog that covers a range of topics, from strength-building exercises to relaxation techniques.

Read More
yoga bum routine
Yoga For Women

Get Your Yoga Bum: 🍑 A 10-Minute Booty PUMP Routine

Join us for a quick yet effective workout designed to sculpt and tone your glutes, perfect for anyone looking to achieve a Yoga Bum. This 15-minute routine will energize you and leave your backside feeling fantastic! This article is inspired by <img draggable= Zoe Cottons‘ YouTube video Zoe is a seasoned expert in using yoga to support weight loss, reduce stress, ease pain, and manage anxiety. Now, while this is a great routine to start working your glutes, you need progression to see the results you’re looking for. That’s where the YogaBURN Booty Challenge comes in! This incredibly effective program is designed to help you LIFT, TONE, SHAPE, TIGHTEN, and BUILD your bum—right from the comfort of your own home and without any equipment!

Table of Contents

Introduction to the Routine

This 10-minute booty pump routine is designed to specifically target the glute muscles, giving you that sought-after Yoga Bum. Each exercise is carefully selected to warm up, activate, and sculpt your glutes, enhancing both strength and tone.

As you progress through the routine, maintain a focus on form and engagement. This will not only maximise your results but will also ensure a safe workout experience.

Getting Started: The Bird Dog

We begin on all fours with the Bird Dog exercise. This foundational move is excellent for warming up the core and glutes.

To perform the Bird Dog:

    1. Start on your hands and knees, ensuring your hands are under your shoulders and knees under your hips.

    1. Extend your right arm forward and your left leg back, keeping your body straight.

    1. Return to the starting position and switch sides.

Focus on driving through your heel as you extend your leg, activating your glutes. This movement is essential for preparing your muscles for the more intense exercises to follow.

Bird Dog exercise starting position

Monster Walks: Warming Up Your Glutes

Next, we transition into Monster Walks. This exercise is perfect for warming up the glutes and engaging the hip stabilisers.

To perform Monster Walks:

    1. Bend your knees slightly and lower into a squat position.

    1. Take four big steps forward to the right, followed by four steps back to the left.

    1. Repeat this for a total of two sets.

Keep your knees open wide as you walk, which helps to activate the outer glutes. This movement not only helps warm up your glutes but also improves hip mobility.

Monster Walks exercise in action

Pump Phase: The Rainbow Exercise

Now we enter the pump phase with the Rainbow exercise. This move targets the glutes while also engaging your core.

To perform the Rainbow exercise:

    1. Come back to all fours, with hands under shoulders and knees under hips.

    1. Kick back your right leg, crossing it behind your left, then lift it out to the side.

    1. Alternate between crossing and lifting, ensuring you maintain a strong core.

By focusing on the glutes during this exercise, you’ll feel a deep burn that is essential for sculpting your Yoga Bum.

Rainbow exercise demonstrating glute activation

Reverse Frog Hypers: Targeting the Glutes

Next, we’ll perform Reverse Frog Hypers, a fantastic move for targeting the glutes while also providing a nice stretch.

To perform Reverse Frog Hypers:

    1. Lie on your stomach with your pubic bone resting on a mat or pillow.

    1. Bring the soles of your feet together and let your knees fall open wide.

    1. Lift and lower your legs, keeping your heels together and focusing on squeezing your glutes.

This exercise not only targets the glutes but also helps improve flexibility in the hips. Remember to breathe and maintain control throughout the movement.

Reverse Frog Hypers exercise showing glute engagement

Pretzel Exercise: Twisting for Tone

The Pretzel exercise is a fantastic way to engage your glutes while also incorporating a twist to enhance flexibility. This movement targets the outer glutes and helps sculpt your Yoga Bum.

To perform the Pretzel exercise:

    1. Start seated with your left leg in front, bending your right knee back.

    1. Ensure your toes are pointing back, keeping your spine tall.

    1. Begin twisting your torso towards your front leg, then release back to the centre.

Focus on squeezing your glutes with each twist. This not only tones the targeted muscles but also improves your range of motion. Aim for ten repetitions before switching sides.

Pretzel exercise demonstrating the twist

Windshield Wipes: Stretching and Relaxing

After the Pretzel, transition to Windshield Wipes for a gentle stretch and relaxation. This exercise helps to release tension in the hips while still engaging the glutes.

To perform Windshield Wipes:

    1. Lie on your back with your knees bent and feet flat on the floor.

    1. Keep your feet wide apart, then lower your knees to one side, feeling the stretch in your hips.

    1. Return to the centre and repeat on the other side.

Perform this for a total of forty full repetitions. This movement is excellent for maintaining flexibility and preventing tightness after your glute workout.

Windshield Wipes exercise showing knee movement

Final Booty Squeeze: Finishing Strong

As we reach the finale of our routine, the Final Booty Squeeze is designed to maximise glute activation and finish strong. This exercise focuses solely on the glutes, ensuring that you end your workout with a powerful finish.In case you are a beginner looking for yoga practices to ease into yoga, this session of just 10 mins is perfect for you. Exclusively created for starters, this soft flow guides you through primal postures that are designed to build your strength, flexibility, and balance.

To perform the Final Booty Squeeze:

    1. Lie on your back with your knees bent and feet flat on the floor, hip-width apart.

    1. Lift your hips towards the ceiling, squeezing your glutes at the top.

    1. Hold for a moment before lowering back down.

Repeat this movement for a total of fifteen repetitions, ensuring that you maintain a strong squeeze at the top of each lift. This exercise is all about that final push to achieve the perfect Yoga Bum.

Final Booty Squeeze showing hip lift

Cool Down and Reflection

After completing the routine, it’s essential to cool down and reflect on your practice. A proper cool down helps to reduce muscle soreness and promotes recovery.

Consider incorporating gentle stretching, focusing on the glutes, hips, and lower back. This will help release any tension built up during the workout.

Take a moment to reflect on how your body feels. Acknowledge the effort you put in and the strength you’ve built. Remember, consistency is key to achieving your Yoga Bum!

Frequently Asked Questions

    • How often should I perform this routine? Aim for two to three times a week for optimal results.

    • Can beginners do these exercises? Yes, modifications can be made to suit all fitness levels. Focus on form and gradually increase intensity.

    • What if I feel discomfort during the exercises? Listen to your body. If you experience pain, stop the exercise and consult a fitness professional.

Read More
Yoga For Weight Loss

Yoga Workout To Lose Your Belly Fat: Strengthen Your Core with Fun Poses

Are you ready to shed some belly fat while enjoying a refreshing yoga workout?This is where the beauty of a Yoga Workout to Lose Your Belly Fat comes into play. By incorporating various yoga postures, we can build a strong core while enjoying the meditative aspects of the practice.
Dive into a series of yoga poses that not only strengthen your core but also invigorate your entire body. Let’s make this practice fun and effective together!

Table of Contents

Introduction to Core Strengthening

Core strengthening is essential for overall body stability and balance. It not only enhances your physical performance but also supports your posture and alleviates back pain. When we think of core strength, we often envision traditional sit-ups or crunches. However, many yoga poses can effectively engage and strengthen the core without the need for these repetitive movements. 

Understanding Efficient Abdominal Work

To truly engage the abdominal muscles, it’s crucial to understand how our body moves and functions. Traditional abdominal workouts often neglect the importance of alignment and breath. In yoga, we focus on integrating breath with movement, which helps activate the core more effectively. For instance, poses like Plank and Boat not only target the abs but also engage the entire body, promoting overall strength and stability. Remember, it’s not just about the number of repetitions; it’s about the quality of movement.

Safety Considerations for Your Practice

Before diving into core-strengthening yoga poses, it’s essential to consider safety. If you have any knee or back issues, ensure you modify poses accordingly. Being body aware is key. Listen to your body and avoid pushing yourself into discomfort. Yoga should feel good! If you’re unsure about a pose, it’s always beneficial to consult a qualified instructor who can provide guidance tailored to your needs.

Starting Your Yoga Journey

Starting your yoga journey can be both exciting and intimidating. The first step is to find a comfortable space where you can move freely. Begin with foundational poses that focus on alignment and breath. Poses such as Mountain Pose (Tadasana) and Cat-Cow (Marjaryasana-Bitilasana) are excellent starting points. They help establish a strong connection with your body while preparing you for more challenging positions.

Awakening the Spine

The spine plays a crucial role in core strength. Awakening the spine involves gentle movements that promote flexibility and mobility. Start with simple twists and stretches to loosen up the vertebrae. For example, seated spinal twists can invigorate the spine, enhancing the flow of energy throughout the body. This helps to engage the core effectively as you transition into more dynamic poses.

Awakening the Spine in Yoga

Building Abdominal Strength

Once you feel comfortable with basic movements, you can start incorporating more targeted abdominal work. Poses such as Boat Pose (Navasana) and Plank Pose are fantastic for this purpose. In Boat Pose, you’ll engage your hip flexors and lower abs, while Plank strengthens the entire core, including your obliques. Remember to maintain proper form and breathe deeply, as this will enhance your stability and strength.

Building Abdominal Strength with Plank Pose

Engaging the Core with Squats

Squats are often overlooked in yoga but can be incredibly effective for core engagement. When performing a squat, focus on drawing your belly button towards your spine. This action activates your transverse abdominis, which is crucial for core stability. Whether you’re in a Chair Pose (Utkatasana) or a simple squat, ensure your knees are aligned with your ankles and your back remains straight. This will not only help build strength but also improve your balance and coordination.

Engaging the Core with Squats in Yoga

Strengthening Your Plank

The Plank Pose is a powerful tool in your yoga arsenal for building core strength. To strengthen your plank, focus on proper alignment. Keep your wrists under your shoulders, your body in a straight line from head to heels, and engage your core. This engagement is crucial; it’s all about pulling your belly button towards your spine. Hold the pose for as long as you can while maintaining form. If you feel your hips sagging or your back arching, lower your knees to the ground for a modified version.

Strengthening Your Plank Pose

Bridge Pose for Core Activation

Bridge Pose is another fantastic way to activate your core. As you lie on your back, bend your knees and place your feet hip-width apart. Press your feet into the ground and lift your hips towards the sky. This not only strengthens your core but also opens up your chest and stretches your spine. Engage your abdominal muscles as you lift, and remember to breathe deeply. This pose is about finding balance between strength and flexibility.

Bridge Pose for Core Activation

Incorporating Fun Movements

Yoga doesn’t have to be serious all the time! Incorporating fun movements can keep your practice light-hearted and enjoyable. Try adding playful transitions between poses, like moving from Downward Dog to a playful hop forward into a Squat. This not only adds a bit of joy to your practice but also increases your heart rate, helping with fat loss. Remember, your yoga practice is your personal journey; make it yours by infusing it with your own energy and style.

Incorporating Fun Movements in Yoga

Finding Your Rhythm

Finding your rhythm in yoga is essential for both enjoyment and effectiveness. Listen to your body and move at your own pace. Whether you prefer a slow, meditative flow or a more vigorous practice, the key is to stay connected with your breath. Inhale deeply as you transition between poses and exhale fully as you settle into each position. This rhythmic breathing not only enhances your practice but also helps in releasing tension and stress.

Finding Your Rhythm in Yoga

Conclusion and Encouragement

As you incorporate these practices into your yoga routine, remember to be patient with yourself. Building strength takes time, and every small improvement is a step towards your goal. Celebrate your progress, no matter how small, and keep the joy of movement alive. A Yoga Workout to Lose Your Belly Fat is not just about the poses; it’s about the journey you take with your body and mind. Keep showing up for yourself, and the results will follow.

Conclusion and Encouragement in Yoga

FAQs About Yoga and Belly Fat

Can yoga help in losing belly fat?

Absolutely! While yoga may not burn as many calories as high-intensity workouts, it helps in toning muscles and reducing stress, which can contribute to weight loss. Poses that engage the core, like Plank and Boat Pose, specifically target the abdominal area and help in tightening those muscles.

How often should I practice yoga to see results?

Consistency is key. Aim for at least three to five sessions a week. Even short sessions of 20-30 minutes can be beneficial. The more regularly you practice, the more progress you’ll see in your strength and flexibility.

Are there specific poses that target belly fat?

Yes! Poses such as Boat Pose, Plank, and Bridge are excellent for targeting the core. Additionally, incorporating twists and balancing poses can enhance your core engagement and promote overall muscle toning.

Can beginners do these poses?

Absolutely! Most of the poses mentioned can be modified for beginners. Start with gentle variations and gradually progress as you become more comfortable. Always listen to your body and take breaks when needed.

Is there a specific diet I should follow alongside yoga?

While yoga supports physical fitness, a balanced diet is crucial for weight loss. Focus on whole foods, plenty of fruits and vegetables, and stay hydrated. Consider consulting a nutritionist for personalized advice. I curated this blog post based on Your Yoga Gym’s video “10-Minute Yoga Workout to Lose Belly Fat” 10 Minute Yoga Workout Lose Your Belly Fat. With 81.6K subscribers, her channel is a fantastic resource for women looking to lose weight and stay fit through yoga. Be sure to bookmark her channel for more effective workout routines and wellness tips!

Read More
Yoga For Women

Top 5 Pelvic Floor Yoga Exercises for Strength and Stability

Pelvic Floor Yoga Exercises are essential for strengthening the smaller muscles that support our pelvic organs and enhance stability in the hip area. In this curated blog, we’ll explore these top five exercises designed to activate and strengthen these crucial muscles, ensuring you can perform them correctly and effectively.

Table of Contents

Introduction to Pelvic Floor Exercises

I curated this blog post based on AskDoctorJo’s video “Top 5 Pelvic Floor Exercises” Top 5 Pelvic Floor Exercises . Her channel is an excellent resource for expert-guided physical therapy exercises to improve strength, mobility, and overall wellness. Be sure to bookmark her channel for more rehabilitation and fitness tips!

Pelvic Floor Yoga Exercises are vital for developing strength and stability in the pelvic region. These exercises target the small, often overlooked muscles that support our pelvic organs. Regular practice can lead to improved core strength, enhanced stability, and better control over pelvic functions.

Understanding and engaging the pelvic floor muscles can significantly impact overall well-being. These muscles play a crucial role in maintaining proper posture, supporting pelvic organs, and contributing to sexual health. Let’s dive deeper into the importance of proper form when performing these exercises.

The Importance of Proper Form

Proper form is crucial when performing Pelvic Floor Yoga Exercises. Without correct alignment and technique, you risk not engaging the right muscles, which can lead to ineffective workouts or even injury.

As you practice, focus on isolating the pelvic floor muscles. It’s important to avoid using your leg or back muscles to perform these movements. Instead, concentrate on the subtle movements of your pelvis and core. If you feel tension in your legs or back, it’s a sign to reassess your form.

When starting with these exercises, slow and controlled movements are key. This allows for proper muscle engagement and prevents overexertion. Always listen to your body and adjust as necessary.

Exercise 1: Pelvic Tilt

The pelvic tilt is a foundational exercise that sets the stage for more advanced movements. Begin by lying on your back with your knees bent and feet flat on the floor. Your arms can rest at your sides.

To perform the pelvic tilt, gently press your lower back into the floor. Imagine drawing your belly button toward your spine. This action flattens your back against the mat. Hold this position for about three to five seconds, then relax. Repeat this movement for five to ten repetitions, focusing on your breath and maintaining a relaxed upper body.

Demonstration of Pelvic Tilt exercise

Exercise 2: Pelvic Clocks

Building on the pelvic tilt, the pelvic clocks exercise adds more complexity. Visualise a clock face on your abdomen. The twelve o’clock position points towards your head, while six points towards your feet.

Start by moving your pelvis from twelve to six, using your pelvic floor muscles to arch and flatten your back. Once comfortable, incorporate movements to the sides, like two and eleven or five and seven. This helps target specific muscle groups while enhancing coordination. Aim for five to ten repetitions, allowing your body to adapt as you progress.

Demonstration of Pelvic Clocks exercise

Exercise 3: Ball Squeeze

The ball squeeze exercise introduces an external prop to enhance engagement. Use a medium-sized ball or a yoga block placed between your knees, ensuring your knees are hip-width apart.

Begin by holding a pelvic tilt while squeezing the ball with your knees. Maintain the pelvic tilt throughout the movement to ensure proper form. Start with holding the squeeze for three to five seconds, then relax. As you gain strength, you can increase the intensity by raising your hips and knees to a ninety-degree angle while maintaining the squeeze.

This exercise not only strengthens the pelvic floor but also engages the inner thighs and core muscles. Aim for five to ten repetitions, gradually increasing the hold time as you build endurance.

Demonstration of Ball Squeeze exercise

Exercise 4: Working the Obturator Internus

The obturator internus is a key muscle in the pelvic floor, playing a vital role in stability and support. To target this muscle effectively, start by lying on your back with a ball or a folded pillow between your knees. Ensure your knees are hip-width apart.

Begin the exercise by squeezing the ball or pillow gently. While maintaining this squeeze, imagine trying to push your feet outward, as if you’re trying to spread your legs apart without actually moving them. This is an isometric contraction, meaning you’re engaging the muscles without visible movement.

Hold this position for about three to five seconds, focusing on the inner thighs and groin area. Aim for five to ten repetitions. This exercise not only strengthens the obturator internus but also enhances overall pelvic stability.

Demonstration of working the Obturator Internus exercise

Exercise 5: Advanced Obturator Internus Workout

Now, let’s advance to a more challenging exercise for the obturator internus. This time, you will move onto your stomach. Use a sturdy belt or strap, ensuring it’s not a resistive band, as we need stability for this exercise.

Place the loop around your ankles and lie down comfortably, with your knees bent and feet together. Your goal here is to push your ankles outward against the resistance of the belt while simultaneously engaging your pelvic floor muscles. Imagine tucking your tailbone in as you squeeze.

Again, hold this contraction for three to five seconds, repeating for five to ten times. This exercise not only targets the obturator internus but also fosters better coordination among the pelvic floor muscles.

Demonstration of Advanced Obturator Internus exercise

Tips for Success

  • Consistency is Key: Practice these Pelvic Floor Yoga Exercises regularly, aiming for a few times a day to build strength over time.
  • Focus on Breathing: Maintain a steady breath throughout each exercise. This helps in relaxation and proper muscle engagement.
  • Listen to Your Body: If you feel any discomfort or strain, reassess your form. It’s essential to perform these exercises correctly to avoid injury.
  • Gradual Progression: Start with the basic exercises and only move to more advanced variations when you feel ready. It’s important to build a solid foundation first.
  • Stay Mindful: Engage your mind with your muscles. Visualise the areas you’re working on to enhance your connection with the pelvic floor.

For further exploration and guidance, check out these resources:

Frequently Asked Questions

1. How often should I perform Pelvic Floor Yoga Exercises?

Aim to practice these exercises several times a week. Daily practice can yield the best results, helping to strengthen your pelvic floor muscles effectively.

2. Can anyone do these exercises?

Yes, these exercises are suitable for most individuals. However, if you have specific medical conditions or concerns, consult with a healthcare professional before starting any new exercise regimen.

3. How long will it take to see results?

With consistent practice, many individuals notice improvements in strength and stability within a few weeks. Patience is essential; focus on form rather than speed.

4. What should I do if I feel discomfort during exercises?

If you experience discomfort, stop the exercise immediately. Reassess your form and ensure you’re not overexerting yourself. If pain persists, consult a healthcare professional.

Read More